Facebook 1

Monday, February 23, 2015

Browned butter, white chocolate chip, and macadamia nut cookies

I've been a bit hooked on browned butter lately.  It's a bit insane, really, but it's just soooo good and it elevates the taste of so many things, so I've been sticking with using it.  Sue me.  But honestly you won't want to when you try these decadently delicious cookies!


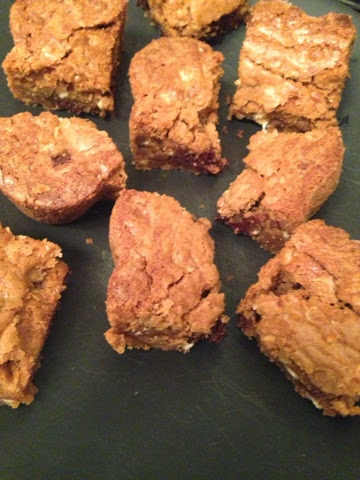
I made these cookies mini because, well, I think mini is adorable -- but also because they're so rich that one or two mini cookies is all you really need.  (But no one would fault you if you grabbed for another few cookies....)


Pardon my odd, sparkly nail polish in the above picture, please.  But look at those cookies.  Mini.  Packed with mini white chocolate chips.  And some raw and toasted macadamia nuts for a depth of flavor....before we even start talking about the butter.  Browned perfectly in the pan and then left to cool.  Adding another layer of slightly nutty, deliciously buttery deliciousness to these cookies.

Browned Butter, White Chocolate Chip, & Macadamia Nut Cookies
Adapted from the Toll House Cookie Recipe

Ingredients:

2 1/4 cups all purpose flour
1 tsp baking soda
1 tsp salt
1 cup (2 sticks) unsalted butter, browned and cooled
3/4 cup granulated sugar
3/4 cup packed light brown sugar
1 tsp vanilla extract
2 large eggs
1 1/2 cups mini white chocolate chips or 2 cups regular-sized white chocolate chips
1 cup chopped macadamia nuts, about 1/2 to 3/4 cups toasted

Directions:

Preheat the oven to 375F.
Line a baking sheet with parchment paper.

Brown the butter in a sautee pan over medium low heat until browned.
Watch carefully so that it does not burn.
Pour into a bowl and allow to cool.
You can put the butter in the fridge to cool, but make sure that it doesn't resolidify.

Measure out the nuts.
Remove about 1/4 - 1/3 of a cup and chop them raw.
Toast the remaining nuts in the oven set at 350F until just light brown and fragrant -- watch them carefully!! as they go from perfect to burnt very quickly.
Allow to cool.
Chop the toasted nuts.
Combine all the nuts in a small bowl.
Set aside.

Combine the flour, baking soda, and salt in a small bowl.
Beat the cooled butter, granulated sugar, brown sugar, and vanilla extract.

Add the eggs, one at a time, beating well after each addition.
Gradually beat in the flour mixture.
Stir in the white chocolate chips and macadamia nuts (both raw and toasted).

Drop by rounded teaspoon onto the prepared sheet.

Bake for 8-10 minutes or until golden brown.
Cool on baking sheets for 2 minutes.
Remove cookies from a wire rack and allow to cool completely (if you can even wait that long!).

Tuesday, February 17, 2015

Chocolate Elmo lollipops

For Baby J's birthday party, the one with the Elmo Smash Cake, I also made some chocolate Elmo lollipops for the kiddos (and some of the adults, too!).  I bought the red chocolate, and had some leftover black and super white chocolate from some other treats I had made (and it lasts forever! in the fridge).  I colored some white chocolate with powdered food coloring to make the orange for the noses.


(Disclaimer -- I have had these two lollipop molds for about 4 years.  My friend's husband bought them for me for their now-almost-5-year-old daughter's first birthday party in March 2011.  I do not know where he got them, but I can guarantee you that a quick little google search yields several nice options.)

The trick to making these lollipops is layering.  And patience!

I make these lollipops in 3 steps.

First, I melt the chocolate in the microwave.  30 second intervals -- especially with white chocolate, so that it doesn't burn! -- mixing in between.

I start with the black chocolate and some white chocolate in separate bowls.

Once the white chocolate is melted and smooth, I add the orange powdered food coloring in small increments mixing well, until the desired color is reached.

Then, I start with my "layering."

I use a clean tooth pick and fill in the pupils and the mouth with the black chocolate.
Then, using a paper lollipop stick, I fill in the nose.

Then I let them cool and harden.  The chocolate kinda looses some of its sheen and is a little more dull when it's try.  Then I wait a little longer, because I really don't want the colors to bleed together.

Once it's all dried and hard, I put the white on the eyes.  I dab it to avoid the black pupils spreading when I apply the white chocolate.  I also use a lollipop stick to do this, since it's a little bigger than the toothpick and the area is a little bigger and round.

Then, I let them dry again.  Like before.  With a little added time just to make sure that they're set.

Then, I spoon in the melted red chocolate.  Place a stick in each and roll it to make sure that the stick is coated/covered in chocolate.  Add more red chocolate if needed to fill the cavity of the mold.  
Tap gently on the counter a few times to release air bubbles.  I have OCD so I pop all the bubbles that have risen to the top, and then shake gently the mold so that the backs of the lollipops are flat.  

Carefully move the molds to the fridge and allow them to set, for at least 4 hours, or until hardened.


To serve, gift, or use as favors, place lollipops in a cellophane bag and tie with ribbon.  I used red because Elmo is red, but you could use any colored ribbon to coordinate with a party theme!


Rice Krispie treats

These are kinda boring, because they're just old school Rice Krispie treats.  Nothing fancy.  Really!  No add-ins, no gourmet touches, no....nothing.  Except a little tweak on an old school favorite.  The real reason I'm posting these is because I went back to my roots.  To the way we used to make Rice Krispie Treats when we were kids (which, in full disclosure, was really not often at all, in fact I can only remember making them once or twice) -- on the stove!  A while ago, I had found a recipe for Rice Krispie treats that you made in the microwave -- sparing you the time of standing over the pot mixing but more importantly saved you the clean up of the pot, which I find to be the most tedious!


But last night while I was at B's, I decided to make some Rice Krispie treats for him while he did some work.  But the only microwave-safe bowl in his apartment was in the dishwasher and I didn't feel like fishing it out.  So I went old school and made them on the stove top in a pot (and, truth be told, while I think they tasted just a little bit better than the microwaved ones -- though I'll explain why that might be in just a little while -- cleaning that pot was just as much of a b*tch as I remembered it being!).


Because I was using the stove top, I decided I'd slightly -- slightly -- brown the butter.  Just a little.  To give them a little depth of flavor.  But just ever so slightly.  Oh, and I upped the butter a little -- about a half tablespoon.  I used 8 oz of marshmallows instead of 10 (since that's the only size container of marshmallows I could find at Whole Foods), so when it came to adding the Rice Krispies, I had every intention of adding the full 6 cups, but as I was mixing them in, I was finding that all the cereal wasn't going to get coated with the marshmallow mixture, so I only used 5 cups.  Then -- then, and this is genius if you ask me! -- I put them in a smaller pan (I used an 8 x 8" pan, but that's because I had less mixture than you will when you use the full 6 cups) than recommended, and really packed them in there, so that I got a thick, dense, chewy Rice Krispie treat.  B's sticky fingers grabbed one before I could even photograph the cut treats, and then I tasted one for good measure.  B came back for another, and then I promptly wrapped them up and gave him instructions to bring them to work today!


Old-School, Old-Fashioned Rice Krispie Treats -- with a little twist!
Straight from the Rice Krispies box (also found here), adapted ever so slightly by me (my recipe is below, and adjusted for the proper amount of marshmallows)

Ingredients:  

4-4.5 Tbsp butter (unsalted)
1 package (10 oz) large marshmallows (or 4 cups of mini marshmallows)
6 cups Rice Krispies

Butter or nonstick spray for the pan
9 x 9 inch pan (for thicker, denser treats) or 9 x 13 pan (for "regular" treats)

Directions:

Butter or spray the pan.
Set aside.

In a large sauce pan, melt the butter over low heat.
Allow the butter to start browning slightly.
Add marshmallows and stir until completely melted.
Remove from the heat.

Add Rice Krispies.
Stir well until all are coated.

Using a buttered spatula (or a spatula sprayed with nonstick spray) or wax paper sprayed with nonstick spray, press the mixture into the pan.

Allow to cool.

Cut into 2 inch squares.

If there are any remaining treats -- and I had to exhibit serious willpower!! -- package up in an airtight container.

    Elmo smash cake

    My friend's son turned 1 at the end of January, and they threw him a little first birthday party.  And apparently a first birthday party just isn't complete without a smash cake (don't worry, I'm already working on patenting the smash cake and starting a side business...I'm kidding (well, only sorta)).  I've been making treats for this little boy and his big sister since her baby shower 5 years ago.


    The theme of the party was Elmo/Sesame Street, and so besides a bunch of chocolate Elmo lollipops (I even recycled the Elmo chocolate lollipop molds from his big sister's 1st birthday party in March 2010!), I made baby J a smash cake -- complete with a sugar Elmo face on top!  The cake itself was simple, just a 6" two layer cake of my go-to yellow cake with vanilla buttercream (which, coincidentally, I debuted on the blog on his big sister's 3rd birthday cupcakes), a few sprinkles, and a red buttercream "1" with an Elmo face stuck on top of the cake.


    I have to admit the cake and the lollipops turned out pretty cute, but I have to say that the cute little boy who devoured his smash cake was definitely the cutest part of the party!


    I might be wrong, but is looks like he was a little into the cake.... ;-)


    Friday, February 13, 2015

    Mini meringues

    Confession: these are totally a copycat.  I stole the idea from a bakery I was in a few weeks ago, where, when buying a marzipan challah, which I will never -- despite how badly I'd love to -- be able to bake, I saw a bag of mini tri-colored meringues for sale.  They were Valentine's-y colors and so cute....and had a pretty hefty price tag on them for what they were...so I decided I'd bake some up myself for B and I for Valentine's Day.


    I actually decided to make these easy on myself (crazy, I know, right?), and despite deciding to make something in three different colors, I figured I could slowly add the food coloring to the meringues in two steps, to get gradations of color.  Pretty sneaky -- and efficient -- right?


    I've made meringues hundreds of times.  They're a go-to Passover recipe in our family.  But I always forget the proportions of sugar to egg white to cream of tartar to salt to vanilla, so I googled it and found this recipe.  If you have a go-to meringue recipe that you use, go ahead and use that one, and just jump on in at the point when I talk about food coloring and piping.

    Check out just how mini they are!
    These are next to a regular Valentine's conversation heart!!

    Tri Colored Valentine's Day Mini Meringues
    Adapted from this recipe

    Ingredients:

    3 egg whites
    1 1/2 tsp clear or regular vanilla extract (or any other flavor you'd like -- I debated strawberry for my pink ones)
    1/4 tsp cream of tartar
    "dash" of salt
    2/3 cups sugar

    red food coloring

    Directions:

    Place egg whites in a small bowl.
    Let stand at room temperature for 30 minutes.

    Line a baking sheet with parchment paper.

    Preheat the oven to 250F.
    Add vanilla, cream of tartar, egg whites, and salt to the bowl of a stand mixer.
    Beat on medium speed until foamy.
    Gradually add sugar, 1 Tablespoon at a time.
    Beat on high after each addition until sugar is dissolved.
    Continue beating until stiff glossy peaks form, about 7 minutes.

    Place a small star or decorative piping tip on a piping bag (I used a Wilton 22).
    Add about 1/3 of the mixture to the piping bag.
    Pipe mini meringues onto the prepared baking sheet, about 1-1.5" apart.

    Once done piping the white meringues, add a few drops of red food coloring to the remaining mixture.
    Beat until color is incorporated and the desired pink color has been reached.
    Remove 1/2 of the mixture and repeat the piping process.

    Once done piping the pink meringues, add a few drops of red food coloring to the remaining mixture.
    Beat until color is incorporated and keep adding drops until the desired red color has been reached.
    Add the remaining red mixture to a piping bag and repeat the piping process.

    Bake for 40-45 minutes or until firm to the touch (my mini ones took 25 minutes).
    Turn off oven (do not open oven door).
    Leave meringues in the oven for 1 hour.
    Remove from the oven and allow to cool completely on baking sheets.

    Once cool, remove meringues from the baking sheet.
    Store in an airtight container at room temperature.

    FYI I got 450 -- yup, four hundred and fifty -- mini meringues!!

    Red velvet Rice Krispie treat sandwiches

    As soon as I saw these, I knew I had to make them for Valentine's Day.  They combine some of my favorite flavors -- all in one!


    But, I'm always honest with you guys, so I feel like I need to come clean right away.  These use cake mix.  You know that boxed stuff, where you add eggs, oil, and water, and bake a cake?  Yeah, well thats in these.  But they're so good I decided to turn a blind eye to my boxed cake mix aversion (except for cake balls....I use it for those), and let you in on this tasty little secret!


    See, you simply use a little extra butter when melting the marshmallows, and then you add some red velvet cake mix to the mixture before adding the rice krispies.  It's as simple as that!  And then once they're cooled, you cut the slab in half, cover half of it with some sweetened cream cheese, and then cover them with the other half of the Rice Krispie treats.  And then you cut them into squares.  They're really a deliciously sweet treat!

    Red Velvet Cake Rice Krispie Treat Sandwiches
    From Cookies & Cups
    I adapted it ever so slightly (my changes are in italics)

    Ingredients:

    1/4 cup butter (4 Tbsp)
    1 10 oz bag of marshmallows (10.5 oz bag of mini marshmallows)
    1/3 cup dry red velvet cake mix
    6 cups Rice Krispies cereal (I used 4.5 cups before I couldn't mix them anymore, and I wanted them all to be coated in the gooey red velvet marshmallow mixture...if you can add more, go for it)

    1/2 cup butter or cream cheese, room temperature (I used cream cheese)
    2 cups powdered sugar

    White chocolate chips, for decoration (optional)

    Directions:

    Line a 10 x 15" jelly roll pan with foil.
    Grease lightly with cooking spray.
    Set aside.
    I used a 9 x 13 inch baking pan, sprayed with cooking spray.

    In a large sauce pan, melt butter over low heat.
    Add marshmallows and stir until melted.
    Remove from heat.
    I melted the butter in a microwave safe bowl in the microwave in 30 second increments until all melted.
    Then, add the marshmallows to the bowl and toss to coat.
    Microwave until melted.  I usually do mine in 60-90 second increments.

    Add in cake mix.
    Stir until completely mixed with the marshmallow-butter mixture.
    Pour into the prepared pan and press evenly (I use a piece of wax paper with cooking spray).
    Let cool.

    Make the filling by beating the butter or cream cheese with the powdered sugar (start low and add sugar according to taste -- I liked mine minimally sweet and ended up using about half the sugar).
    Whip them really well.  I didn't whip mine as much as I would've liked (I was in a rush), and it makes it hard to see that delicious sweetened cream cheese layer in the center.

    Cut the Rice Krispie treat sheet in half, so that you have two equal portions.
    Spread filling on one of the halves.
    Cover with the other piece of the Rice Krispie treat.
    Cut into squares.

    I debated drizzling some with melted white chocolate, but last minute decided against it.

    Wednesday, February 11, 2015

    Browned butter blondies

    The other day B and I had a relatively low key day.  We got up and picked up some coffee (and a donut)....walked up a little and then all the way across town to get, yup, another donut.  Walking back across town, we stopped at my most favorite cheese shop in Little Italy and bought provisions for dinner that night, then ended up at Whole Foods to buy the rest of the dinner stuff and some stuff for me to make blondies...because clearly after two donuts (I guess it was technically one each, but still), baking anything is clearly the logical thing to do...

    See, I had been copying down A LOT of recipes that I had been coming across lately, and one of them was for blondies.  They were touted as being some of -- if not -- the best out there, so I figured I'd take a stab at them.  Except I don't like nuts in my baked goods, so I left those out.  And ever since I made those browned butter brown sugar cookies, I've been more than a wee bit obsessed with browned butter...and since these blondies called for melted butter anyway, I figured why not brown the butter, too?  Which was, frankly, a delicious idea!


    I wanted my blondies a little thicker than the recipe called for, so I made mine in an 9 x 9 inch pan, and then left out some of the batter (to attempt something, which didn't work out exactly as I had hoped).  This yielded a chewy, thick, delicious blondie!  So delicious and rich, in fact, that I had to send the rest of the pan to work with B to get them out of the apartment!


    Browned Butter Blondies
    Adapted from Cook's Illustrated, Found at Food52.com

    Ingredients:

    1.5 cups unbleached all purpose flour
    1 tsp baking powder
    1/2 tsp table salt
    12 Tbsp unsalted butter (1 1/2 sticks), melted, browned, and cooled
    1.5 cups packed light brown sugar
    2 large eggs, lightly beaten
    4 tsp (yup, you read that right!) vanilla extract
    6-8 oz white chocolate chips (1 cup) or chopped bar, or 3-4 oz each white chocolate chips and semisweet chocolate chips (use smaller amounts if using nuts; if leaving out the nuts, use the higher amounts)

    1 cup pecans or walnuts (4 oz), optional

    Directions:

    If using nuts, put the oven rack in the middle of the oven.
    Preheat to 350F,
    Spread nuts on a large rimmed baking sheet and bake until deep golden brown, 10-15 minutes.
    Transfer to cutting board to cool.
    Chop coarsely and set aside.

    While the nuts toast, line a 9x13 inch baking pan with foil, leaving enough overhand to help you lift the blondies out of the pan when they're done.
    Grease the foil-lined pain with butter or oil.

    Whisk flour, baking powder, and salt together in a medium bowl.
    Set aside.

    Whisk browned butter and brown sugar together in a medium bowl until combined.
    Add eggs and vanilla.
    Mix well.
    Using a rubber spatula, fold in the dry ingredients until just combined -- do not overmix.
    Fold in chocolate (and nuts, if using....I did not).
    Turn batter into prepared pan, smoothing top with a rubber spatula.

    Bake until top is shiny, cracked, and light golden brown, 22-25 minutes.
    Do not overbake.
    Cool on a wire rack until room temperature.
    Remove bars from pan by lifting by foil overhang.
    Transfer to cutting board.
    Cut into 2 inch squares and serve.