Facebook 1

Monday, August 25, 2014

Brookies (half brownie, half chocolate chip cookie)

B's and my week long vacation got postponed this week.  While I had been looking forward to it, I know it was for the better (knowing that it has only been postponed and not canceled also makes it better).  Something else that makes it better?  The little escape we planned for the end of the week!


I had thought that I'd take two days and go into work and help out, since it's the pre-school rush at the office, but when I called in to tell them that the trip was postponed yesterday, they told me to -- get this -- take the days off as planned!

So what to do with a SURPRISE day off?!  With literally NOTHING on the agenda?!  Honestly, I don't think this has ever happened to me.  I spent most of yesterday afternoon coming up with scenarios of what I could do with today (and tomorrow, but that's a whole other day!), but B kept telling me to "relax" and "have a day for yourself," but frankly, I don't know how to do either of those things...


But one thing I do know how to do is bake!  And with a whole bunch of free time today, bake I did.  "Brookies" -- half brownie, half chocolate chip cookie -- to be exact, because they sounded fun and I wanted to bake cookies.  Cause see, while I have two surprise days off, Wednesday morning I'm boarding a plane for a place which will warrant wearing a bathing suit AND being in public (in said bathing suit).  And I really shouldn't be wearing bathing suits in public.  Especially if I will be baking (and eating) for two days beforehand.  So cookies are also great to freeze and give away -- two huge bonuses!!

Brookies
from Mel's Kitchen Cafe

Ingredients:

Brownie Cookie Dough:

1/3 cup butter (5 1/3 Tbsp)
1/ cup semisweet or bittersweet chocolate chips
2/3 cups granulated sugar
2 large eggs
1 tsp vanilla
2 Tbsp cocoa (I used regular cocoa and I feel like the brownie batter looked kinda anemic -- and less chocolately than the original recipe.  I would try dark cocoa powder next time for an extra chocolately punch)
1 1/3 cups flour
1/2 tsp baking powder
1/4 tsp salt

Chocolate Chip Cookie Dough:

2/3 cups granulated sugar
2/3 cups light brown sugar
12 Tbsp (1.5 sticks) butter, softened
1 tsp vanilla
2 large eggs
2 cups flour
1 tsp baking soda
1/4 tsp salt
1 1/4 cups chocolate chips (mini size preferred) -- I used regular, since that was all the store had, and they were fine!

Directions:

Make the brownie cookie dough.
In a medium microwave-safe bowl, melt the butter and chocolate chips together, at 1 minute intervals, stirring in between, until smooth and combined.
Stir in the sugar.
Whisk in the eggs and vanilla and mix until thick and well-combined.

Stir in the cocoa, flour, baking powder, and salt until no streaks remain.
Cover and refrigerate for at least 30 minutes.

Make the chocolate chip cookie dough.
In the bowl of an electric mixer or with a handheld electric mixer, cream together the butter and the two sugars until smooth.
Blend in the eggs and vanilla, mixing for 2-3 minutes until the batter is light in color.
Stir in the flour, baking soda, salt, and chocolate chips until no dry streaks remain and chocolate chips are evenly distributed.

Mine was super soft, probably since the butter was really soft as it's been hot out.  
I had to refrigerate my chocolate chip cookie dough for a while to make it easy to roll into balls.
I scooped it into 1 tablespoon scoops and refrigerated that way, then when I was able to roll them into balls, I went onto the next step.

Preheat the oven to 350F.
Line baking sheets with silpat liners or parchment paper.
Set aside.

Portion both sets of dough into tablespoon-sized balls.
It may help to lightly grease your hands with cookie spray is the brownie dough seems to sticky.

Grab one chocolate chip cookie dough ball and one brownie ball and press them together and use your hands to gently form each into a cookie shape, flattening and turning to smooth the edges, and form a flattish but still thick cookie shape (they'll spread out while baking).

Refrigerate the brookies (unbaked) for at least 30 minutes -- they can be kept in the fridge for up to a day.

Bake the cookies on the prepared baking sheets, spacing them 2 inches apart.
Bake for 10-12 minutes (mine took 9 minutes) until the chocolate chip cookie side is just very sightly browned and the brownie side looks set - they should still be soft and slightly underbaked, if anything.
Remove from the oven and let cook on the pan for 1-2 minutes before scooping onto a cooling rack to cool completely.

(I ended up with a little extra chocolate chip cookie dough, which I could've made into cookies, but instead I ate the dough.  Because it's good and I was hungry, and at that point, a little lazy, too ;-))

Blueberry bundt cake

My friend E's mom lives in Maine and she came down this weekend with a load of lobster meat for a delicious lobsterfest!  B and I were supposed to be away but due to a change in plans, we ended up actually being in the city for it.  Once we found out we'd be able to attend, I offered my baking services to E.  I was thinking beach-themed cupcakes, lobster-shaped cookies, and lobster and other beach-related chocolate lollipops, but was really up for anything.  E thought a blueberry dessert would be fun keeping with a "Maine" theme -- and I couldn't agree more!


So I set out to find the perfect blueberry dessert.  At first I thought blueberry shortcake, which them changed to blueberry biscuits with vanilla ice cream and blueberry sauce, and ultimately ended with a blueberry buttermilk bundt cake served with vanilla ice cream.  (Admittedly, the thought of blueberry cupcakes also (briefly) passed through my head.).

This cake was delicious (and super easy to make, too!), and went perfectly with our delicious lobster lunch that came straight from Maine!


Blueberry Buttermilk Bundt Cake
From Food Network

Ingredients:

2 sticks unsalted butter, at room temperature, plus more for the pan
3 cups plus 2 Tbsp flour
2.5 tsp baking powder
1 1/4 tsp salt
1 3/4 cups granulated sugar
1/4 cup vegetable oil
4 large eggs, at room temperature
1 tsp vanilla extract
3/4 cup buttermilk
2 cups blueberries (about 1 pint -- mine was a bit more than 1 pint)

Directions:

Preheat the oven to 350F
Generously butter a nonstick 12 cup bundt pan -- I used Pam for Baking -- it works like a charm!
Whisk 3 cups flour, baking powder, and salt in a medium bowl.

Beat 2 sticks butter, granulated sugar, and vegetable oil in a bowl with a mixer on medium-high until fluffy, at least 5 minutes.
Scrape down the sides of the bowl with a rubber spatula as needed.
Reduce mixer speed to low.
Beat in the eggs 1 at a time.
Beat in vanilla.
Add about 1/3 of the flour mixture and half of the buttermilk, beat until almost incorporated.
Add another 1/3 of the flour mixture and the remaining buttermilk.
Beat, scraping down the sides of the bowl as needed, until just combined.
Add the remaining flour mixture and beat for 30 seconds.
Finish incorporating the flour by hand to avoid overmixing (mine was a little "overmixed" and it was fine!)

Toss the blueberries with the remaining 2 Tbsp of flour in a small bowl.
Spoon 1/3 of the batter evenly into the prepared pan.
Sprinkle half the blueberries on top, then cover with another 1/3 of the batter.
Scatter the remaining blueberries on top and then cover with the rest of the batter.
Smooth the top.
Bake until the cake is golden brown and a toothpick inserted into the center comes out clean, about 1 hour to 1 hour and 10 minutes (mine took 55 minutes).

Transfer to a rack and let cool for 30 minutes in the pan.
Run a small sharp knife around the edge of the pan to loosen the cake (I didn't have to since I used the Pam, the cake popped right out.  Literally.).
Invert the cake onto the rack to cool completely (I inverted mine onto a cardboard cake round, since I needed it on there to transport it to the Lobsterfest.)

*I served mine with vanilla ice cream, since I think that vanilla ice cream and blueberries are a perfect summer dessert!!  I was also going to make some homemade blueberry sauce but got too lazy...*

Saturday, August 23, 2014

Mini blueberry scones

I bought some blueberries the other day for a blueberry dessert I'm making over the weekend.  I was good to go.  Delicious, plump, sweet blueberries sitting in my fridge.  You can imagine how long that lasted!?!


They were calling to me, as most fresh fruit always does, but especially in the summer.  They were saying things like "bake with me" and "I'd go great in a scone" and "don't I look delicious?"  Eventually I succumbed, and decided to make some mini fresh blueberry scones with them.  And of course, I snacked on the remaining blueberries that didn't make it into the dough!


I did 2 (well, technically 3) things different from this original recipe.  First off, I left out the orange zest.  Because frankly, I HATE (yes, I know that it's a strong word, and yes, I still want to use it) orange zest.  That's it, I don't have to go into it more.  Secondly, I made them mini.  Because all baked goods are cute in mini.  (And I wanted to try them when they came out of the oven, but it was after 11 p.m. and I frankly didn't need an entire scone.)  Lastly, the original recipe called for tubinado sugar, but I had demerara sugar, so I used that instead.

These were light and crumbly and delicious!  I had to walk out of the kitchen because I kept popping them in my mouth as I cleaned up afterwards.  They're delicious and super easy to make!

Bakery Style Blueberry Scones
From Pinch of Yum

Ingredients:

2 cups all purpose flour
1/2 cup sugar
1 Tbsp baking powder (yes, a whole Tablespoon!)
1/2 teaspoon salt
1 Tbsp orange zest -- I left this out and I thought that they were still delicious!!
1/2 cup cold butter, cut into very small cubes
1 large egg
1/2 cup cold cream, plus more for brushing the tops of the scones
1 cup fresh blueberries
Turbinado sugar for sprinkling the tops of the scones

Directions:

Preheat the oven to 400F.
Stir the flour, sugar, baking powder and salt together in the bowl of a stand mixer (or just a mixing bowl).
Add orange zest, if using.
Add the butter.
Mix ingredients with an electric mixer until fine crumbs form.

With the mixer on low, add the egg and heavy cream in a slow stream.
Mix until a thick, stuff dough forms.
Add the blueberries and mix until just incorporated -- I used a spatula and folded them in, since I didn't want the blueberries to break in the mixer.  According to the original blog post, "If some of them break, that's okay - you'll get those pretty juice drops down the side.

Flour your hands.
Remove the dough from the mixing bowl and place on a floured work surface.
Roll into a rectangle about 1 inch thick --  I just used my hands and flattened the dough into a rectangle.
Cut into 8 triangles, and pull the triangles apart from each other -- Or, do what I did, and use a small biscuit cutter - or a larger one if you want - and cut out smaller scones.
Brush the tops of the scones with some heavy cream.
Sprinkle with turbinado sugar.
Bake for 18-20 minutes (my mini ones took 9 minutes) or until golden brown and firm to the touch.
Sprinkle again with turbinado sugar for extra texture.

Enjoy warm.
Store leftovers (if there are any....) in an airtight container for 1-2 days.

NOTES: Parchment paper helps prevent the scones from burning on the bottom.  For lighter scones, be sure to keep the butter as cold as possible throughout the process.  Stick the dough in the fridge for a few minutes if its getting too warm and soft.

Sunday, August 17, 2014

Banana bread crumb cake

Two years ago I walked into a bar with my friend E and sat down next to a handsome guy.  I'll spare you all the sappy stuff, but I'm sure you've figured out by now that that handsome guy I was sitting next to was B!

I have to say,

It's been an amazing two years!

Since this year the date falls on a Sunday -- and one that I'm not working on! -- I decided I'd bake up a nice treat for us to celebrate the occasion.  B never got to try the heavenly banana cake I made for Mother's Day, and recently he suggested I make some banana bread when I asked -- annoyingly, I'm sure (and not for the first time) -- "What should I bake?"  He also raves about the crumb cake muffins I made when he had a visitor in town this spring to just about anyone who will listen.


So when, scrolling through my Facebook feed, I saw a post for this Banana Bread Crumb Cake, I knew I didn't have to look any further for what I was going to bake!!  And when I mentioned it to B a few days beforehand, he was overly ecstatic -- so then I knew for sure that I had chosen the right recipe!  Luckily I remembered to pick up bananas that night so that they had time to ripen before I planned to bake the cake.


Banana Bread Crumb Cake
From Cookies & Cups

Ingredients:

For the Cake:

2 cups flour
3 tsp baking powder
1 tsp salt
3 ripe bananas
1/2 cup butter, at room temperature
2 cups granulated sugar
2 eggs
1 tsp vanilla
1 cup milk

For the Crumb Filling and Topping:

1 cup cold butter, cubed
2 cups light brown sugar
2 cups flour

For the (optional) Glaze:

1 cup powdered sugar
1-2 Tbsp milk

Directions:

Preheat the oven to 350F.
Spray a 9 x 13 inch pan with cooking spray.

In a medium bowl whisk together the flour, baking powder, and salt.
Set aside.

In a large bowl mash the bananas until they become liquified.
Mix in butter until combined.
Then stir in sugar, eggs, and vanilla until mixed well.
Stir in milk and flour until combined.

Prepare crumb filling/topping.
Combine all the ingredients together, cutting them together with a fork or pastry cutter until a coarse crumb forms.

Pour half of the batter into the prepared pan.
Top with 1/3 of the crumb mixture.
Cover the filling with the remaining batter.
Top with the remaining crumb mixture.

Bake for 50-55 minutes until the center is set and a toothpick comes out clean.
Cool for 10 minutes.

* If desired, mix the powdered sugar and milk together.
Drizzle on top.

Cake can be served warm or at room temperature.

Sunday, August 10, 2014

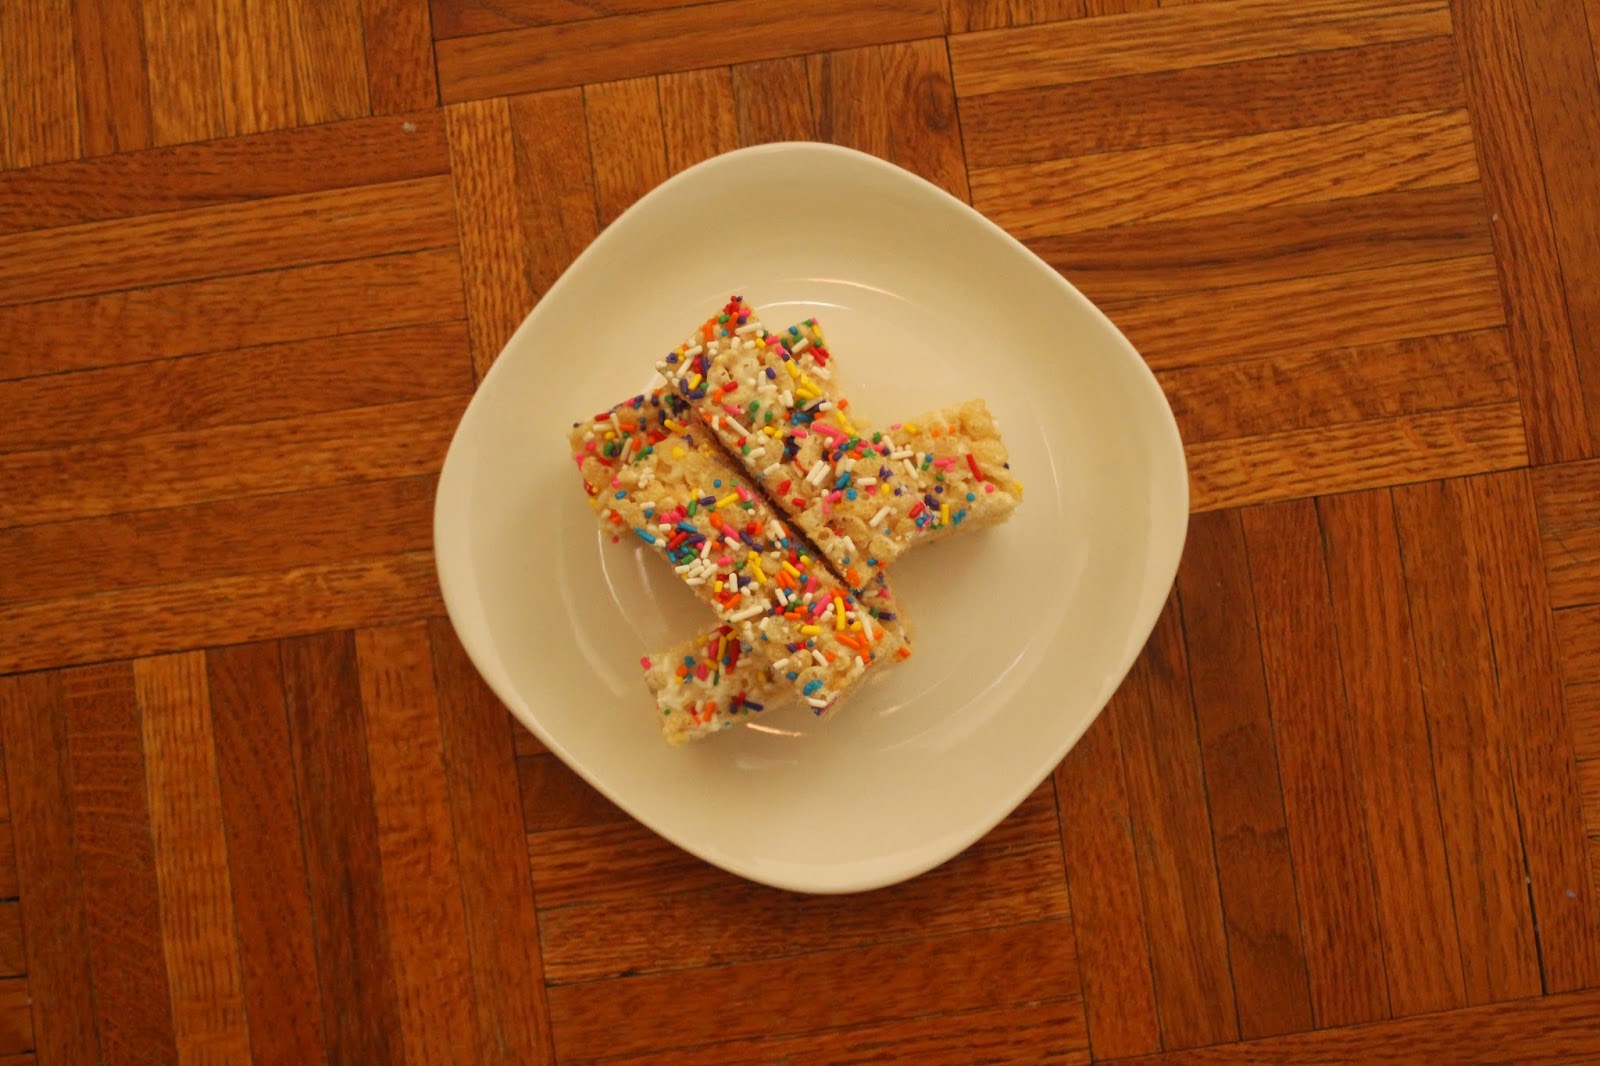
Rice Krispie treats with sprinkles

About two weeks ago, I made some Rice Krispie Treats.  I even mentioned them on the Facebook page.  So why has it taken me so long to post about them?  I was embarassed...and ashamed.  See, I ate about half the tray of Rice Krispie Treats myself that first day.  The following day I made an even bigger dent.  Then, I took pictures of them for the blog, and tossed the remaining ones.


See, I have this problem with homemade Rice Krispie Treats....They're addictive!!  I just cannot walk away from them.  They're gooey, and sweet-but-not-too-sweet, and perfectly crunchy....and these even had a bunch of sprinkles on them!  I decided to cut these into long rectangles instead of the usual squares, since I thought it was a fun shape.


Enough about that, though....I'm starting to feel guilty again about eating all those Rice Krispie Treats....and yet part of me is thinking "I have leftover Rice Krispies, and I have butter and marshmallows....maybe I'll make another batch."  But I'm walking away from that latter thought....but I'm leaving you with these for now.

Rice Krispie Treats with Sprinkles
* My goal had been to have an entire sprinkle "crust" on top of the Rice Krispie Treats, but I decided that it might be too much, and instead decided last minute for a heavy sprinkling on top *
(adapted from the Jet Puffed bag)

Ingredients:

3 Tbsp butter or margarine
1 bag of large marshmallows
4 cups of Rice Krispies


2 big handfuls of rainbow sprinkles, maybe more as needed

Directions:

Grease a 9 x 9 inch baking pan.  My preference is Pam, but you could also brush it with some melted butter.

Microwave the butter in a microwavable bowl on high until melted (about 45 seconds).
Add marshmallows and toss to coat.
Microwave for 1 minute 30 seconds or until marshmallows are completely melted and mixture is well blended, stirring after 45 seconds.  I recommend using a nonstick spatula or a spatula sprayed with Pam.

Add the cereal immediately, and mix well.
Press into the greased pan.  My go-to way to do it easily is to spray a piece of wax paper with Pam, and use that (Pam-side down) to press it evenly into the pan.

Once flat, add the sprinkles on top, distributing them evenly across the top of the Rice Krispie treatsAllow to cool completely.

Cut into rectangles/sticks.
* I find the prettiest way to cut them is to invert them out of the pan with the sprinkle side down, so that when you cut them, you don't track the colors from the sprinkles along the cut sides of the treats
Serve.....if you don't eat them all before the guests arrive.