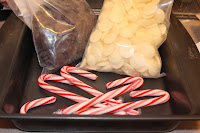
I actually debated sharing this "recipe" with you, because like a magician doesn't share their secrets, I figured I needed to keep this one to myself. After all, if people know how I make my Peppermint Bark, there's a chance I won't be invited to as many holiday parties (see, peppermint bark makes a perfect hostess gift!). But after some serious thought, I figured I should share it. I mean, if I came up with THE perfect peppermint bark "recipe," you - the faithful JulieBakes readers - needed to know how to make it, too.
So, what's the secret? Where did I get my recipe?
Honestly? I made it up. Myself. There are no measurements. Just go with your gut. It goes something like this:
Julie's Awesome Homemade Peppermint Bark!
I start with candy canes, dark chocolate (I prefer it over milk), and white chocolate. My favorite is the lollipop making chocolate that I buy from the baking store.
Melt the dark chocolate in the microwave, in small intervals, being sure not to burn it.
Pour the melted chocolate into a pan (I usually use a paper baking tray, since they're coated, and the chocolate doesn't stick. I thought I had one in the apartment, but when I didn't see it, I used a 9 x 9 inch baking pan with 2 pieces of waxed paper criss-crossed with an overhang). I make the layers between 1/8 and 1/4" thick. Because I wasn't familiar with this size tray, my layers ended up being a little thicker than that.
Let the chocolate chill in the fridge.
While the chocolate is chilling, crush your candy canes.
The amount of candy canes I use depends on how many trays I'm making. I crushed 5 this time, and ended up leaving a little bit over. I like mine pretty peppermint-y, so I crush a lot of candy canes and then add to taste.
I wrap the candy canes (in their plastic wrappers) in paper towels, and then crush them with a hammer. A mallet, big soup can, or butt of a Kitchen-Aid dough hook (my newest discovery when I made the peppermint rice krispie treats) work well, too.
Remove the plastic wrap from the candy canes.
Pick out the larger pieces of candy cane and put them in a separate bowl.
Once the dark chocolate has hardened, melt the white chocolate.
Be extra careful not to burn the white chocolate (white chocolate always burns more quickly than milk or dark chocolate).
This is where I get super creative: Mix the really finely broken candy cane pieces and powder into the white chocolate. -- This is, in my humble opinion, the step that sets my delicious peppermint bark apart from the store-bought varieties.
Mix well.
Spread evenly across the dark chocolate layer.
Sprinkle with the larger pieces of candy cane that you put aside earlier.
Allow the peppermint bark to harden in the fridge.
When hard, break it into small pieces.
The easiest way I've found over the years is to take a knife (a regular kitchen knife) and tap the top of it with the hammer (that you used to break the candy canes) to break it into pieces:
Serve and enjoy!
If not serving immediately, I keep mine in a container in the fridge. It lasts forever...if it's not eaten before that!
*If not serving immediately, keep it in an airtight container in the fridge until serving *


No comments:
Post a Comment