Facebook 1

Showing posts with label Coffee. Show all posts

Thursday, December 17, 2015

Espresso bark

I made some trays of holiday treats this year for our doormen, B's coworkers, and the baristas at my favorite coffee shop. I wanted a nice mix of candies, marshmallows, and cookies.  Which is exactly what I made!  In terms of candies, my super-awesome homemade peppermint bark made the cut (duh!), as did this (insanely easy, melt-in-your-mouth delicious) espresso bark!


This bark......Oh, this bark!  It's melt in your mouth soft but not too sweet and totally caffeinated!  It was a shame that there were so many little shards of it left on the cutting board after I cut it, so I just had to sample every.  last.  one of them.  P.S. that "it was a shame" part was dripping in sarcasm, in case you couldn't tell...


And the best part?  There are THREE ingredients.  Three.  Two different kinds of chocolate chips and roughly ground espresso beans.  And it's amazing!  I bet it would be awesome in homemade vanilla or coffee ice cream (I still haven't tried homemade ice cream....) or in chocolate chip or double chocolate cookies....which I'm totally going to have to real soon!

Espresso Bark
Adapted from The Food Poet (I changed their coffee bark to espresso bark)

Ingredients:

2 cups Extra Dark Chocolate chips
2 cups semisweet chocolate chips
1/4 cup whole espresso beans

4 cups of water

Directions:

Pour espresso beans into a coffee grinder and grind until almost fine.  Some slightly bigger chunks are fine.  This allows for a bit more coarseness of beans for texture.

Pour water into a heavy pot.
In a double boiler, pour in the chocolate chips.
Place double boiler over heavy pot.

Cover a baking sheet with sides with a sheet of parchment paper.

Stir the chocolate chips as they begin melting.
Continue stirring them until smooth.
Remove from the heat.

Stir the ground espresso beans into the smooth chocolate until well integrated.
Spoon the chocolate-espresso mixture onto the parchment-lined sheet.  Take care to work it into the corners and try to maintain a level surface.

Place the sheet in the fridge for at least 3 hours.
Break into chunks or chop with a heavy knife.

Enjoy, and try to leave enough over to give as gifts or share with others!

Wednesday, October 14, 2015

Blueberry coffee crumb cake cookies

Over two years ago, I baked a New York Style Crumb Cake with blueberry jam that my youngest sister absolutely fell in love with!  My self-proclaimed lover-of-savory-foods and hater-of-almost-all-sweet-things sister.  The one that shocked me when she asked me when I was going to bake this for her again.


Once I picked my jaw up off the floor, and after we polished off the cake, I told myself I'd make it for her again.  But then, well, that just never happened.  She's been asking for it a lot again lately, namely for our non-traditional Thanksgiving dinner this year (can anyone say lamb?  That's the proposed protein for the meal....but I digress).


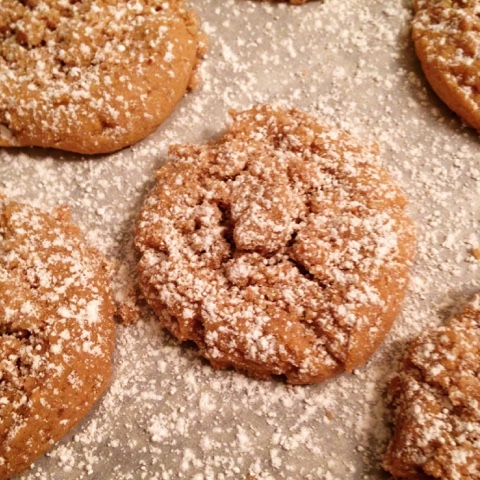
So when I made these Coffee Crumb Cake Cookies for break fast this year, I had the brilliant idea to add blueberry jam to them for my sister.  Because cookies are so much easier to transport than a cake, and plus, the cookies were met with such rave reviews, that I just had to try them with the addition of blueberry jam.  They came out deliciously!

P.S. Don't fret....my sister will still get her coffee cake soon!

Blueberry Coffee Crumb Cake Cookies
Adapted from Cookies & Cups

Ingredients:

For the crumb topping:

1/2 cup butter, softened
1/3 cup brown sugar
1/3 cup granulated sugar
1 tsp cinnamon
1/2 tsp salt
1 2/3 cup flour

For the cookie:

10 Tbsp butter
1/2 cup shortening
1 cup light brown sugar
1/2 cup granulated sugar
1.5 tsp cinnamon
2 eggs
2 tsp vanilla
2 tsp baking powder
1 tsp salt
3 1/3 cup flour

Blueberry jam, about 1/2 cup

Optional:

powdered sugar, for dusting

Directions:

Preheat the oven to 350F.
Line cookie sheets with parchment paper or silicon liner.
Set aside.

Make the crumb topping.
Mix all the crumb ingredients together in a medium bowl.
Cut together with a pastry cutter or a fork until evenly mixed.
Refrigerate while making the dough.

Make the cookies.
Mix together the butter, shortening, and both sugars for 1-2 minutes on medium speed, until combined and smooth.
Add in cinnamon, eggs, and vanilla.
Continue mixing until evenly combined.
Turn mixer to low and mix in baking powder, salt, and flour.
Mix until dough comes together evenly.

Scoop cookies out using a cookie scoop or spoon (about 3 Tbsp) and place on lined cookie sheets.  If using a spoon, roll dough into balls.
Make an indentation in the center of the cookie dough.
Place about 1/4 to 1/2 tsp of jam into the indentation.
Scoop at least 1 Tbsp of the crumb topping into the center of the dough, pressing lightly to stick.  Don't be afraid to cram it in!
Bake cookies for 9-10 minutes, or until edges start to get golden.
Remove from oven and allow to cool for 3 minutes on cookie sheet.
Transfer cookies to a wire rack to finish cooling.

Dust cooled cookies with powdered sugar, if you'd like.

Saturday, October 3, 2015

Coffee syrup

I missed National Coffee Day.  I'm not proud to admit it, but I feel the need to come clean.  In an attempt to make up for it, I made some espresso brownies two days later.  I had intended to make them for national coffee day, but time got away from me.  I also planned to make this coffee syrup.  Seems simple enough -- coffee syrup.  I thought it would be good on ice cream (which I've never made, but would love to try)...or anything for that matter!


The recipe is easy: two ingredients, in equal parts.  So you can modify it as you want.  The original calls for 4 cups, but I went down to 3.  Easy peasy!  And the best part?  It's super tasty!  Plus, it stays for days, in case you're wondering "what on earth am I going to do with four cups of coffee syrup?!" (Don't worry, it does cook down.) The possibilities really are endless!

Coffee Syrup
Found on the KitchenAid Blog

Ingredients:

4 cups brewed coffee
4 cups sugar

(Just remember, it's a 1:1 ratio, so you can adjust easily.  I went with 3 cups coffee to 3 cups sugar, since I had under 4 cups of coffee when I brewed it.  It yielded about 2 3/4 cups of syrup.)

Directions:

Combine the coffee and sugar in a sauce pan.
Bring to a boil.
Once boiling, reduce heat to medium and moderately boil for about 1 hour, or until your preferred thickness.  (Syrup will thicken as it cools.  You can test the final thickness of the syrup while it is still hot by placing some on a metal spoon and chilling in the freezer for a minute or two, until the underside of the spoon is no longer warm.  Test the consistency and if needed continue boiling and testing every 5-10 minutes.)

When the syrup is at your desired consistency, allow the syrup to cool completely and then store in the fridge.
The colder the syrup, the thicker the consistency, so if you want to use it the same day, chill it for as long as possible.

Espresso brownies

Tuesday was National Coffee Day.  I don't know who comes up with these national food holidays, but I would like to thank the person who came up with this one.  I am obsessed with coffee!  I used to spend many of my waking non-work moments studying in Starbucks when I was a grad student (both times, all three of you count that second bachelors...), and I still frequent the chain, but lately I've been seriously crushing on the iced americanos from this little coffee shop in my neighborhood, Laughing Man (and in case you don't live in my neighborhood -- if you do, stop by and say hi! -- and want to sample it, I just read the coffee is available for Keurig!!).


But I digress.  Enough about my favorite coffee (I could go on and on).  Back to what I had been saying: It was national coffee day, and I didn't have a coffee treat for you guys.  I could've let it go by unnoticed. I could've made the coffee syrup that I saw online that day (that'll be coming soon), but with nothing to put it on it would've been sad.  So I decided to wait and make something good.  Like these espresso brownies.  Which are really just a modification of these yummy brownies I made for Yom Kippur break fast (and on Valentine's Day last year).  Because they're so freaking good, and because when pumped up with espresso flavor, they can take the place of a brownie and a cup of coffee -- a two-for-one deal.


Wait!  Am I rambling?  I think I may be rambling.  I don't know why I'm so hopped up.  Oh, right, maybe it's because I licked the batter?  The batter with 3 tablespoons of espresso powder? Yeah, maybe that's it.  Why am I still rambling??


OK, meltdown aside, these brownies are awesome.  The espresso goes so nicely with the chocolate in the brownie, you might even be able to call them mocha, but I like the ring of espresso brownies better.  And they'll give you a little buzz, but in a good mellow I-just-had-a-shot-of-espresso way. Lip smacking good!  

P.S. I don't think anyone would fault you if you enjoyed one of these with a cup of coffee!

Espresso Brownies 
Adapted from these heavenly Fudge Brownies from Yammie's Noshery

Ingredients:

2 sticks of butter
2 1/4 cups of sugar
4 large eggs
1 Tbsp vanilla
1 1/4 cups of cocoa powder (I used Dutch press)
1/2 teaspoon salt
1 teaspoon baking powder
1 1/2 cups of flour
2 cups chocolate chips
3 Tbsp espresso powder

Directions:

Grease a 9 x 13 inch pan.
Preheat the oven to 350 degrees.

Mix together the butter and sugar in a microwave safe bowl.
Heat in the microwave, stirring about every 30 seconds, until the mixture is bubbly and smooth (mine was smooth, but not so bubbly).  You can also do this on the stove.

Add in the eggs and vanilla and beat until smooth.
Add the espresso powder and mix well to incorporate.
Mix together the cocoa powder, salt, baking powder, and flour.  I just sifted it into the butter mixture, in about 3 additions.
Add to the butter mixture, mixing until smooth.
Stir in the chocolate chips.

Pour the batter into the prepared pan.
Bake for about 28 minutes.  I baked mine for 25 minutes.  They were delicious, but very gooey when they came out of the oven.  They did set up nicely when the cooled.

Monday, September 21, 2015

Coffee cake cookies

My family has all the holidays divvied up quite nicely and evenly.  Since as far back as I can remember, since my grandmother vacated her role of preparer of break fast (the meal after the fast of Yom Kippur, when I eat almost 300 times more calories in one meal than I typically eat in a day), my aunt has held the title.  And although the meal is chock full of delicious food (appetizing and bagels and cream cheese, oh my!) we feel the need for dessert.  Even though a typical breakfast doesn't have dessert, our break fast always does.


My grandmother still usually makes the coffee cake -- handed down to her from her mother, my great grandmother, and possibly (and likely) from generations before her -- but since she did some sort of acrobatics last month and ended up with a fractured shoulder (she's healing quite nicely and is quite the champ!), I graciously usurped the cake-baking responsibilities for her.  Here's the problem.  This recipe I talk of?  This heavenly coffee cake?  Well it's a family secret.  It's always referred to as "Nanny Rose's Coffee Cake," and even if you promised to call it "Julie's Great Grandmother Rose's Coffee Cake," I don't think my family would ever forgive me for sharing it with you.  I did bake it and talk about it on the blog almost 3 years ago (see here for that post and a fabulous picture of four generations of women on my mom's side -- me, my mother, my grandmother, and my two great grandmothers), but I figured it wasn't fair to have another post about the cake and leave you drooling with no recipe, so I decided it was only fair to also make some coffee cake cookies.  Because that recipe I can share with you!

My Great Grandmother's Coffee Cake


I saw this recipe for coffee cake cookies over 6 months ago and I emailed it to myself.  "I must make these," I thought to myself, but then I never did.  See, just about anything that is advertised as coffee cake gets my attention.  And if you say coffee crumb cake, well then I'm 1000% sold!  So imagine a coffee cake cookie topped with loads of crumb topping, in a portable snackable delicious cookie that's been dusted in a faint snowfall of powdered sugar?!  I can't believe it's taken me this long to make them!


Coffee Cake Cookies
From Cookies & Cups

Ingredients:

For the crumb topping:

1/2 cup butter, softened
1/3 cup brown sugar
1/3 cup granulated sugar
1 tsp cinnamon
1/2 tsp salt
1 2/3 cup flour

For the cookie:

10 Tbsp butter
1/2 cup shortening
1 cup light brown sugar
1/2 cup granulated sugar
1.5 tsp cinnamon
2 eggs
2 tsp vanilla
2 tsp baking powder
1 tsp salt
3 1/3 cup flour

Optional:

powdered sugar, for dusting

Directions:

Preheat the oven to 350F.
Line cookie sheets with parchment paper or silicon liner.
Set aside.

Make the crumb topping.
Mix all the crumb ingredients together in a medium bowl.
Cut together with a pastry cutter or a fork until evenly mixed.
Refrigerate while making the dough.

Make the cookies.
Mix together the butter, shortening, and both sugars for 1-2 minutes on medium speed, until combined and smooth.
Add in cinnamon, eggs, and vanilla.
Continue mixing until evenly combined.
Turn mixer to low and mix in baking powder, salt, and flour.
Mix until dough comes together evenly.

Scoop cookies out using a cookie scoop or spoon (about 3 Tbsp) and place on lined cookie sheets.  If using a spoon, roll dough into balls.
Make an indentation in the center of the cookie dough.
Scoop at least 1 Tbsp of the crumb topping into the center of the dough, pressing lightly to stick.  Don't be afraid to cram it in!
Bake cookies for 9-10 minutes, or until edges start to get golden.
Remove from oven and allow to cool for 3 minutes on cookie sheet.
Transfer cookies to a wire rack to finish cooling.

Dust cooled cookies with powdered sugar, if you'd like.

Sunday, April 26, 2015

Tiramisu mousse

I'm not going to lie....the past few weeks have been a little bit hectic.  I packed (about 85% of) my apartment, moved downtown, unpacked (not nearly enough), spent the weekend in the 'burbs to celebrate my dad's 65th birthday (!!), came back to the city today, and packed up more of my old apartment.  Then, I came back downtown with a few bags in tow, and started unpacking some more!


Would I change any of it?  No, not a chance!  Except maybe I would've packed up my whole apartment before I moved so that I didn't have to go back and keep packing.  Like I'll have to do tomorrow after my 8-4 shift at work, and probably two days later, too.  :-(


So when my dad's 65th birthday fell TWO days after my move, I knew it was going to be hard to make a birthday treat for him.  I was definitely upset that I wouldn't be able to make anything, but it was highly unrealistic to think that I could.  I mean there was a good chance that my kitchen-aid wouldn't be unpacked, and that would be a travesty (in the end, as I'm sure you've figured out, it was unpacked on the first or second day).


But then something happened.  I came across a recipe.  It sounded good and it had easy in the title.  I read more and I was sold!  Easy Tiramisu Mousse sounded delicious.  And I thought it was perfect to pipe into small plastic cups and serve at the hors d'ourves party that my mom had planned for my dad.  The extensive, over the top, insane -- but also delicious -- hors d'ourves party that my mom had planned (there will be more on that in another post later, I promise!).

I was so amazed at how delicious and easy this was.  And it tasted just like tiramisu!  I highly recommend this recipe....as well as using a bigger serving vessel than I did.  I saw some people reach for seconds ;-)

Easy Tiramisu Mousse
From Crazy for Crust

Ingredients:

1.5 tsp instant coffee (like Starbucks Via or any other variety of instant coffee)
1/4 cup hot water
1 cup heavy whipping cream, cold
1.5 cups powdered sugar
8 oz mascarpone cheese or cream cheese (low fat cream cheese is fine, too) -- I used mascarpone
1 tsp vanilla extract
1 Tbsp unsweetened cocoa powder
1 oz semi-sweet baking chocolate

Directions:

Put instant coffee into hot water and stir.
Let cool for 5 minutes, or longer.

Beat whipping cream until stiff peaks form.
Chill until ready to use.

Mix powdered sugar and mascarpone cheese with a hand mixer until smooth.
Mix in vanilla and 1 Tbsp of the coffee mixture.
Continue adding coffee until you reach your desired taste.  The original recipe blogger said she used the whole coffee mixture; I ended up using 2 Tbsp and loving the flavor.  

Fold whipped cream into coffee-mascarpone mixture gently.
Place the mousse in a gallon sized ziploc bag that is fitted with a large round or 1M tip (I used a piping bag with a star tip, because sometimes I'm a little crazy!).

Pipe a small amount in the bottom of your serving dishes.
Top the layer with a dusting of cocoa powder.
Continue layering mousse and cocoa powder in each dish.
Once you get to the top layer, grate the semisweet baking chocolate over the top of each dish (I used a little bit of cocoa powder and then went to town with the chocolate shavings).

Chill, covered, in the fridge until ready to be served.

Friday, March 6, 2015

Espresso bark.....and exciting news from the JulieBakes kitchen!

I feel the need to sugar-coat (no pun intended, I swear!) the news I'm about to share with you.  It's kinda big.  And it's going to be bittersweet -- sad for the next few weeks, but exciting overall -- so in order to make the news slightly less harsh, I made you some espresso bark to lessen the blow.


I've been wanting to make this for a long time.  I even bought the chocolate wafers once and let them expire, having not made this bark.  But I bought them for a second time and was determined to make this for you guys.  And the added bonus?  The caffeine level is up there....which I'll need for the second part of this blog post.


And this bark is easy, delicious, and so pretty.  Plus, it's a nice peace offering for blog readers about to read some possibly upsetting news (right?!).  And it's a great hostess gift if you need one.  Easy is a huge key right now, since washing dishes is annoying, and time isn't quite as free as it used to be.

See, in just a few weeks the JulieBakes kitchen will be packing itself up* (* I've yet to actually find a way to have my kitchen pack itself up, so I'm forced to pack it -- as well as the rest of my apartment that I've lived in for almost TEN years!! -- up....hence my need for caffeine!) and moving downtown.  I'm really excited for the move, but in the meantime, my baking time of the past has been replaced with packing time.  So while I am going to be baking a lot less over the next few weeks, I promise I will still be gracing your email and Facebook feeds with some baked goods...and rest assured that once I'm settled in the new place, the baked goods will be flowing once again!


So, now that I've ripped that band-aid off and delivered the news, back to this bark.  Two layers of chocolate, one spiked with espresso, chocolate wafers, and chocolate covered coffee beans.....well, you can just imagine how delicious this is.

So pass me another piece of this bark and another roll of packing tape, and let's get this party started....

Espresso Bark 
From Tutti Dolci

Ingredients:

6 ounces semisweet chocolate, chopped
1 tsp instant espresso (she recommended Starbucks Via, I used my trusted Cafe Bustelo, which I thought was delicious), consider upping the instant espresso to closer to 1.5 tsp, like I did
12 chocolate wafers (I ended up using about 10 and a half)
8 oz white chocolate, chopped
1/2 cup chocolate covered espresso beans, halved (I left the smaller ones whole)

Directions:

Line a 7 x 11 inch baking dish with parchment paper (I used an 8x8 inch pan, because, well I don't have a 7x11 pan.....square inch wise, mine was a bit smaller, so it was fine :-))

Cut chocolate covered espresso beans in half, leaving smaller ones whole.
Set aside.

Place semisweet chocolate and instant espresso in a double boiler or heat-proof bowl over a saucepan of gently simmering water.
Slowly melt the chocolate, stirring occasionally, until glossy and smooth.
(Alternately, you can melt the semisweet chocolate in a microwave safe bowl, in 30 second increments, until smooth and glossy....then add espresso and stir until smooth.)

Pour melted chocolate into prepared pan and spread with an offset spatula into an even layer.
Top with a single later of chocolate wafers (if necessary, cut wafers in half to fit).
Chill in the fridge until set, about 25 minutes.
Remove pan from fridge and leave at room temperature while melting white chocolate.

Place white chocolate in a double boiler or a heat-proof bowl over a saucepan of gently simmering water (I don't recommend doing this in the microwave, as I find that microwaved white chocolate doesn't melt to smoothly).
Slowly melt the chocolate, stirring occasionally, until glossy and smooth.
Pour melted white chocolate over the wafer layer.
Carefully spread it with an offset spatula into an even layer.
Sprinkle with chocolate covered espresso beans.
Chill in the fridge until completely set, about 1 hour.

Carefully lift the parchement paper out of the pan.
Place bark on a cutting board.
Trim away any ragged edges.
Use a sharp knife to cut into squares (or triangles, or "break" it into ragged pieces, like I remember bark having).
Store leftovers (if any) in an airtight container at room temperature.

Monday, July 21, 2014

S'mores bar

So one of the things I debated doing for B's birthday party was a S'mores bar.  See, we had unfettered access to a grill, but didn't actually plan on grilling for the party.  We were going to be a big group and I didn't want B to be stuck grilling at his birthday party, I wanted him to be able to hang out with his friends.  But when in NYC do you have access to a grill?  I wanted to find a use for it...I was going to find a use for it!!


Enter the marshmallow!  Able to be perfectly toasted over a flame when there is a flame nearby.  And then why stop at plain marshmallows?  Why not make a few flavors?  Maybe some chocolate or berry flavored ones, or cinnamon, or coffee?  The possibilities were endless!

So I started with some plain vanilla marshmallows.  B loves all things vanilla, so that was a good place to start.  Plus, they're almost identical to store-bought marshmallows, but way more delicious!  Then I started thinking of some other flavors.  I thought about some fruity flavored marshmallows, but didn't know how they'd taste toasted, or even with chocolate and sandwiched between graham crackers.  Then I decided on some chocolate marshmallows.  But I thought that maybe I could come up with another flavor.  Coffee sounded great, so I decided on those.  But then I thought back to a peanut butter and jelly marshmallow I has seen in the past, and - while I thought fruity marshmallows wouldn't work for this - I thought that peanut butter marshmallows with melted chocolate and graham crackers did sound pretty awesome.  So I made a few varieties of marshmallows (1 more than I had planned to make), then bought a few flavors of graham crackers and chocolate bars, and set them up next to the grill for a s'mores making bar!

It was a huge hit!  My favorite was a regular graham cracker-cookies n' cream chocolate bar-coffee marshmallow combination!!!

Monday, July 7, 2014

Coffee marshmallows

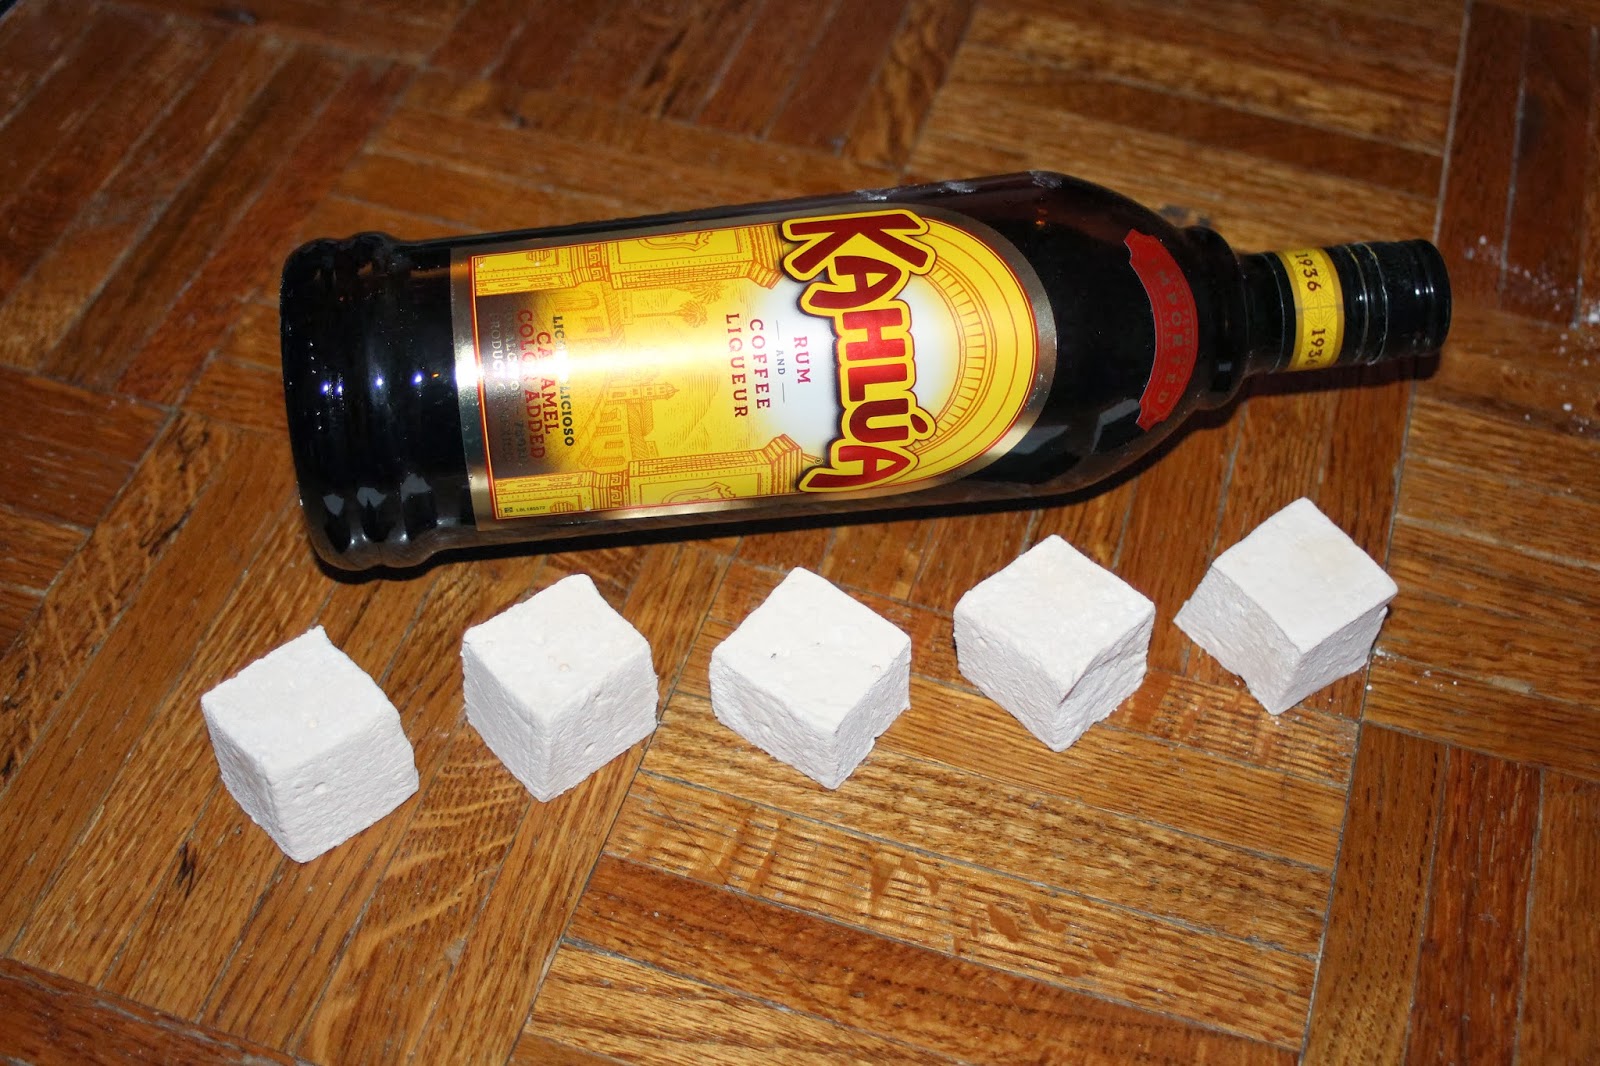
This winter, I had been on a marshmallow making spree.  Toasted coconut, vanilla, even raspberry heart marshmallows!  I tried Kahlua marshmallows (twice!) and thought they were OK, but I wanted to make some more flavored marshmallows.  I have something coming up and I thought that some flavored marshmallows would be perfect for it, so I set out to find the perfect flavor of marshmallow to make.  Enter the coffee marshmallow!  Besides being delicious on it's own, imagine how good it would be in hot cocoa (say, in about 5 months when the heat has disappeared and hot cocoa actually sounds appetizing), making it a mocha....or even in a mug of coffee?!

*Pardon the poor photo quality - I took them with my iPhone*

I doctored up this recipe from the toasted coconut marshmallow recipe, leaving off the toasted coconut (obviously) and instead replacing the water in the recipe with really strong coffee (I used 8 oz of water and 3 heaping teaspoons of instant espresso powder for a really strong coffee flavor!....so I guess technically they are espresso marshmallows, but I digress.  A cup of really strong coffee would work, too).  I was going to add the vanilla, but when I tasted the marshmallow mixture before adding it, I thought it didn't need the added vanilla....they were perfectly coffee-y and delicious just as they were!


Stay tuned for a post on what I did with these delicious marshmallows!

(P.S. I also made a batch of the vanilla ones as they are, but used only 1 Tbsp of vanilla,  I'm not going to post them again since I made them here, but just so you know -- they're totally fluffy, tasty, and simply out-of-this-world.  Homemade marshmallows are worlds better than store bought ones!!  I tossed them in a mixture of 3/4 cup confectioners sugar and 1/2 cup of corn starch)

Coffee Marshmallows (or, in this case, Espresso Marshmallows)
Recipe by me, based on this recipe

Ingredients:

1 cup strong coffee, room temperature, divided (I used 3 heaping teaspoons of instant espresso powder in 8 oz of water)
3 Tbsp plus 1.5 tsp unflavored gelatin (3 envelopes)
2 cups granulated sugar
1/2 cup light corn syrup
1/2 tsp fine salt

Marshmallow coating:

1.5 cups confectioners sugar
1 cup corn starch
(I debated adding a pinch of espresso powder, but last minute I decided against it)

Directions:

Spray a 9 x 9 inch pan with Pam, and line the bottom with parchment paper.  Feel free to spray the parchment paper with some Pam, too, since when I made the vanilla ones it stuck a little.

In a stand mixer with the whisk attachment, pour in half a cup of the coffee and sprinkle the gelatin over it.
Let it stand.

In a medium saucepan over high hear, stir together the coffee, corn syrup, sugar, and salt.
Stir until the sugar dissolves and the mixture begins to boil.
Stop stirring and once the mixture comes to a rolling boil, continue boiling for one minute.
Remove from the heat (it helps to then pour the mixture into a 2-cup glass measuring up, to make it easier to pour the mixture.

Turn the mixer to low and mix the gelatin a bit to loosen it.
Very slowly and carefully pour the hot sugar mixture into the bowl by pouring it gently down the side of the bowl.
Continue to mix on low until all the sugar mixture is added.

Turn the mixture to high and whip for 10-12 minutes until the marshmallow batter almost triples in size and becomes very thick.

Transfer the mixture to the prepared baking pan and use a spatula or bench scraper to spread the marshmallow evenly in the pan, pushing it down into the corners.
Work quickly, as the marshmallow becomes more difficult to manipulate as it begins to set.

Spray a sheet of plastic wrap liberally with Pam and lay it across the top of the marshmallow, sprayed side down.
Using your fingers, smooth the plastic wrap on top of the marshmallows a bit to seal it smoothly and tightly against the marshmallows.

Leave the marshmallows to set at room temperature for at least 3 hours, or even better, overnight.

Mix together the confectioners sugar and corn starch.

When you're ready to cut the marshmallows, put a little bit of the corn starch mixture on a cutting board and flip the marshmallows onto the mixture.
Cut the marshmallows using a sharp knife or pizza cutter.  Or, use cookie cutters to make shapes.
Toss the cut marshmallows into the coating to cover, and then shake off the excess coating mixture using a strainer.
Place the marshmallows in a single layer in a pan, and then place waxed paper on top, and then continue layering marshmallows.
Store in an air tight container, for up to a week....if they last that long!

Thursday, April 17, 2014

Passover mandel bread

Two years ago I made my friend L's kosher for Passover mandel bread for Passover and I was hooked.  It was, in my opinion, one of the best kosher for Passover treats I had even had.  Ever.  And with a cup of coffee?  Heaven!  I made it last year, too, and when it came time to make it this year, I thought I might mix it up a little and make a few varieties.


First up was the original.  Because how could I NOT make the amazing chocolate chip mandle bread?!  The recipe is here.  It's also the base for the other two varieties I made.


Second up was the espresso chip mandle bread.  And the third?  Mocha chip.


Frankly, I don't think this needs more of an introduction than I gave them already.  So here it goes:

Espresso Chip Passover Mandel Bread
Adapted from L&A's Kosher for Passover mandel bread

Ingredients:

2 3/4 c. matza cake meal
1/2 lb. butter
2 c. sugar
6 eggs
3/4 c. potato starch
1/2 tsp. salt
6 oz. passover chocolate, or chips and/or nuts (I leave the nuts out and go with all chocolate)

1 1/2 Tbsp finely ground coffee or instant espresso powder

2 tsp. sugar
1 tsp. cinnamon


Directions:


Preheat oven to 350 degrees. 

Cream the butter and sugar
Add the eggs one at a time, beat until smooth.
Sift the cake meal, potato starch, salt, and coffee.
Fold the dry mixture into the egg mixture.
Mix thoroughly.
Add the chocolate, and chopped nuts (if using)
Form into 3 or 4 loaves on a greased baking sheet (I used foil-lined sheets and they work just fine), about 3 inches wide.
Top with the mixture of 2 tsp sugar and 1 tsp cinnamon.
Bake 40-45 minutes
When mostly cooled but still a little warm, slice into 1-1.5" slices

Mocha Chip Passover Mandle Bread

Adapted from L&A's Kosher for Passover mandel bread

Ingredients:

2 3/4 c. matza cake meal
1/2 lb. butter
2 c. sugar
6 eggs
3/4 c. potato starch
1/2 tsp. salt
6 oz. passover chocolate, or chips and/or nuts (I leave the nuts out and go with all chocolate)

1 1/2 Tbsp finely ground coffee or instant espresso powder
4 Tbsp cocoa powder (I debated taking out a few Tbsp of cake meal to make up for the cocoa powder, but didn't end up doing that.  It turned out fine.)

2 tsp. sugar
1 tsp. cinnamon


Directions:


Preheat oven to 350 degrees. 

Cream the butter and sugar
Add the eggs one at a time, beat until smooth.
Sift the cake meal, potato starch, salt, cocoa powder, and coffee.
Fold the dry mixture into the egg mixture.
Mix thoroughly.
Add the chocolate, and chopped nuts (if using)
Form into 3 or 4 loaves on a greased baking sheet (I used foil-lined sheets and they work just fine), about 3 inches wide.
Top with the mixture of 2 tsp sugar and 1 tsp cinnamon.
Bake 40-45 minutes
When mostly cooled but still a little warm, slice into 1-1.5" slices

Monday, January 27, 2014

Kahlúa marshmallows....perfect this time!

So in early January, I decided to make some flavored marshmallows.  See, I had made toasted coconut marshmallows before, and then some vanilla marshmallows, too, but I hadn't really made flavored marshmallows.  So in the shadow of a lot of snow and freezing temperatures, I decided to make some Kahlúa marshmallows to put in a nice big mug of hot cocoa.  The only problem?  The marshmallows fell flat and my kitchenaid suffered an injury. 

Check out how fluffy the new ones are:


especially when compared to the older version:


But I was committed to making these right.  So once I improvised a little, wedged a pen strategically in the Kitchen-Aid, and held it at a 90 degree angle while it whipped the delicious marshmallow batter, I made those raspberry marshmallows.  With those whipped so fluffy that they filled the 9 x 9 inch pan to the tippy-top, I set out to make these again!


Now these didn't whip up quite as fluffy as the raspberry ones, but they were a HUGE improvement from the last batch of Kahlua ones I made.  First off, before they were even done setting up, they bounced back when I poked them -- a good sign!


These marshmallows are a lot stickier than the vanilla and coconut ones and a bit stickier than the raspberry ones.  They're also a bit softer, so I left them sitting out longer to let them dry a little.  And lastly, I was lazy and dipped them in just powdered sugar and not the powdered sugar-corn starch mixture, since I had it out on a plate from the raspberry ones I made yesterday.  I actually think that the corn starch may help dry them out a little, so I recommend going with that.

Kahlúa Marshmallows
Idea from this recipe, recipe from here, and put together by me :)

Ingredients:

For the marshmallows
1/2 cup Kahlúa
3 Tbsp. + 1 1/2 tsp. unflavored powdered gelatin (3 envelopes – envelope is 1/4 oz. each, for 3/4 oz. total)
2 cups granulated white sugar
1/2 cup water
1/2 cup light corn syrup
1/2 tsp. fine salt
For the coating
3/4 cup powdered sugar
1/2 cup corn starch
Directions:
Spray a 9 x 9 or 7 x 11 inch baking pan and line with parchment paper (Recommendation: cut to fit flat on the bottom, with the edges of the paper over-hanging the sides. The ends are fine just sprayed.)
In a stand mixer fitted with a whisk attachment, pour in 1/2 cup of the Kahlúa and sprinkle the gelatin over.
Let stand.
In a medium saucepan over high heat, stir together the sugar, corn syrup, salt and the water.   
Stir until sugar dissolves and mixture begins to boil.
Stop stirring and once mixture comes to a rolling boil, continue boiling for 1 minute.
Remove from the heat. (Recommendation: the original recipe said that they like to carefully pour mixture into a 2-cup glass measuring cup, to make it easier to pour into mixer.  I did this and found it extremely helpful!).
The mixture is very, very, very hot.  Be extremely careful!

Turn the mixer to low and mix the gelatin a bit to loosen.
Very slowly and carefully add the hot sugar mixture by pouring it gently down the side of the bowl.
Continue to mix on low until all the sugar mixture is added.

Turn the mixer to high and whip the mixture for 10 to 12 minutes until the marshmallow batter almost triples in size and becomes very thick.
If you have a smaller mixer bowl, you may need to scrape down the sides of the bowl frequently to avoid the batter overflowing as it grows.

Transfer the mixture to the prepared baking pan (a silicone bowl scraper works like a charm for this) and use a spatula or bench scraper to spread the marshmallow evenly in the pan, pushing it down into the corners.
Work quickly, as the marshmallow becomes more difficult to manipulate as it begins to set.

Spray a sheet of plastic wrap liberally with cooking spray and lay it across the top of the marshmallow, sprayed side down.
Using you fingers, smooth the plastic wrap on top of the marshmallows a bit to seal it smoothly and tightly against the mixture.

Leave the marshmallow to set at room temperature for at least 3 hours or, even better, overnight.
The marshmallow will be too sticky and soft to cut if you try too soon.

Meanwhile, mix the coating ingredients in a bowl.
Set aside.

Coat a clean area of the counter or work surface with some of the coating mixture.
Remove the plastic wrap from on top of the marshmallows and invert them onto the coating mixture.
Remove the parchment paper.
Sprinkle the top with some coating mixture as well.
Cut the marshmallows into squares, keeping the knife clean and coated with the coating as necessary to prevent sticking

Roll each of the freshly cut marshmallow squares in the coating mixture.
Lift them out with a mesh strainer.
Tap off all excess coating and place on a plate or in a storage container.

Sunday, January 5, 2014

Kahlúa marshmallows...a little bit of a flop

Two days ago we had some snow.  OK, it was more than just some snow.  I think in the end, New York City got over 6 inches.  But what was worse was how cold it was the next day.  It was so cold, in fact, that B and I stayed in that night and cooked a delicious Italian dinner with some red wine.  There was no way we were going to venture out -- the predicted low overnight was 0 degrees -- zero.  degrees!

It's hard to read, but under "Kahlúa Marshmallows" it says "The first time they fell a little flat (pun intended)"

So when I thought about what I might make this weekend, I figured some marshmallows might be a good option....for hot cocoa....because it's cold out there!  And why stop at just marshmallows when I could make flavored marshmallows (the first time I made marshmallows were those toasted coconut marshmallows, which were delicious, but weren't really flavored -- they were vanilla marshmallows dipped in toasted coconut.  The second time I remade that same recipe, skipping the coconut and instead coating them in some corn starch and powdered sugar (which I saw on another recipe)).  Plus, I've been kinda craving making marshmallows again.  It's a win-win situation!

I found a recipe for Kahlúa marshmallows a while ago and had been holding onto it for the right time.  It used flavored Kahlúa, but I figured I'd stick with the original (partly because I like the coffee flavor, and secondly, because I have another recipe I want to use it for).  Plus, alcohol + hot cocoa = extra warmth for the cold weather!  The original recipe called for egg whites, whipped, and then added to the marshmallow mixture.  I have to admit, I was a little weirded out by that.  So I figured that I'd try to substitute the Kahlúa into the original recipe I made and see if that worked.

These marshmallows were kinda a flop.  I'm not completely sure if it's that there was too much Kahlúa in them and, since Kahlúa has some sugar in it, it threw off the balance of ingredients, or if it's because my Kitchenaid made a big clunk, and then the head wasn't at the proper angle on the base, and, well, my kitchenaid seems to be a bit busted right now :-(, or if I should've gone by temperature (like the original Kahlúa marshmallow recipe called for) instead of by timing (like the coconut recipe called for, and I followed).   I debated adding a little vanilla to them, but when I tasted them as they were mixing, I realized they didn't need any vanilla.  They're uber-Kahlúa-y, so I think they'd be best in hot cocoa or even a cup of coffee, but I found them a little strong to be eaten alone.  Again, it could also be because they fell a little flat, and had they been whipped up well, maybe the flavor would've dissipated a little.  I'm already thinking about when I can make them again to test out my theory, but I think I'm going to be on a marshmallow-making hiatus until I figure out how to fix my kitchenaid -- or buy a new one!

So "WHY??" you may ask, am I sharing this story with you when it clearly fell flat (fine, pun intended!).  Well, for two reasons.  First of all, we're all human and we all make mistakes.  Even I have a baking error or two in my past.  Secondly, I'm not sure entirely why the recipe flopped, and I want to investigate that and try to figure out if it was a mechanical error (did I add the sugar recipe too quickly?), a cooking error (did the sugar mixture not get hot enough?), or if it was just a recipe failure.

So once I get my kitchenaid fixed (or, gulp, get a new one), I will be back at it, trying to perfect these Kahlúa marshmallows!

Saturday, January 4, 2014

Espresso caramels

So I kinda became obsessed with caramels since I made them last week.  Mine came out pretty awesomely last time given the fact that I didn't have enough corn syrup and had to adjust everything else by decreasing by 20%, which was doable because I'm kinda a math nerd.  But they came out a little thinner than I had hoped, because of the adjustment, and while I knew I should've used a smaller pan, I didn't actually use the smaller pan. 


So I had in my head that I needed to make caramels again with the proper amounts of ingredients.  I debated making the plain, classic ones again because they were so delicious (but do you really want to see me post the same recipe twice, less than a week apart?!).  Then I thought about the sesame ginger ones (yum!) that I had seen on the same website, but I didn't have any candied ginger (and the frigid NYC temperatures and remaining snow on the ground made going outside to buy candied ginger just because seem, well, kinda silly).  I settled on the espresso orange caramels also featured on the same website, but of course I had to adjust them just a little and leave out the candied orange because, well, I think the combination of orange and espresso sounds kinda gross.  And I don't generally like orange flavored things, anyway.


And you know what happened when I went looking for the sugar that I bought at the store the other day in preparation of making some more caramels?  I found the cream that I bought that same day.  Yup, it had been sitting out literally for days.  So then I had to toss that (obviously!), and use the cream I had at home, since I already voiced how silly going out in this weather would be, and had to half the recipe....which, in all honesty, was easier than making 80% of the recipe like I did last time.

Espresso Caramels
Adapted from Ms. Martha Stewart

Ingredients (adjusted due to the amount of usable cream I had here):

Vegetable oil, for baking sheet (or Pam, because I used Pam -- let's face it, it's just easier sometimes)     
1 cup heavy cream
1 cups sugar
3 tablespoons unsalted butter, cut into pieces
1/2 + 1/8 (5/8 total) cups light corn syrup
1/4 teaspoon coarse salt
1/4 teaspoon pure vanilla extract
1/8 cup instant espresso powder
 
Directions:
 
Lightly brush bottom and sides of a 9 x 9 inch rimmed pan with oil.  Or use Pam, like I did.
Line with parchment, leaving a 2-inch overhang on long sides.
Lightly brush parchment with oil.
 
Bring cream, sugar, butter, and corn syrup to a boil in a large saucepan over high heat, stirring until sugar dissolves.
Reduce heat to medium-high.
Cook, stirring occasionally, until caramel reaches 248 degrees on a candy thermometer, about 15 minutes.  You NEED to be VERY quick and take it off at exactly 248 degrees and add the rest of the ingredients.  I took mine off of the heat and moved it and by the time I added the rest of the ingredients, the temp had crept up to 250-251.  When I went to check on the caramels an hour and a half later, they were pretty hard -- I think it's because the caramels were over-heated.
 
Immediately remove caramel from heat, and stir in salt, vanilla, and espresso power.
Pour caramel into/onto lined sheet, and let stand, uncovered, at room temperature at least 8 hours and up to 1 day.
 
Lifting by parchment overhang, transfer caramel to a large cutting board.
Cut into 3/4-by-1 1/4-inch pieces.
Wrap each piece in waxed paper or cellophane.

As I stated above, mine got a little too hot, and when I went to check on them an hour and a half later, the caramels were already really hard.  I went to cut them and they kinda broke as I cut them, so they're oddly misshapen.  BUT...they're super flavorful, and have a little crunch to them (translation: not chewy).  I still advise this recipe but be really quick about removing them off the head and adding the rest of the ingredients.  It helps if the burner behind or next to the pot is open for easy access....I had to move mine to the other side of the kitchen, and that probably allowed the caramels to cook even more than they should've.

I guess you'll have to stay tuned for another caramel recipe in the near future, just working on perfecting my caramel skills ;-)

Monday, December 23, 2013

Mochacchino meringues

When I think of meringues, the first place my head goes to is the plain meringues with chocolate chips that my grandma makes for Passover.  They're a simple meringue with chocolate chips, dropped onto a baking tray with a spoon, and then baked until light and crispy.  Then, a few years ago, meringues became all the rage, and were available in a ton of flavors - mint, fruity flavors, chocolate, vanilla, just to name a few.  They were all the rage, but I never really fell for them, I can't even fathom a guess as to why.


But then when I was looking for some holiday recipes to make, I came across a recipe for espresso meringues.  And then one for chocolate meringues.  And another for marbled chocolate meringues.  I wanted to make the espresso meringues, but the chocolate ones looked good, too.  So then I came up with my awesome idea -- mochacchino meringues!  Part chocolate, part espresso, pinch of cinnamon, 100% mochacchino-y goodness!


Of course the first time I made them, the recipe fell flat.....literally.  I poured out the entire batch, let the mixer bowl dry completely (moisture is the enemy), and started out again...all I can say is add the sugar mixture V...E...R...Y......S...L...O...W...L...Y...!


Although I loved the way the big meringues looked, I opted to make mine a bit smaller.  The hardest part was adjusting the baking time, since I didn't want them to burn.  Also, I had to work with one of the two recipes, since the proportions they both used were very different.  Below is my adapted mocha meringue recipe.  Feel free to serve them as they are, or dip the bottoms into some semisweet chocolate!

Mochacchino Meringues
Adapted from this recipe for Chocolate Meringues

Ingredients:

1 1/4 cups sugar
5 tsp unsweetened cocoa (not Dutch-processed) -- I used Special Dark cocoa powder simply because I didn't have regular Hershey's cocoa
1 tsp instant espresso powder
1/8 tsp cinnamon
4 egg whites, room temperature
1/4 tsp. salt

4 oz. semi-sweet or bittersweet chocolate, melted (optional)

Directions:

Preheat oven to 225 degrees F.
Line two baking sheets with parchment paper.

Combine sugar, cocoa, espresso powder, and cinnamon in a bowl.
Set aside.

In the bowl of a stand mixer, with the whisk attachment, whisk the egg whites until frothy.
Add the salt and whisk at high speed until soft peaks form.

Slowly add the sugar/cocoa/espresso/cinnamon mixture, in a steady stream, with the mixer at medium speed.  Add it  V...E...R...Y......S...L...O...W...L...Y...!  I basically did it 1 or 2 tsp at a time.
Increase speed to high and continue whipping until stiff peaks form and the meringue is glossy.
Scrape down the sides of the bowl to make sure that everything is combined well.

Using a pastry bag fitted with a tip of your choice, place the meringue mixture in the pastry bag and pipe out cookies in whatever design you like.
Be sure to leave a few inches between each meringue cookie.

Bake the cookies for approximately an hour and 10 minutes (I baked mine for about 50 minutes since I made them a little smaller than the original recipe) and then turn the oven off.
Let the cookies cool in the oven for one hour.
Remove from the oven and transfer the meringue cookies to a wire rack to continue cooling.
Leave overnight so that the cookies will dry out completely.

** Full disclosure?  I had 3 trays and my oven only had room for two at a time, so I took them out immediately after but let them cool on the counter.  The last batch I left in the oven afterwards, and think they came out just a little bit crispier.  **

If you want, dip the bottoms of the meringues in the melted chocolate, or drizzle with the melted chocolate (I skipped this step).
The meringues should be stored in an airtight container and will keep for a week or so.

Sunday, October 20, 2013

Chocolate peanut butter pretzel cupcakes

Yeah, in case you were wondering, you read that title correctly.  Chocolate Peanut Butter Pretzel Cupcakes.  Chocolate + peanut butter + pretzels.  In a cupcake. Pretty awesome sounding, right?

A few days ago, I made these awesome cannoli-inspired cupcakes (affectionately named the Dom DeLuise cupcake) for JulieBakes' 2nd birthday.  I found them online on a blog that I subscribe to, mere days before the cookbook they're featured in was launched.  These chocolate peanut butter pretzel cupcakes are by the same bakers/bakery, Robicelli's.  These two cupcakes sounded so awesome (as did another one posted on that same blog, but I'm saving those for another day), that I ended up baking them both in the span of a few days -- and ordering their newly launched cookbook!  Look out for a post about all the awesome recipes featured in it soon (once I receive it, read it, and drool over it).


When I made the Dom DeLuise cupcakes, the recipe said it made 12, but I ended up with 22 regular sized cupcakes and 24 mini cupcakes.  These chocolate peanut butter pretzel cupcakes said that they made 24 regular sized cupcakes, but I ended up with 21 full-sized cupcakes.  I didn't even overfill any of them.  Interesting that the recipes are by the same people but the number of cupcakes would be off on both of them.  Regardless, super awesome cupcakes, so it doesn't really matter to me....and it shouldn't to you, unless you need a specific number of cupcakes.  I needed 12-14 cupcakes, so I ended up with more than enough cupcakes for my need.


A few notes about these cupcakes:

- I used Dutch press cocoa because I wanted to cupcakes to come out dark and super chocolatey looking.
- The recipe said that the cocoa-coffee mixture was going to be a thick paste.  Mine was actually pretty runny.
- The batter itself is pretty runny.  Don't fret.  It'll bake up nice and pretty anyway.
- Usually when I use coffee in my chocolate cake recipes, you don't taste the coffee at all, it just enhances the chocolate.  I used Starbuck's dark roast coffee, and it was pretty strong, so the cake tasted a little coffee-y.  It got better as the cake cooled.  So if you're a "taste it when it's fresh out of the oven" baker, as I tend to be more often than not, again, don't fret!
- Don't worry if the icing isn't perfectly piped - it'll be covered with crushed peanuts and pretzels, and then drizzled with chocolate ganache, and you won't be able to tell if the swirls aren't perfect.
- For the perfect drizzle - or close to it - I used a squeeze bottle and a back and forth motion.  If you don't have a squeeze bottle, using a fork dipped into the ganache would work well, too.

I feel like it's one of those math problems from elementary school: chocolate + peanut butter + pretzels + peanuts + ganache - concern for calories = one awesome cupcake.  That makes sense, even to the least math savvy person out there.  So does the following statement: Make these cupcakes.  Now.

Chocolate Peanut Butter Pretzel Cupcakes
From Robicelli's: A Love Story, with Cupcakes, found on Food52

Cupcakes:

Ingredients:

3/4 cups cocoa powder (I used Dutch press cocoa for super dark, chocolatey cupcakes)
2/3 cups scalding hot coffee
2/3 cups buttermilk
2/3 cups canola oil
1 teaspoon vanilla extract
1 egg
1 egg yolk
1/2 teaspoon kosher salt
1 1/3 cup all purpose flour
1 3/4 cup sugar
3/4 teaspoons baking powder
1/2 teaspoon baking soda
 
Directions:

Preheat oven to 350.
Line cupcake pans with 24 liners.
 
Place cocoa powder in mixer bowl and pour scalding hot coffee over.
Mix on low speed until a thick paste forms and mixture stops steaming- about one minute. Like I said before, mine was not thick nor was it a paste, it was actually quite runny.  The cupcakes turned out perfectly deliciously well.
 
Turn mixer speed to medium.
In a measuring cup, combine buttermilk, egg, yolk, vanilla, salt and oil, and mix lightly with a fork, ensuring yolks are broken.
Slowly pour into mixer.
 
Stop mixer and scrape bottom well to loosen any caked on cocoa.
Reattach and turn mixer to medium, letting run one minute.
Stop mixer again.
 
Sift together dry ingredients and pour into wet mixture.
Mix on low speed until just combined.
Remove bowl and use scrape down the sides of the bowl, ensuring everything is mixed.
 
Scoop cake batter into prepared pans, filling cups 2/3 of the way.
 
Bake in the middle of the oven for 20-25 minutes, rotating halfway through (I don't rotate them....shhh, don't tell).
Cupcakes are done when the centers spring back when you touch them.
 
Remove cupcakes from oven.
Let cool completely. 
 
Peanut Butter Buttercream:
 
Ingredients:
 
3 sticks unsalted butter
1/2 cup natural peanut butter
1 teaspoon kosher salt
1 1/2 cups powdered sugar
1/4 cup heavy cream
 
Directions:

Cream together the butter, peanut butter, and kosher salt with a mixer set to "high" until light and fluffy.

Add powdered sugar a 1/4 cup at a time, beating well between each addition.
Add heavy cream.
Once combined, taste for flavor.  I added more peanut butter -- probably about 1/4+ cups.

Continue to beat on high for an additional minute to incorporate air.

Classic Chocolate Ganache:

Ingredients:

1/4 cup semisweet chocolate, chopped
1/4 cup cream
pinch of sea salt

Directions:

Place chocolate in a bowl, and shake back and forth until it flattens out on top.
 
Heat cream and sea salt in a medium saucepan until it comes to a boil.
Immediately pour hot cream mixture over chocolate, and allow to sit for two minutes to allow chocolate to melt.
 
Using a heatproof spatula, stir the cream and chocolate together until completely smooth.
 
Allow to cool slightly before drizzling on cupcakes.
Ganache should not be hot to the touch, but still be liquid.
If it cools completely and becomes solid, microwave on 50% power in 20 second increments, stirring between each, until desired consistency is reached.
 
Toppings:
 
3/4 cups roasted peanuts
1 1/2 cup pretzels
 
Directions: Pulse pretzels and peanuts in a food processor until they're coarse crumbs.  (Alternately, place in a strong ziptop bag and repeatedly smack with a rolling pin, a heavy skillet, or anything else your find enjoyable. Place crumbs in a pie dish or baking pan.)
 
Assembly:

Fill pastry bag fitted with regular tip with peanut buttercream, and pipe onto each chocolate cupcake.
Put cupcakes into the refrigerator so buttercream hardens- about 20 minutes.  Don't skip this step - my icing was pretty soft otherwise and I'm sure they wouldn't have been nicely domed afterwards.

Gently roll the sides of the buttercream in peanut/pretzel mixture.
Pour a handful over the top and lightly pack on with hand. Do NOT dip them top down into the bowl and press.  The icing isn't THAT hard.  You will flatten out the icing on the top of the cupcakes.  I learned that lesson after cupcake #1, and the rest of them looked perfect (if I do say so myself).
Shake off excess and set aside.
Drizzle ganache across each cupcake