Facebook 1

Showing posts with label Holiday. Show all posts

Wednesday, December 18, 2024

Ultimate chocolate cookies

My husband mocks me because I constantly have around 500 open tabs on my cell phone web browser.  I this an insane about of tabs to have open?  Yes.  But did you know that roughly 85-90% of them are recipes that I want to try? Or have baked but kept open so that I can write my blog post about them (I know, I know...I suck on that front!)?


One of those recipes was a cookie that I'm sure I either got an email about or saw on Instagram.  I'll get back to that cookie later on, but that cookie led me down a rabbit hole to find the original recipe, which led me to Sarah Kieffer of The Vanilla Bean Blog.  Deeper into the rabbit hole, I wanted to make like all of her recipes, and then even deeper, I ended up buying her cookbook.

The gateway cookie, so to speak, was her Pan-Banging Ginger Molasses CookieI've made them a few times, they're always delish, and to say I was hooked after the first time may be the biggest understatement ever.

I currently have a bunch of her cookies in my line up to bake, but this cookie caught my eye, and I thought they'd be great in a box of holiday cookies for our doormen and friends.


These cookies live up to their name -- special cocoa powder, two types of chocolate -- they're decadent and super chocolatey, and also not super sweet.  And get this -- they're super easy to make, too!


Ultimate Chocolate Cookies

By Sarah Kieffer, of The Vanilla Bean Blog


Ingredients:

1.5 cups all purpose flour

1/2 cup Ghirardelli Majestic Cocoa Powder (she said you need to use this cocoa powder.  I got mine on Amazon)

1 tsp baking powder

1/2 tsp baking soda

9 Tbsp unsalted butter at room temp

3/4 cup granulated sugar

3/4 cup brown sugar (I used light)

3/4 tsp salt

1 large egg

1 large egg yolk

1 Tbsp pure vanilla extract

5 oz Ghirardelli Dark Chocolate wafers, chopped

2 oz Ghirardelli Milk Chocolate wafers, chopped (I read this wrong when I made them and used 3 oz of milk chocolate wafers.  My mistake, but seeing as these cookies were amazing, I'm going to keep it at 3 oz going forward)

Flaky sea salt for sprinkling, if desired (I'm sure this would be AMAZING, but seeing as I was freezing my cookies to give away at a later visit, I didn't know if the salt on top would affect it, so I skipped this step)

Directions:

Adjust oven rack to middle of the oven.

Preheat oven to 400F.

Line two sheet pans with parchment paper.


In a medium bowl, whisk together the flour, cocoa powder, baking powder, and baking soda.

Set aside.


Cream butter in a stand mixer with the paddle attachment.

Beat on medium until creamy, about 1 minute.

Add in sugars and salt.

Beat on medium speed until light and fluffy, about 2-3 minutes.

Scrape down the sides of the bowl.

Add in egg, egg yolk, and vanilla.

Continue beating until smooth.

Add in dry ingredients, and beat on low until just combined.

Add in chopped chocolates and mix on low.

Use a rubber spatula to give the dough one last mix.


Form the dough into balls, about 2 Tbsp each.

Place 8 cookies on each sheet pan.

Sprinkle with flaky salt, if using.


Bake one pan at a time, rotating halfway through (oops, forgot to rotate....).

Bake the cookies until the tops are golden brown (I couldn't tell if they were golden or not, since the cookies were so dark) and the cookies are slightly puffed and starting to crinkle, 9-11 minutes (mine were perfect after 9 min).

Remove the baking sheet from the oven.

Use the back of a spatula to gently press the top of each cookie to flatten it.

Let the cookies rest on the sheet pan for 5 minutes, then transfer to wire rack to finish cooling.


* According to the author, the cookies are best slightly warm but can be stored at room temp for up to 3 days, and will get softer the longer they sit.

* Dough can be put in the fridge or frozen after being rolled into balls.  Take them out of the fridge when the oven preheats, or if baking from frozen they may require an extra minute of baking time.

* I decided to try freezing the cookies fresh out of the oven (after they cooled) to see if they could be baked ahead before gifting.

Saturday, December 18, 2021

Ginger molasses cookies

Ok, first off the bat, let me tell you how good these cookies are!  Then, I'll get to the rest of the info.  These cookies are the perfect amount of ginger and crisp edges/chewy centers and sugary coating!  I'm not going to lie, I ate 3 of them straight out of the oven last night when I was baking them.  They're that good!


These cookies come from the genius Sarah Kieffer of the Vanilla Bean Blog.  I want to say I came across her years ago through an article (I think in the New York Times) about her "pan banging method" for chocolate chip cookies (I  made them, they're worth the hype, and if I haven't posted that yet, I'll be sure to back track and get that up soon), and later again through an email with a link to her Neapolitan cookies.  I also own her cookbook, 100 cookies.  She's a baking genius, if you want my unbiased opinion, and I'm sure you'll be seeing a lot of her recipes in the future here on JulieBakes.

These cookies also involve her "pan banging" technique, which gives the cookies a crispy edge and a chewy center.  They're probably not the best cookie to bake at 9:30 p.m. in a 2 bedroom apartment with a sleeping 5.5 month old, 2.5 year old, and guest on the couch -- oops! -- but at least the guest got some of these cookies fresh out of the oven when she woke from her nap.


I plan to include these in my yearly box of cookies for the holidays for our doormen*.  It's been a trying year, for sure, and they've been fielding the majority of my "I can buy it on Amazon" mentality of the pandemic (* yes, they're also getting a monetary tip, I just think cookies plus a tip is just a nice way to do things).

Pan-Banging Ginger Molasses Cookies

By Sarah Kieffer, Vanilla Bean Blog

* The holiday version calls for a glaze.  Truth be told, I haven't tried the glaze, because the cookies are so damn good on their own they don't need anything more, but if you want yours to look festive or you'd like glaze, click on the link above for directions and ingredients.

Ingredients:

1 3/4 cups all purpose flour

1/2 tsp baking soda

1/2 tsp + 1/8 tsp salt

2 tsp ground ginger

3/4 tsp ground cinnamon

Pinch of cloves (I leave this out, as I don't like cloves)

12 Tbsp unsalted butter, at room temperature

1 1/2 cup granulated sugar, plus more for rolling

2 Tbsp mild molasses

1 egg

1 tsp pure vanilla extract


Directions:

Adjust an oven rack to middle position

Preheat oven to 350F

Line 3 baking sheets with parchment paper.


In a small bowl, whisk the flour, baking soda, salt, ginger, cinnamon, and cloves (if using).


In the bowl of a stand mixer fitted with the paddle attachment, beat the butter on medium until creamy.

Add the sugar and beat until light and fluffy, 2-3 minutes.

Add in the molasses, egg, and vanilla.

Mix on low to combine.

Add the flour mixture and mix on low until combined.

Remove bowl from mixer.

Using a spatula, make sure that the molasses is completely combined into the dough and that it is a uniform color.


Form the dough into 2 ounce balls.

Roll balls into granulated sugar to coat.

Put 4 balls of dough on prepared baking tray.


Place the baking sheet in the oven and bake for 8 minutes, until the cookies are puffed slightly in the center.

Lift the side of the baking sheet up about 4 inches and gently let it drop down against the oven rack (so that the edges of the cookies set and the inside falls back down).

After the cookies puff up again in about 2 minutes, repeat lifting and dropping the pan.  

Repeat 3-4 more times to create ridges around the edge of the cookie.

Bake 13-16 minutes TOTAL, until the cookies have spread out and the edges are golden brown but the centers are might  lighter and not fully cooked.

Transfer the baking sheet to a wire rack.

Let cool completely before removing cookies from the pan

Saturday, December 9, 2017

Whipped shortbread cookies

For the holiday pajama party that B and I went to this weekend, the theme of the drink-making contest was "night cap."  B and I decided on a White Russian.  One of our favorite bars in our neighborhood -- which we haven't been to in quite some time --  serves their heavenly White Russian with a cookie on the side.  I thought it was a biscotti, but B reminded me that it was more of a shortbread cookie (he was, in fact right).


So with all of the ingredients for our cocktail packed away to bring out to Long Island, I set about trying to find the perfect shortbread cookie recipe.  I literally had to look no further than Instagram to find a recipe posted this morning!  The recipe was for whipped shortbread cookies, which sounded delicious to me.  And seeing as I had the forethought to take some butter out of the fridge before we left to run errands this morning, I was ready to go when I got home.

It also happened to be that today was the first snow in NYC.  There's nothing that I love more than baking on a snowy day, with the warmth of the oven keeping the apartment toasty, and having cookies to sample warm out of the oven.


This dough is meant to be piped out onto the baking sheet with a piping tip and bag.  You can use a variety of tips.  Since I had the intent of serving these cookies on the side of our drink tonight, I used an Ateco 898 tip, which some people use to ice cakes.  I used the ridged side up for a little detail.  I think they came out adorable, and that they'd be perfect to rest on the top of the glass for a classy presentation!

P.S. I halved the recipe and I got over 5 dozen cookies

Whipped Shortbread Cookies
Recipe from SprinkleBakes

Makes 6 dozen cookies

Ingredients:

3 cups (6 sticks) unsalted butter, at room temperature
1 1/2 cups confectioners' sugar
4 1/2 cups all purpose flour
1 tsp salt
1 vanilla bean, seeds scraped (or you can substitute 2 tsp vanilla extract)

Optional decorations:
Assorted holiday sprinkles and candies
4 oz semisweet or dark chocolate, melted

Directions:

Combine butter and confectioners' sugar in the bowl of a stand mixer fitted with the whisk attachment.
Mix on high speed until mixture turns pale, about 2 minutes.

Add flour to butter mixture in 3 additions, mixing well on medium speed after each addition.
When flour is incorporated, add salt and vanilla seeds.
Beat on high speed for 5 minutes -- the dough should be pale and thick.
Transfer dough to piping bags fitted with decorating tips.  You can also used a small cookie scoop.

Line two or more cookie sheets with parchment paper.
Pipe or place mounds of cookie dough on prepared pans, spacing then a least 1 inch apart.
Add sprinkles, if using.
Transfer cookies on baking sheets to refrigerator to chill for 10 minutes or until cookies are firm to touch.

While the cookies are chilling, preheat the oven to 275F.
Bake cookies 30-35 minutes, or until cookies are lightly golden around the edges and still pale in the center.  Since I piped my cookies thinner than the cookies on the original blog post, I started watching my cookies after 20 minutes.  They ended up taking 21-22 minutes to achieve desired doneness.
Transfer cookies to a wire rack to cool completely.
Drizzle with chocolate if using.
Store cooled cookies in an airtight container.

Thursday, November 9, 2017

Mini pumpkin spice crumb muffins

I've been looking forward to this weekend for a few weeks, since my friend and I are hosting a baby shower for another friend of ours!  There were a thousand things I wanted to bake, but only a day or two to get things done (work schedule is packed and I work super long days three days a week now).  These muffins definitely made the list, though!


Now I've said it before and I'll (have to) say it again: I hate pumpkin spice.  Like ugh, gross, despise it.  But almost everyone else loves it, including the mom-to-be, who told me she was "bad" when she got a pumpkin spice latte (caffeine is OK when pregnant, so I'm not sure why she thinks she was "bad," but I digress....).  So when hosting a baby shower for 13 women, including at least one who has confirmed her love for pumpkin spice, these muffins were a given!  Plus, they have the most heavenly looking crumb topping.  [I debated making these pumpkin spice latte cupcakes, but wanted something more breakfast/brunch-y.  And again, remember, crumbs!]


I ended up making mini muffins, since they were being served before lunch.  I halved the recipe since I didn't want to have an insane amount of muffins, and as it was I got 27 mini muffins with a half recipe.  I didn't, however, half the crumb topping since I figured mini muffins = more surface area, and I'd probably need extra crumbs.  As it ended up, I had leftover crumb topping, but that's fine.  Better to have too much than not enough!


* Full disclosure, it took me a long time to post this blog post, despite having written it and staging the photos at the time I baked them.  When I went to put the final edits on the post and add the recipe, the original link I had was defunct.  When I searched the blog again, I came across this recipe, which from my recollection is the same * 

Pumpkin Crumb Cake Muffins

Ingredients:

For the muffins:

1 3/4 cups all purpose flour (spooned and leveled)
1 tsp baking soda
2 tsp ground cinnamon
1 tsp pumpkin pie spice
1/2 tsp salt
1/2 cup canola or vegetable oil
1/2 cup granulated sugar
1/2 cup packed light or dark brown sugar
1 1/2 cups canned pumpkin puree
2 large eggs, at room temperature
1/4 cup milk, at room temperature

For the crumb topping:

3/4 cup all purpose flour (spooned and leveled)
1/4 cup granulated sugar
1/4 cup packed light or dark brown sugar
1 tsp pumpkin pie spice
6 Tbsp unsalted butter, melted

For the (optional) maple icing:

1 1/2 cups confectioners' sugar
2 Tbsp pure maple syrup
2 Tbsp milk

Directions:

Preheat oven to 425F.
Spray a 2 x 12 count muffin pan with nonstick spray or line with cupcake liners.  This recipe makes 15 full sized muffins, so you'll need a second pan. (I made mini muffins, and used a 24-cavity mini muffin pan, but chose to use liners instead of spraying it; I halved the recipe and got 27 mini muffins, so you'd need do to this for at least 2 muffin pans).

Prepare the muffins.
In a large bowl, whisk the flour, baking soda, cinnamon, pumpkin pie spice, and salt together until combined.
Set aside.
In a medium bowl, whisk the oil, granulated sugar, brown sugar, pumpkin puree, eggs, and milk together until combined.
Pour the wet ingredients into the dry.
Fold everything together gentlyy, just until combined and no flour pockets remain.

Spoon batter into liners, until almost full.

Make the crumb topping.
Whisk together the flour, granulated sugar, brown sugar, and pumpkin pie spice until combined.
Using a fork, lightly mix in the melted butter until crumbs form.
Do not over mix.

Spoon crumbs evenly on top of the batter and gently press them down into the batter.

Bake for 5 minutes at 425, then while the muffins are still in the oven, reduce the temperature to 350F.
Bake for an additional 16-17 minutes or until a toothpick inserted in the center comes out clean.
For my mini muffins, I baked at 425 for 5 minutes, then lowered the heat to 350F and baked for 8 more minutes.  The newer version of this recipe says to bake mini muffins for 11-13 minutes at 350F the entire time.

Allow the muffins to cool in the pan for 10 minutes as you make the icing.

To make the icing, whisk the milk, maple syrup, and confectioners' sugar together until combined and smooth.  
Drizzle over muffins and serve warm.

*These can be stored at room temp for 1-2 days, in the fridge for up to a week, and can be frozen (with or without the icing, though I generally recommend freezing without icing and icing them once they've thawed).

Thursday, September 14, 2017

Almond, tahini, and honey cookies

The fall is upon us, and while the fall may be synonymous with everything pumpkin spice for most, to me it means that the Jewish holidays are coming.  Rosh Hashanah (the Jewish new year) starts on Wednesday, September 20th this year, and so I've started in on my holiday baking today.


First up were these almond, tehini, and honey cookies.  Honey is used in a lot of Rosh Hasahanah treats since it symbolizes a sweet new year.  Apples and honey, to be exact.  And while these cookies lack apples, they're full of sweet honey.  Another thing they're missing?  Gluten (so if you're looking for a gluten-free recipe on this blog, this may just be the first one -- or at least the first one labeled gluten-free). 


This dough comes together in literally a manner of seconds.  Whisk together the dry ingredients in own bowl, the wet in another.  Then, add the dry to the wet and mix together -- I did this with a whisk and some upper arm strength (thanks to my barre workout this morning).  Seriously, it took seconds!  They also bake up in no time!

Honey Almond Tahini Cookies
By The Gush Gourmet
Makes about 28 cookies

1.5 cups almond flour (finely ground almonds)
1/2 tsp baking soda
1/2 tsp salt
1/2 tsp cinnamon
2 Tbsp tapioca starch OR 1 Tbsp corn starch (I used corn starch)
1/2 cup well-mixed tahini
1/2 cup honey
1 tsp vanilla
1 egg
1/3 cup sliced almonds (The recipe called for slivered almonds but I think she actually meant sliced almonds, but I bought slivered.  I actually went out and bought sliced almonds since I thought they looked pretty on her cookies.  Go with sliced almonds.)

Directions:

Whisk together the almond flour, baking soda, salt, cinnamon, and starch in a bowl.

In a separate bowl, mix together the wet ingredients: tahini, honey, egg, and vanilla.
Add the dry ingredients to the wet and mix well.  I added mine in 3 additions.

Place in the fridge for a few hours or overnight.

Preheat the oven to 350F.

Place small scoops of the cookie dough on a parchment lined baking sheet.
Make sure there is plenty of space between each one (they spread a lot!).
Sprinkle a little bit of sliced almonds over each cookie, pressing down slightly so they adhere.  Don't be shy with the sliced almonds -- since the cookies spread, they too will spread out as the cookies bake.

Bake for 8-10 minutes until lightly golden brown.
Remove from the oven.
Cool completely before removing from the baking sheet.

Fruity rum bundt cake

I saw this recipe for this fruity rum cake almost a year ago.  I had wanted to make it for New Year's Eve last year, but with my work schedule and the fact that bundt cakes take a long time to bake, well, let's just say it wasn't in the cards.  I thought about it on and off since then, but never had an occasion to make it.  Until now.


Rosh Hashanah is upon us.  The season of apples and honey and all things sweet for a sweet New Year.  But wait?!  There aren't apples or honey in this cake!  Blasphemy!


I decided that golden raisins and dried apricots and dried (ok, these are tart) cherries are definitely sweet, and therefore totally appropriate for Rosh Hashanah!  The only adjustment I made to this recipe is that I used 1/2 tsp cinnamon instead of cloves, because I utterly hate them.  Since cloves are, in my opinion, stronger than cinnamon, I used a little more.  And I have to say, the flavor of this cake was Ah-maz-ing!  B and I were devouring the cupcakes I made with the extra batter!


When I served it at the holiday meal, it was met with a resounding round of approval.  My father, who doesn't like rum, said the cake flavor was great and there was just a hint of rum that was delicious.  My grandmother, who is (rightfully so) a critic of baked goods, said it was delicious, and even took home a piece to enjoy the following day!!!  This cake is a total winner!

Fruity Rum Bundt Cake
From Bon Appetit

This cake calls for a 12 cup bundt pan.  If you have a 10 cup bundt cake pan (like I do), the recipe recommends reserving 2 cups of batter and baking into 8 cupcakes.

Ingredients:

1/2 cup chopped dried apricots
1/2 cup dried tart cherries
1/2 cup golden raisins
1/2 cup plus 2 Tbsp gold rum, divided
3 Tbsp plus 3 cups all purpose flour, plus more for pan
1 cup (2 sticks) unsalted butter, room temperature, plus more for pan
5 tsp baking powder
1.5 tsp Kosher salt
1/4 tsp ground cloves -- I used 1/2 tsp ground cinnamon instead
2 Tbsp vegetable oil (believe it or not, they did not have vegetable oil at my Whole Foods.  I used Canola oil)
1 1/4 cups plus 2 Tbsp (or more) sour cream -- I ran out of sour cream and ended up using 1 cup sour cream plus 1/4 cup applesauce....by the time I iced the cake, I was able to pick up more sour cream for the icing
2 cups raw sugar, plus more for serving
1 vanilla bean, split lengthwise
7 large egg yolks
1 large egg
1 cup powdered sugar
Gold sugar, for a festive touch

Directions:

Combine apricots, cherries, raisins, and 1/2 cup rum in a small bowl.
Let sit for 30 minutes to allow fruit to rehydrate.
Drain, reserving the rum.
Sprinkle the fruit with 3 Tbsp flour and toss to coat.
Set aside.

Preheat oven to 350 degrees.
Thoroughly butter the pan (don't skimp!), making sure to get into all the curves and grooves of your pan.
Dust with flour (do this even if your plan has a nonstick coating).
Whisk together the baking powder, salt, cloves (or in my case cinnamon), and 3 cups of flour in a medium bowl to combine.
Whisk reserved rum, oil, and 1 1/4 cups sour cream (in my case sour cream + applesauce) in another medium bowl to combine.

Using an electric mixer (I used my kitchenaid), beat 2 cups of raw sugar and 1 cup of butter in a large bowl until light and fluffy, about 4 minutes.
Scrape in seeds of vanilla bean (reserve pod for another use.....vanilla sugar, anyone?!).
Add yolks and egg, 1 at a time, beating to blend after each addition.
Beat until mixture is light and very fluffy, about 4 minutes.
Reduce speed to low.
Add dry ingredients in 3 additions, alternating with sour cream mixture in 2 additions, starting and ending with dry ingredients.
Fold in reserved dried fruit.

Scrape batter into prepared pan.
Smooth top of cake.
Tap pan firmly a few times on the counter to force batter into the edges of the pan.

Bake cake until golden brown and a tested inserted into the cake comes out clean, 60-70 minutes.
Transfer pan to a wire rack.
Let cake cool in pan for 15 minutes.
Invert cake onto a serving plate and carefully remove the pan.
Brush the warm cake with the remaining 2 Tbsp of rum.
Let cool completely, about 3 hours.

(I froze my cake, since I was serving it a few days later.  I recommend freezing the cake wrapped in saran wrap and tin foil, uniced.  Thaw cake before serving and ice cake.)

Mix powdered sugar and remaining 2 tbsp sour cream in another small bowl.
Thin with more sour cream if desired, until smooth.
Drizzle glaze over cake, working along the center of the top of the cake for even coverage,
Sprinkle with raw and gold sugar.
Let sit 10 minutes for glaze to set before slicing with a serrated knife.

Saturday, September 2, 2017

Yellow cupcakes

It's not every day that I get an American holiday off from work.  A day off where others have the day off, and make BBQs and have pool parties and general day-off fun shenanigans.  Sometimes I make it to the tail end of the festivities after my day of work.  But no, not this year!  This year the stars aligned, and not only did I get Labor Day off, I even got invited to B's friend's home and had a BBQ.


So what to do I do when I'm invited somewhere (just about anywhere?!)?  I bake.  And bake I did.  And it was exceptionally momentous because I christened my new Kitchen-Aid!!  It was sitting on the kitchen counter so lonely for over three months, since we got married, just begging to be used.  And today was it's lucky day!


I bought some super cute red, white, and blue star sprinkles for whatever treat I baked for our Labor Day BBQ, and I ultimately decided on cupcakes because, well, cupcakes are fun BBQ food, and I also haven't baked cupcakes in what seems like forever!  I was going to use my go-to yellow cake cupcake recipe but I couldn't, for the life of me, find my cake flour.  So I set off onto the internet to find a yellow cake recipe that didn't use cake flour.  I found it in the form of Brown Eyed Baker's yellow cake, which I turned into cupcakes.

One thing I'll say about these cupcakes is that they rise a lot, so filling them 2/3 of the way like I did with my first batch yielded cupcakes that overflowed a bit.  I filled them about 1/2 way for the second batch, and they didn't overflow.  I recommend filling them halfway -- with my first 18 cupcakes being filled 2/3 of the way and the rest being filled 1/2 way, I got 28 cupcakes.  My guess is you'll get closer to 33 to 3 dozen if you filled them all 1/2 way.

Yellow Cake Cupcakes
Recipe from Brown Eyed Baker, cupcake directions by me

Ingredients:

2 1/4 cups all-purpose flour
2 teaspoon baking powder
1 teaspoon baking soda
1 teaspoon salt
1/2 cup unsalted butter, at room temperature
1 1/2 cups granulated sugar
3 large eggs, at room temperature
1 teaspoon vanilla extract
1 1/4 cup buttermilk

Directions:

Preheat the oven to 350F.
Line cupcake tin with cupcake liners.
Set aside

In a medium bowl, whisk together the flour, baking powder, baking soda, and salt.
Set aside.

Using an electric mixer or stand mixer, cream together butter and sugar until light and fluffy, about 3 to 5 minutes.
Scrape down the sides of the bowl.
Beat in eggs, 1 at a time, beating for 1 minute between each addition.
Beat in vanilla extract.

Add the dry ingredients all at once.
Beat on low speed until just combined.
Add the buttermilk and beat on low for 1 minute.
Increase speed to medium and beat for 3 additional minutes.

Divide the batter evenly between prepared pans.  I recommend filling them halfway....more than that and mine overflowed.  You may need to bake them in two batches.
If filled 1/2 way, as recommended, bake for 16-18 minutes, or until a skewer inserted into the center of the came comes out with just a few moist crumbs attached.
Remove from the oven and cool for 10 minutes in the pans.
Remove, and place on wire racks.

Cool completely before icing.

Use the icing of your choice.  I went with this vanilla icing.  

Pipe icing onto cupcakes.
Top with sprinkles of your choice, if desired.

Sunday, November 20, 2016

Pumpkin spice candied nuts

At my grandfather's 90th birthday (!!) celebration last night, my aunt (who hosts Thanksgiving) asked me if I was baking anything for Thanksgiving.  Of course, the answer was yes!  I asked her what she wants, and I heard the most beautiful words ever: "you have free reign."  As in I can bake whatever I want!  And what's even more, my cousin (whom I love dearly, and we will all miss at Thanksgiving dinner) with the nut allergy won't be there, I can really bake anything!


Like these nuts.

OK, OK, they don't technically fall under "baking," however they do go in the oven, so they are technically baked.

I had been toying with the idea of making some pumpkin spice candied nuts for a while.  But as you probably know, I'm not a huge fan of pumpkin spice.  And when I came home and got ready to bake them, the pumpkin spice mix I thought I had at home was nowhere to be seen.  So with that little snafu (combined with the fact that my Trader Joe's was out of pumpkin spice, too!) as my disdain for pumpkin spice flavors, I made these candied nuts with a combination of spices found in pumpkin spice, but not all of them.  Which is fine for me, since the missing spices are actually the spices I don't like in pumpkin spice flavored foods and drinks.

I chose to package these nuts in a clear cube box (meant for cupcakes).  With a nice bow and cute hanging tag, they'd be a perfect holiday hostess gift...or gift for the pumpkin spice lover in your life!

Pumpkin Spice Candied Nuts
Adapted from these candied cinnamon sugar nuts

Ingredients:

6 cups of nuts (I used mixed nuts.  I wanted to make sure to have some pecans in it, since I think pumpkin pie and pecan pie are synonymous with Thanksgiving.  After devouring half the recipe, B and I decided that the pecans were the best part.  No one would fault you if you went ALL pecans or half pecans and half other nuts.)
2 egg whites
2 Tbsp water
2 cups granulated sugar
2 1/2 teaspoons ground cinnamon
1/2 tsp ground ginger
1/2 tsp ground nutmeg
2 tsp salt

Optional (if you want to really make them "pumpkin spice"-y):

pinch of ground allspice
pinch of ground cloves

Directions:

Preheat the oven to 300F.
Line two large baking sheets with parchment paper or a silicon baking mat.
Spray with non-stick spray (if using parchment paper).
Set aside.

Mix nuts in a large bowl.
Set aside.

Using an electric mixer, beat egg whites and water on medium-high speed until still peaks form, about 4-5 minutes.
Add the sugar, cinnamon, nutmeg, ginger, and salt.
Stir until well combined.

Pour sugar mixture over nuts.
Stir to coat completely.
Spread nuts over the baking sheets.
Bake for 45 minutes, stirring every 15 minutes.

Allow to cool completely.
Enjoy.

Store nuts at room temperature, covered.

Wednesday, October 12, 2016

Brownies with milk chocolate chips

I have a favorite brownie recipe.  I found it online.  It's super easy to make and the result is a super fudgy brownie (in my opinion, fudgy brownies are far superior to cakey brownies).  I make them pretty often.


I've also made variations of this brownie. My go-to is to use Dutch process cocoa powder, but it's hard to come by sometimes.  I usually buy it and save it up, so that I always have some on hand for these particular brownie-craving times.  Then I made a coffee/espresso version.  I'm pretty sure there's a peanut butter version floating around out there, too.  Recently I made them for B and his coworkers, but instead of my go-to, I used special dark cocoa powder.  Those were midnight dark and super fudgy (and will be up soon...I know, I know, I'm a little out of order wit my posts)!  

And then for Yom Kippur breakfast, I decided to make some more brownies. A lack of Dutch press cocoa powder and a now-empty container of dark cocoa powder (and none on the shelves when I went to the store) in the kitchen, I turned to boring old regular cocoa powder. I mixed it up a bit with the chips (mostly because I'm a fool and forgot to buy them for this recipe), using 1 cup of mini semisweet chocolate chips and 1 cup of milk chocolate chips.  

Despite what I can only call their pale color (the other two versions yield a way darker brownie), their flavor was still spot on!  Feel free to mix up the combination of chips -- who knows...maybe there will be an all-milk chocolate version up one of these days...

Brownies with Milk Chocolate Chips
Original recipe from Yammie's Noshery

Ingredients:

2 sticks of butter
2 1/4 cups of sugar
4 large eggs
1 Tbsp vanilla
1 1/4 cups of regular cocoa powder
1/2 teaspoon salt
1 teaspoon baking powder
1 1/2 cups of flour
2 cups chocolate chips (for these, I used 1 cup of milk chocolate chips and 1 cup of mini semisweet chocolate chips)

Directions:

Grease a 9 x 13 inch pan.  I lined mine with parchment paper and then sprayed it with Pam.
Preheat the oven to 350 degrees.

Mix together the butter and sugar in a microwave safe bowl.
Heat in the microwave, stirring about every 30 seconds, until the mixture is bubbly and smooth (mine was smooth, but not so bubbly).  You can also do this on the stove.

Add in the eggs and vanilla and beat until smooth.
Mix together the cocoa powder, salt, baking powder, and flour.  I just sifted it into the butter mixture, in about 3 additions.
Add to the butter mixture, mixing until smooth.
Stir in the chocolate chips.

Pour the batter into the prepared pan.
Bake for about 28 minutes.

Saturday, October 1, 2016

Fresh apple cake with honey glaze

Every Rosh Hashana, I debate for a second or two about making a non-apple dessert.  But, alas, I always end up with an apple centered dessert.  Four years ago I made an apple pizza, something I remember distinctly, since it was right after B and I met. But I digress...


This apple cake appealed to me for two reasons.  First off, it has a honey glaze.  Honey.  The other big sweet food for Rosh Hashana.  Apples and honey are used to symbolize the beginning of a sweet new year (choruses of the kids Rosh Hashana song are ringing in my head now...."dip the apples in the honey...have a happy sweet new year"). Secondly, it's a bundt cake.  Bundt cakes are, in my opinion, way easier to transport than a beautiful layer cake. And considering that my apple cake is going from downtown Manhattan to Brooklyn (via a 2.5 mile walk) and then back up to midtown Manhattan, before a train ride to Westchester, I figured a dessert that was less likely to be demolished en route was a nice option. 

The one change I made to the cake was that I cut the oil down and replaced it with some apple sauce.  Given the fact that we'll be eating a super huge meal (my mom's brisket....OMG I'm drooling just thinking about it!), plus the added apple flavor from the apple sauce, I thought that it would be a nice addition!

Paula Deen's Uncle Bob's Fresh Apple Cake
From Food Newtork

Ingredients:

For the Honey Glaze:

1 cup confectioner's sugar
2 Tbsp honey
2 Tbsp milk

For the Apple Cake:

3 cups diced peeled Granny Smith apples, about 2 apples (I needed 2.5 apples)
1 cup lightly toasted chopped walnuts
2 tsp vanilla extract
2 tsp ground cinnamon
3 cups all purpose flour
1 tsp baking soda
1 tsp salt
2 cups sugar
1 1/4 cups vegetable oil (I used 3/4 cups apple sauce and 1/2 cup canola oil)
3 eggs

Directions:

Make the glaze:

Add all the glaze ingredients to a small bowl and stir until smooth.
Set the bowl aside.

Make the cake:

Preheat the oven to 325F.
Lightly grease a bundt or tube pan.  I debated flouring it afterwards but decided against it since the recipe didn't say.  My cake got stuck when I tried taking it out and actually broke.  So I instantly regretted not flouring the pan.  I recommend you do so.

Toast the walnuts.
Let cool.

In a bowl, mix together the apples, walnuts, vanilla, and cinnamon.
In a separate bowl, sift together the flour, baking soda, and salt.

Using an electric mixer, beat together the sugar, oil, apple sauce, and eggs in a large bowl.
Add in the dry ingredients.
Beat until completely combined.
Fold in the apple mixture.

Scrape the batter into the prepared pan.
Bake for 1 hour and 30 minutes or until a tester inserted into the middle of the cake comes out clean.  Mine was done after about 1 hour and 15 minutes.  I'd say start watching after an hour.

Allow the cake to fully cool in the pan, about 1 hour.
Turn the cake out onto a plate.

Drizzle the cake with some honey glaze before serving.

The cake can be wrapped tightly and stored in the fridge for 3-5 days.

Friday, September 9, 2016

Nonpareils

I had the day off.  The usual activities for me on my day off are an early morning (OK, 9 a.m., but still, it's my day off....) barre class followed by errands and a walk, and then some baking.  Today I made some hand-piped milk chocolate nonpareils.  Because, really, why not?  I was just playing around in the kitchen, so I don't have exact measurements for you, but I do promise the next time I make them, I'll be sure to give measurements.  I promise!


The thing I like about these is that you can make them in different sizes; large, small, mini (like the ones I made).  And also different colors!  How cute would pale pink and white be for a baby shower for a little girl?  Orange, black, and yellow for Halloween?  Pink, red, and white for Valentine's Day?  Green and gold for St. Patty's Day?  The list could go on....and on....and on!  Or, you could play around with the chocolates you use.  I went with milk this time.  White and dark would also be tasty.  Or what about a trio?  I'm thinking those would be super cute favors for said baby shower...Or even different colored "chocolates."


Rainbow Nonpareils

Ingredients:

Chocolate, either chocolate chips or wafers such as Mercken's or Wilton Candy Melts
Rainbow nonpareil sprinkles.

Directions:

Line an 8x8" or 9x9" pan with wax paper.
Put a thin layer of nonpareils on the bottom of the pan.

Melt the chocolate in the microwave in 30 second intervals, stirring between each.
Make sure not to burn the chocolate.
Let the chocolate cool a little so it is not HOT to the touch.

Spoon the chocolate into a piping bag.
Cut a small hole at the opening.

Moving quickly but carefully -- be careful not to hit the pan and move the nonpareils -- pipe little (or larger, your call) dots of chocolate onto the sprinkles, leaving a small space between them.  I made them about the size of chocolate chips.

When the entire layer of nonpareils is covered with chocolate dots, carefully place it into the fridge.
Let the chocolate harden.

In the mean time, remove all the chocolate from the piping bag and place it bag into the bowl.

Once the candies are hard, remove them from the sprinkles and place into a ziplock bag or airtight plastic container.
Redistribute the sprinkles into a thin layer.
Melt the chocolate again.

Repeat the steps above until all the chocolate is used up.
Add more sprinkles as needed.

Tuesday, April 26, 2016

Flourless blueberry almond muffins (Kosher for Passover)

Passover is here!  While some people I know (whose names will not be mentioned, but they know who they are) lament over the lack of food options during Passover.  Some might even say they *whine* about it.  But I digress.  Bottom line is: food options are limited.  However, one can at least attempt to make lemons out of lemonade, as I have tried.


First off, in a #juliebakesgoessavory endeavor, I made almond crusted chicken fingers for dinner the other night (check it out on my instagram feed).  Then I saw a recipe for Kosher for Passover Almond-Bluberry Muffins, and thought that (a) they sounded delicious, (b) B would love them, and (c) I already had almond meal on hand from the chicken fingers!


I made a few adjustments given what I had at home (Turbinado sugar instead of demerara, sweetened (cinnamon) applesauce instead of unsweetened, and slivered almonds instead of sliced), but they turned out absolutely delicious.  Just a heads up -- I followed the directions and ended up filling the 12 muffin tins and still had enough leftover batter to make 4 more muffins!

And an added bonus?  They're totally gluten-free (or at least can be made that way).  I don't do much gluten-free baking, but between the almond meal and coconut flour I picked up recently, I'm sure I could get int it a little more...

Hope everyone has a wonderful Passover!

Flourless Almond-Blueberry Muffins
(Kosher for Passover, and can be made gluten-free!)
From Epicurious

Ingredients:

2.5 cups almond meal
1 tsp ground cinnamon
5 large eggs, separated
1/3 cup granulated sugar
1 tsp vanilla extract
1/2 cup unsweetened apple sauce
1/2 tsp kosher salt (crushed between your fingers as you add it)
1/2 pint (about 1 1/3 cups)
Sliced almonds (for sprinkling)
Demerara or raw sugar (for sprinkling)

Directions:

Preheat the oven to 350F.
Line a standard 12-cup muffin pan with paper liners (keep a few extra liners around, in case you have extra batter).
Whisk almond meal and cinnamon in a medium bowl.
Set aside.

Using an electric mixer on high speed, beat egg yolks, granulated sugar, and vanilla in a large bowl until pale and doubled in size, about 3 minutes.
Add almond meal mixture and apple sauce.
Stir just to combine.

In another bowl: use an electric mixer on high speed to beat the egg whites and salt (crushing it between your fingers as you add it to the egg whites) until stiff peaks form, about 3 minutes.
Add half of the egg white mixture to the almond meal mixture.
Fold to combine.
Then add remaining egg white mixture.
Fold to combine.
Gently fold in blueberries.

Divide the batter among muffin cups (I filled mine full and then had enough batter to make 4 more muffins).
Top with almonds and demerara sugar.

Bake muffins until tops are golden brown and a tester inserted into the center comes out clean, about 30 minutes (mine took 25 minutes).
Transfer to a wire rack.
Let cool in pan for at least 10 minutes before serving.

*They can be made 3 days ahead.

Friday, December 18, 2015

Gingerbread marshmallows

After making that batch of fluffy peppermint swirl marshmallows the other day, I set out to make another festive holiday-flavored marshmallows.  But what flavor?  Thoughts of egg nog danced in my head (I must've seen them online somewhere), and cinnamon is always tasty, too, but then poof! as if a baking lightening bolt hit me, I thought Gingerbread!  And thus, that's what I made.


I doctored up two recipes and came up with my own.  These are super gingery spiced, but I think in the future I may try to get some molasses into the marshmallows, to give it that real authentic gingerbread flavor.  Not that there's anything wrong with these -- they have a pop of ginger, cinnamon, and nutmeg (I left out cloves.  I hate cloves.  But I put them in the recipe below because if you love cloves, or want that real gingerbread flavor, I most definitely won't hold it against you!).


I keep getting the fluffiest marshmallows with this (base) recipe, and end up cutting them into squares that are over 2" cubes, so when it came to these gingerbread marshmallows, and the fact that I wanted to cut them with a cookie cutter (shaped marshmallows -- could I get any cuter?!), I ended up using a larger pan to get flatter marshmallows -- and they were STILL fluffy.  But the final product is so cute!


Gingerbread Marshmallows
adapted from this recipe, and my go-to marshmallow recipe

For the Marshmallows:

1 cup water, divided
3 Tbsp + 1 1/2 tsp unflavored powdered gelatin (3 x 1/4 oz envelopes)
2 cups granulated white sugar
1/2 cup dark corn syrup
1/2 tsp fine salt
2 tsp pure vanilla extract
1/2 tsp ground cinnamon
1/2 tsp ground ginger
1/2 tsp freshly grated nutmeg (in a pinch, pre-ground works, which is what I used)
pinch of cloves (I left these out, but for the real gingerbread flavor, I'd use them)

For the coating:

3/4 cup powdered sugar
1/2 cup corn starch

Directions:

Spray a 9 x 13 inch baking pan, and line the bottom with parchment paper.
In a stand mixer fitted with a whisk attachment, pour in 1/2 cup of water and sprinkle the gelatin on top.
Let stand.

In a medium sauce pain over high heat, stir together the sugar, corn syrup, salt, and remaining 1/2 cup of water.
Stir until sugar dissolves and mixture begins to boil.
Stop stirring once the mixture comes to a rolling boil.
Continue boiling for 1 minute.

Remove from the heat.
CAREFULLY pour the hot mixture into a 2-cup glass measuring cup.

Turn the mixer to low and mix he gelatin a bit to loosen it.
Very slowly and carefully add the hot sugar mixture by pouring it gently down the side of the bowl.
Continue to mix on low until all the sugar mixture is added.

Turn the mixture to high and whip the mixture for 2 minutes.
Then, add the dry spices.
Continue whipping until almost tripled in size, about 8-10 more minutes.
If you have a smaller mixer bowl, you may need to scrape down the sides of the bowl frequently to avoid the batter from overflowing as it grown.
Stop the mixer, add the vanilla, and then whip briefly to combine.

Transfer the mixture to the prepared baking pan.
Use a spatula or bench scraper to spread the marshmallow evenly into the pan, pushing it down into the corners.
Work quickly, as the marshmallow becomes more difficult to manipulate as it begins to set.

Spray a sheet of plastic wrap liberally with cooking spray and lay it across the top of the marshmallow, spayed side down.
Using your fingers, smooth the plastic wrap on top of the marshmallows a bit to seal it smoothly and tightly against the mixture.

Leave the marshmallow to set at room temperature for at least 3 hours or, even better, overnight.
The marshmallow will be too sticky and soft to cut if you try too soon.

When ready to cut the marshmallows, mix the coating ingredients in a bowl.

When the marshmallows are ready, grab the edges of the parchment and life the marshmallow from the pan.

Remove the plastic wrap from the top.
Take a small handful of coating mixture and spread over the top of the marshmallow slab.
Using a pizza cutter or large knife, cut the slab into 1 x 1 inch squares, or use a small cookie cutter.
Roll each cut marshmallow into the coating mixture.
Lay them on a baking sheet to dry slightly before packaging them up (about 30-45 minutes)

Wednesday, December 16, 2015

Spritz cookies

This fall, I signed up for my second The Great Food Blogger Cookie Swap.  In case you missed my post last year, here's a quick rundown: It's really a fantastic event -- a cookie swap of epic proportions, so to speak.  The premise is this: sign up.  Get 3 matches emailed to you.  Bake 3 dozen cookies.  Mail 1 dozen cookies to each match.  Receive 1 dozen cookies from 3 bloggers who received your name as their match.  Blog about your cookies.  And the best part (the other best part, the best part besides receiving 3 dozen cookies mailed.  to.  your.  door!)?  Your $4 admission fee goes to Cookies for Kids' Cancer -- which really helps combine two of my passions: baking and helping kids (I am a pediatric nurse practitioner, after all!).


So last year I made some killer cranberry shortbread cookies.  They were awesome.  I actually made them four different ways, and ended up deciding the cranberry ones were the best.  This year I went with a classic spritz cookie.  A delicious crumbly not-to-sweet butter cookie that I topped with just a sprinkling of colorful nonpareils for a pop of color.  b and his mom were more than happy to be my taste testers for these a few days before I made my cookie swap cookies.  His coworkers were huge fans, too!


Spritz Cookies 
From America's Test Kitchen Step by Step Holiday Baking

Ingredients:

1 large egg yolk
1 Tbsp heavy cream
1 tsp vanilla extract
16 Tbsp unsalted butter, softened
2/3 cups sugar
1/4 tsp salt
2 cps all-purpose flour

Directions:

Adjust oven rack to middle position.
Heat oven to 375F.
Line 2 baking sheets with parchment paper.
Set aside.

Whisk egg yolk, cream, and vanilla in a small bowl until combined.
Set aside.

Using a stand mixer with the paddle attachment, beat butter, sugar, and salt on medium-high speed until pale and fluffy, about 3 minutes.
Scrape down bowl as needed.
Reduce speed to medium.
Add egg yolk mixture.
Beat until incorporated.
Reduce speed to low.
Gradually beat in flour until combined, scraping down bowl as needed.
Give dough a final stir by hand.

If using cookie press, follow directions on the press.  If using pastry bag, insert star tip and fill bag halfway with dough.  (I used different tips to make different shapes.)
Hold the bag at a 90 degree angle about 1/2 inch above the prepared tray.
Pipe cookies, spacing them about 1.5 inches apart.
Refill cookie press/pastry bag as needed.
Bake cookies, 1 sheet at a time, until light golden brown, 10-12 minutes.
Rotate sheet halfway through baking.

Let cookies cool on sheets for 10-15 minutes.
Transfer to wire rack to cool.
Let cool completely before serving (or packaging up to mail ;-)).

Monday, October 12, 2015

Salted caramel popcorn

I can't be the only one who has had one of these moments in the kitchen.  You're following a recipe to a T and then all of a sudden you have an 'oh crap' (I usually use a different four-letter word) moment.  Where you fear something has gone terribly wrong (and it usually has)?  Like the burning caramel in the bottom of the pot.  Well in this case, it was what I thought was burnt caramel and actually wasn't (or maybe it was?  As compared to the popcorn in the original post, my caramel is way darker).  But I ended up pouring some of what I thought was burnt caramel out, and my popcorn didn't get totally and completely covered in delicious salted caramel. Which is actually ok.  But I was more impressed with my disaster-averted.


But let me get back to this salted caramel popcorn.  Because first, it's the best combination of salty and sweet.  And secondly, it's really easy (as long as you don't burn the caramel)!


I ended up seeing mimi popcorn kernels on the shelf at the supermarket and I decided that they would probably be the best for caramel popcorn since their surface area to popcorn ratio was high -- meaning more caramel per kernel for a better bite. B thought that I had overthought the popcorn size, but I guess that's the science nerd in me coming out.  Plus, he got a tastier popcorn so I really don't think anyone lost out on this deal!


Salted Caramel Popcorn
From Cookies & Cups

Ingredients:

1/2 cup unpopped popcorn kernels (about 16 cups popped corn)
1 cup salted butter
1 cup light brown sugar
1/3 cup light corn syrup
1.5-2 tsp kosher or sea salt, divided
2 cups of nuts, optional

Directions:

Preheat oven to 300F.

Line a large baking sheet with parchment paper or a silicone mat.
Set aside.

Pop popcorn kernels using air popper into a large bowl (I don't have an air popper, and popping it the old fashioned way in a pan with a little bit of oil worked nicely...just move it to a bowl before proceeding).
If using nuts, add them here.

In a small sauce pan, melt the butter, brown sugar, corn syrup, and 1 tsp of salt together of medium heat.
Bring to a boil.
Boil for 4 minutes without stirring.

Pour caramel mixture over popcorn.
Stir to coat evenly.

Pour popcorn onto lined pan.
Sprinkle remaining salt on top (I skipped this part).
Place pan in the oven.
Bake for 30 minutes, stirring every 10 minutes.

Allow popcorn to cool on a parchment lined counter.

Monday, September 21, 2015

Coffee cake cookies

My family has all the holidays divvied up quite nicely and evenly.  Since as far back as I can remember, since my grandmother vacated her role of preparer of break fast (the meal after the fast of Yom Kippur, when I eat almost 300 times more calories in one meal than I typically eat in a day), my aunt has held the title.  And although the meal is chock full of delicious food (appetizing and bagels and cream cheese, oh my!) we feel the need for dessert.  Even though a typical breakfast doesn't have dessert, our break fast always does.


My grandmother still usually makes the coffee cake -- handed down to her from her mother, my great grandmother, and possibly (and likely) from generations before her -- but since she did some sort of acrobatics last month and ended up with a fractured shoulder (she's healing quite nicely and is quite the champ!), I graciously usurped the cake-baking responsibilities for her.  Here's the problem.  This recipe I talk of?  This heavenly coffee cake?  Well it's a family secret.  It's always referred to as "Nanny Rose's Coffee Cake," and even if you promised to call it "Julie's Great Grandmother Rose's Coffee Cake," I don't think my family would ever forgive me for sharing it with you.  I did bake it and talk about it on the blog almost 3 years ago (see here for that post and a fabulous picture of four generations of women on my mom's side -- me, my mother, my grandmother, and my two great grandmothers), but I figured it wasn't fair to have another post about the cake and leave you drooling with no recipe, so I decided it was only fair to also make some coffee cake cookies.  Because that recipe I can share with you!

My Great Grandmother's Coffee Cake


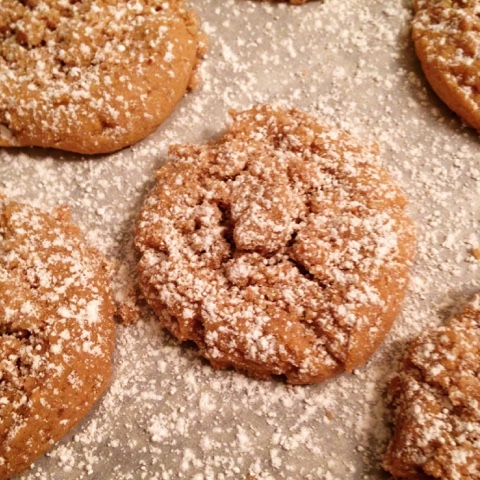
I saw this recipe for coffee cake cookies over 6 months ago and I emailed it to myself.  "I must make these," I thought to myself, but then I never did.  See, just about anything that is advertised as coffee cake gets my attention.  And if you say coffee crumb cake, well then I'm 1000% sold!  So imagine a coffee cake cookie topped with loads of crumb topping, in a portable snackable delicious cookie that's been dusted in a faint snowfall of powdered sugar?!  I can't believe it's taken me this long to make them!


Coffee Cake Cookies
From Cookies & Cups

Ingredients:

For the crumb topping:

1/2 cup butter, softened
1/3 cup brown sugar
1/3 cup granulated sugar
1 tsp cinnamon
1/2 tsp salt
1 2/3 cup flour

For the cookie:

10 Tbsp butter
1/2 cup shortening
1 cup light brown sugar
1/2 cup granulated sugar
1.5 tsp cinnamon
2 eggs
2 tsp vanilla
2 tsp baking powder
1 tsp salt
3 1/3 cup flour

Optional:

powdered sugar, for dusting

Directions:

Preheat the oven to 350F.
Line cookie sheets with parchment paper or silicon liner.
Set aside.

Make the crumb topping.
Mix all the crumb ingredients together in a medium bowl.
Cut together with a pastry cutter or a fork until evenly mixed.
Refrigerate while making the dough.

Make the cookies.
Mix together the butter, shortening, and both sugars for 1-2 minutes on medium speed, until combined and smooth.
Add in cinnamon, eggs, and vanilla.
Continue mixing until evenly combined.
Turn mixer to low and mix in baking powder, salt, and flour.
Mix until dough comes together evenly.

Scoop cookies out using a cookie scoop or spoon (about 3 Tbsp) and place on lined cookie sheets.  If using a spoon, roll dough into balls.
Make an indentation in the center of the cookie dough.
Scoop at least 1 Tbsp of the crumb topping into the center of the dough, pressing lightly to stick.  Don't be afraid to cram it in!
Bake cookies for 9-10 minutes, or until edges start to get golden.
Remove from oven and allow to cool for 3 minutes on cookie sheet.
Transfer cookies to a wire rack to finish cooling.

Dust cooled cookies with powdered sugar, if you'd like.

Sunday, September 20, 2015

Triple ginger cookies revisited

A long time ago, I made these triple ginger cookies.  Almost 2.5 years ago, I made those cookies because of my love of ginger and I wanted a tasty cookie.  They turned out delicious, but given a lot of what was going on in my life at the time (grad school, portfolios, stress....), I didn't have all the ingredients on hand - I fell short on the crystallized ginger, I didn't have molasses so I subbed in corn syrup.  So while I ended up making a delicious cookie, I wanted to revisit this recipe and make them as they were supposed to be made.  But then I made a few smaller adjustments (no allspice, no cloves, because in my personal opinion, ugh!!).  All I have to say is, it was worth it!  These cookies were the star of our Rosh Hashana lunch!  My grandmother wanted me to make more for her, my cousin was literally drooling on the table cloth, and my aunt thought they were super tasty.  It's a good thing I made extra dough and froze it, because guess what I'm bringing (in addition to other things) to my aunt's house when we break the fast on Yom Kippur this week!


Triple Ginger Cookies
Adapted ever so slightly from Will Cook for Friends

Ingredients:

1 1/2 cups all-purpose flour
1 1/2 tsp. baking soda
2 tsp. ground ginger
1 tsp ground cinnamon
1/4 tsp. ground nutmeg
1/8th tsp. sea salt
3/4 cup crystallized ginger, chopped fine
1 stick (4oz.) unsalted butter, softened
1/2 cup dark brown sugar, packed
1/2 cup unsulfured molasses
2 tsp. freshly grated ginger*
1/4-1/2 cup granulated sugar, for rolling

As per the original recipe, * Crystallized ginger can be chilled in the freezer to make chopping easier. Fresh ginger can be stored in the freezer for easier peeling and grating.

Directions:

Sift together the flour, baking soda, spices, and salt.
Add in the chopped crystallized ginger, breaking up any clumps.

In a large bowl, or the bowl of your mixer, cream together the butter, brown sugar, and fresh ginger.
Pour in the molasses and beat well.

Mix in the dry ingredients until just combined.
The mixture should be thick and somewhat sticky.
Turn the dough out onto a sheet of plastic wrap, fold the plastic over itself, and pat into a 1 inch thick disc.
Wrap it up and refrigerate until firm (at least 1-2 hours, or up to a few days).

Tear or break the dough into about 20 equal chunks, and roll each into a ball between your palms.
Roll each ball in granulated sugar, and return to the fridge to keep cool (rolled cookies can be stored in the fridge, or frozen in an airtight container, for future baking).

Preheat oven to 325F. 
Place the chilled balls of dough onto a parchment or silicone lined baking sheet, spacing them at least 1.5 inches apart.
Bake on the middle rack for 10-12 minutes, or until the surface begins to crack - for a crispier cookie, bake a few minutes longer (I like chewy cookies, personally, so I skipped the extra time).
Let the cookies cool 3-4 minutes before transferring to a wire rack.

Once completely cool, cookies can be stored in a baggie or airtight container for several days, or frozen...but they won't last that long.