Facebook 1

Monday, January 27, 2014

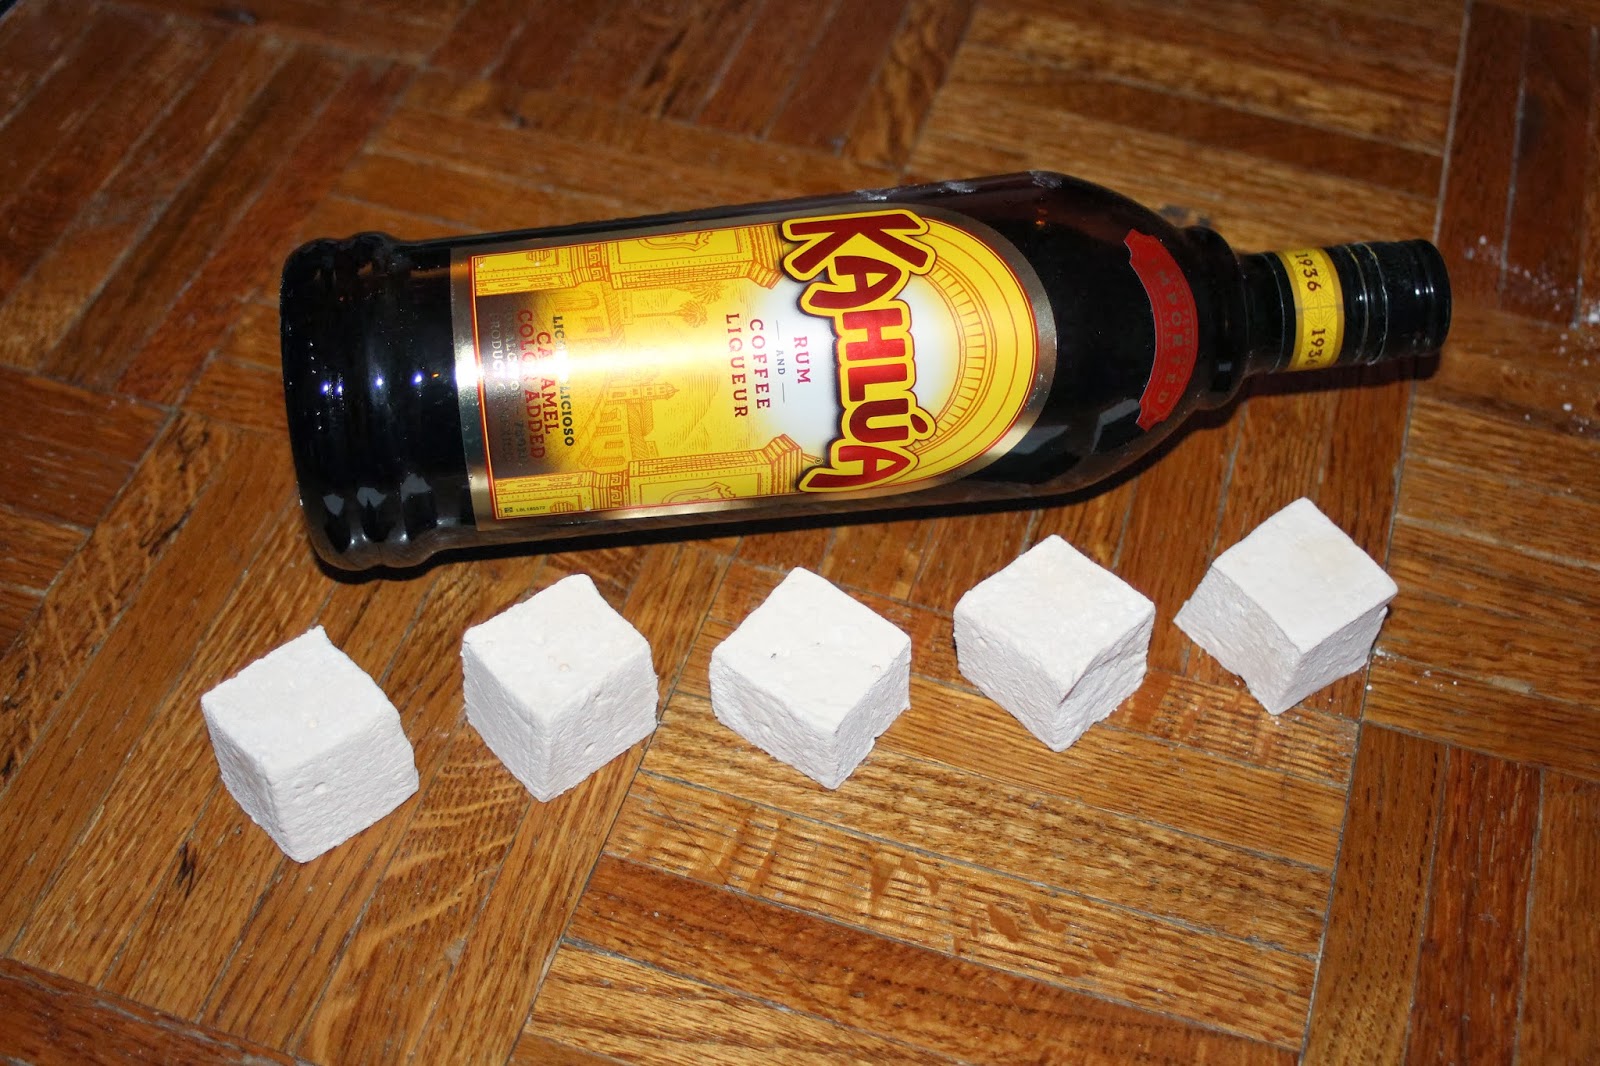
Kahlúa marshmallows....perfect this time!

So in early January, I decided to make some flavored marshmallows.  See, I had made toasted coconut marshmallows before, and then some vanilla marshmallows, too, but I hadn't really made flavored marshmallows.  So in the shadow of a lot of snow and freezing temperatures, I decided to make some Kahlúa marshmallows to put in a nice big mug of hot cocoa.  The only problem?  The marshmallows fell flat and my kitchenaid suffered an injury. 

Check out how fluffy the new ones are:


especially when compared to the older version:


But I was committed to making these right.  So once I improvised a little, wedged a pen strategically in the Kitchen-Aid, and held it at a 90 degree angle while it whipped the delicious marshmallow batter, I made those raspberry marshmallows.  With those whipped so fluffy that they filled the 9 x 9 inch pan to the tippy-top, I set out to make these again!


Now these didn't whip up quite as fluffy as the raspberry ones, but they were a HUGE improvement from the last batch of Kahlua ones I made.  First off, before they were even done setting up, they bounced back when I poked them -- a good sign!


These marshmallows are a lot stickier than the vanilla and coconut ones and a bit stickier than the raspberry ones.  They're also a bit softer, so I left them sitting out longer to let them dry a little.  And lastly, I was lazy and dipped them in just powdered sugar and not the powdered sugar-corn starch mixture, since I had it out on a plate from the raspberry ones I made yesterday.  I actually think that the corn starch may help dry them out a little, so I recommend going with that.

Kahlúa Marshmallows
Idea from this recipe, recipe from here, and put together by me :)

Ingredients:

For the marshmallows
1/2 cup Kahlúa
3 Tbsp. + 1 1/2 tsp. unflavored powdered gelatin (3 envelopes – envelope is 1/4 oz. each, for 3/4 oz. total)
2 cups granulated white sugar
1/2 cup water
1/2 cup light corn syrup
1/2 tsp. fine salt
For the coating
3/4 cup powdered sugar
1/2 cup corn starch
Directions:
Spray a 9 x 9 or 7 x 11 inch baking pan and line with parchment paper (Recommendation: cut to fit flat on the bottom, with the edges of the paper over-hanging the sides. The ends are fine just sprayed.)
In a stand mixer fitted with a whisk attachment, pour in 1/2 cup of the Kahlúa and sprinkle the gelatin over.
Let stand.
In a medium saucepan over high heat, stir together the sugar, corn syrup, salt and the water.   
Stir until sugar dissolves and mixture begins to boil.
Stop stirring and once mixture comes to a rolling boil, continue boiling for 1 minute.
Remove from the heat. (Recommendation: the original recipe said that they like to carefully pour mixture into a 2-cup glass measuring cup, to make it easier to pour into mixer.  I did this and found it extremely helpful!).
The mixture is very, very, very hot.  Be extremely careful!

Turn the mixer to low and mix the gelatin a bit to loosen.
Very slowly and carefully add the hot sugar mixture by pouring it gently down the side of the bowl.
Continue to mix on low until all the sugar mixture is added.

Turn the mixer to high and whip the mixture for 10 to 12 minutes until the marshmallow batter almost triples in size and becomes very thick.
If you have a smaller mixer bowl, you may need to scrape down the sides of the bowl frequently to avoid the batter overflowing as it grows.

Transfer the mixture to the prepared baking pan (a silicone bowl scraper works like a charm for this) and use a spatula or bench scraper to spread the marshmallow evenly in the pan, pushing it down into the corners.
Work quickly, as the marshmallow becomes more difficult to manipulate as it begins to set.

Spray a sheet of plastic wrap liberally with cooking spray and lay it across the top of the marshmallow, sprayed side down.
Using you fingers, smooth the plastic wrap on top of the marshmallows a bit to seal it smoothly and tightly against the mixture.

Leave the marshmallow to set at room temperature for at least 3 hours or, even better, overnight.
The marshmallow will be too sticky and soft to cut if you try too soon.

Meanwhile, mix the coating ingredients in a bowl.
Set aside.

Coat a clean area of the counter or work surface with some of the coating mixture.
Remove the plastic wrap from on top of the marshmallows and invert them onto the coating mixture.
Remove the parchment paper.
Sprinkle the top with some coating mixture as well.
Cut the marshmallows into squares, keeping the knife clean and coated with the coating as necessary to prevent sticking

Roll each of the freshly cut marshmallow squares in the coating mixture.
Lift them out with a mesh strainer.
Tap off all excess coating and place on a plate or in a storage container.

Sunday, January 26, 2014

Raspberry marshmallows

I've been wanting to make marshmallows for a while now, but the last time I attempted them (with the failure that was the Kahlua marshmallows), my Kitchen-Aid broke :-(  It was a sad, sad day.  But, today, my innovation, improvisation, and downright perseverance prevailed, and I used the Kitchen-Aid once more.  And this time, the marshmallows came out super fluffy!  It just involved putting a pen strategically in a cylinder in the Kitchen-Aid, and then I just had to stand there holding the head of the Kitchen-Aid for 12 minutes while it whipped on high speed.  But it was totally worth it.  Did I mention those super fluffy marshmallows??


I wanted to make flavored marshmallows this time (I still have 8 of those vanilla marshmallows that I've been saving for hot chocolate!).  To add some color and flavor and variety to the (growing) list of marshmallows on the blog.  Plus, I had another idea for these that I thought I might be able to test out for a later date (you know me, always planning ahead!).


So why did I decide on raspberry marshmallows?  First of all, I wanted to make something with color and was leaning towards pink (to test out that other project).  And secondly, I had raspberry jam in the fridge already.  And let me tell you, a quarter cup of raspberry jam goes a long way!  Even though I needed to use a little red food coloring to make them a bit pink, the raspberry flavor is huge!


Raspberry Marshmallows
From this link, which has ideas for a bunch of flavors!

Ingredients:

1 cup of water, divided
3 envelopes gelatin, unflavored
2 cups sugar (granulated)
1/2 cup light corn syrup
1/2 tsp salt
2 tablespoons pure vanilla (which I forgot to add, oops....I guess that's what I get for being preoccupied holding the Kitchen-Aid in place for 12 minutes)
1/4 cup raspberry jam
1 drop red food coloring (I ended up using about 3 drops)

Generous amount of icing sugar to coat the marshmallows, about 2 cups (icing sugar = powdered sugar)

Butter for pan (I used Pam)

Directions:

Grease a 9 x 9 inch pan with butter (or Pam).

In a small saucepan over medium heat (I was lazy, I microwaved it in 30 second increments), warm 1/4 cup raspberry jam (or any other flavor) until it becomes runny, about 3 minutes.
Remove from the heat.
Place a fine sieve over a small bowl and pour the warm jam through the sieve to catch any seeds and create a puree.  Set aside for now.

In a stand mixer fitted with the whisk attachment, pour in 1/2 cup of the water and sprinkle with the gelatin.
Set aside to allow the gelatin to soak in.

In a medium sauce pan over high heat, add the sugar, corn syrup, remaining 1/2 cup of water, and salt.
Bring to a rolling boil and continue to boil for 1 minute.
Remove from the heat.
I pour my sugar syrup into a 2-cup measuring cup, which makes it easier and safer to pour into the mixer bowl.

Turn the mixer to low and mix the gelatin once or twice to combine it with the water.
Slowly add the hot sugar mixture by pouring it gently down the side of the bowl, and continue to mix on low.

Add the raspberry puree and one drop of red food coloring.
Turn the mixer to high and continue to whip for 10 to 12 minutes until the marshmallow batter almost triples in size and becomes very thick.
Scrape down the sides of the bowl frequently to avoid overflowing batter.
Add additional drops of red food coloring, if needed, until desired color.
Stop the mixer, add the vanilla, and then whip briefly to combine.  Oops, I forgot that.  It's all good, they're super tasty.

Transfer the mixture to the prepared baking pan and use a spatula or bench scraper to spread it evenly in the pan.
Work quickly, as the marshmallow becomes more difficult to manipulate as it sets.

Grease a piece of plastic wrap with butter (again, I used Pam) and lay it across the top of the marshmallow.
Press firmly on the plastic wrap to seal it smoothly and tightly against the marshmallows.

Leave the marshmallows to set at room temperature for at least 3 hours, or -- even better -- overnight.
The marshmallow will be too sticky and soft to cut before then.

Sprinkle work surface or cutting board with icing sugar.
Run a knife along the top edge of the pan to loosen the marshmallow slab.
Invert the pan and flip the marshmallow out onto the work surface.
Scoop handfuls of the icing sugar and rub all over the marshmallow slab.

Using a large knife, cut the slab into 1 x 1 inch squares.
It's sticky, so I tried coating the knife with Pam, but that left a weird discoloration right where the knife hit the marshmallow, so instead I just coated the knife with some powdered sugar, and that got the job done :)
Roll each of the freshly cut marshmallow squares in the remaining icing sugar to coat them completely.

Monday, January 20, 2014

Chocolate oatmeal coconut cookies

So by now those of you who know me (either personally or through the blog) know that when it comes to baking, I tend to do things in excess.  My friends 30th birthday a few years ago?  Yeah, I made two cakes.  My birthday this year?  A week of treats (ok, ok, it was only 4 days...).  A 30th birthday party last year resulted in 36 cupcakes for about 15 people (red velvet and Samoa).  And when we went wine tasting this past fall, I brought another 36 cupcakes (this time cannoli-inspired and chocolate-peanut butter-pretzel ones).  I could go on, but I think you get the picture...

So when my friend P asked me to bake cookies for a baby shower last weekend, I couldn't stop at one, two, or three varieties.  I needed to make a fourth type.  I debated a fifth, but we can talk about that later.


This time I set out to make some chocolate oatmeal coconut cookies. For some reason, they intrigued me. I used to hate coconut, but lately it's been growing on me.  I think it started with those Samoa cupcakes, but then there were also the toasted coconut marshmallows and the coconut caramel cupcakes on New Years.

These cookies were really good, but I think you lose out on a little by making them so big.  Therefore, my bottom line with these cookies is make them, just don't make them huge!

Chocolate Oatmeal Coconut Cookies
from Taste and Tell

Ingredients:

1 cup unsalted butter, at room temperature
1 cup brown sugar, packed
6 tablespoons sugar
2 eggs
1 1/2 teaspoons vanilla
1/2 teaspoon salt
1/2 teaspoon baking soda
1 1/2 cups flour
2 1/4 cups oats
1 1/2 cups coconut
12 oz semi-sweet mini chocolate chips (2 cups)
 
Directions: 
 
Preheat the oven to 350F.

In a mixer, beat together the butter and the sugars until light and fluffy.
Add the eggs one at a time, beating well after each addition.
Beat in the vanilla, salt, and baking soda.
Add in the flour and beat just until combined.
Add in the oats, coconut and chocolate chips.
Beat until combined.
 
Place 1/4-cup scoops of the dough on a greased cookie sheet, at least 3 inches apart.
Pat down to circles 1/2-inch high.
 
Bake in the preheated oven for about 15 minutes, rotating cookie sheet halfway through the baking time.
Cool on cooling racks.

The result?  19 ginormous cookies!

Peanut butter monster cookies

I try not to make the same thing on the blog, but sometimes, it's just so fitting that I have to let my "no repeats" rule slide by the wayside.  These cookies are one of those exceptions!


I made these peanut butter monster cookies for my birthday last year, but unfortunately didn't get to share them with many people.  Which is a complete shame, since they were amazing.  And HUGE.  So when my friend asked me to make some cookies for a baby shower she was attending last weekend, and we settled on a variety of large cookies, I knew I had to include these!  And since I knew I was making large cookies, I knew these would totally fit the bill!


These are a peanut butter lovers dream!  There's peanut butter in the cookie dough, peanut butter chips in the cookies, and then they're studded with Reese's Pieces!  Did I mention they're fantastic??

Peanut Butter Monster Cookies
Originally from here, and reposted on the blog

Ingredients:

2 cups all-purpose flour
2 and 1/4 teaspoons baking soda
1/2 teaspoon salt
1 cup unsalted butter, softened
1 cup peanut butter
1 cup sugar
2/3 cup packed brown sugar
2 large eggs at room temperature
1 teaspoon vanilla extract
1/2 cup rolled oats
1/2 cup peanut butter chips
1/2 cup chocolate chips
Reese’s Pieces mini candies, 1 bag (They suggested two bags, since there weren't enough to coat all of the cookies with one bag - and I needed about 1/5 of an additional bag)

Directions:

Whisk together flour, baking soda and salt in a small bowl.
Set aside.

In a large bowl (or the bowl of a stand mixer) cream together butter, peanut butter, sugar and brown sugar (I used light brown sugar).
Beat until light and fluffy.
Add eggs one at a time, beating well after each addition.
Add vanilla, and beat to combine.
Slowly add dry ingredients, and beat just until combined.
Don’t over beat at this stage.
Stir in oats, peanut butter chips and chocolate chips.
Refrigerate dough for 15 minutes, meanwhile preheating oven to 350 degrees (F).

Prepare a cookie sheet with parchment paper.
Pour Reese’s Pieces candies onto a plate or into a flat bowl.

Using a large cookie scoop (about 3 Tablespoons - I actually used an ice cream scooper, which I purchased specifically for these cookies!) drop cookie dough into the bowl of candies.
Gently use your hand to press the dough down into the candies and flatten the dough into a disc, then transfer to cookie sheet.
Bake, six at a time, for 12-15 minutes or until the edges are just beginning to darken.

Allow to cool on cookie sheet for 5-10 minutes.
*If you skip this step, the cookies might break when you transfer them to a cooling rack.*

Allow to cool on a wire rack for 30 minutes before serving.  Enjoy!

Sunday, January 19, 2014

Oatmeal cranberry cookies

Remember that baby shower I posted about yesterday?  The one where I said I was going to make a few varieties of cookies and that you should stay tuned?  Well, you should be glad you did because these next cookies that I made were pretty darn awesome!


I personally love oatmeal raisin cookies and find that too many people add nuts to theirs, therefore making me dislike them (if you're new to this blog, you should know for the future that I really don't like nuts in my baked goods).  I also love craisins, and find oatmeal craisin cookies to be delicious...I particularly like the tart dried cranberries in the sweet brown sugary cookie.  I debated trying some with white chocolate chips but was afraid that the white chocolate might be too sweet in the cookie, so I skipped the white chocolate chips this time. 

Because my friend had basically requested a cookie per person, I didn't want to skimp on the cookies and make them mini, so I went the complete opposite route and made massive cookies!  I tried to keep them the same size as the chocolate chunk ones.  I think I did a pretty decent job (the trick?  Using the same sized scooper for the cookies -- in this case an ice cream scoop).

Oatmeal Cranberry Cookies (with and without White Chocolate Chips)
From Yums and Loves

Ingredients:

1 cup butter, softened
1 cup packed brown sugar
1/2 cup granulated sugar
1 egg
1 Tablespoon vanilla
2 cups all-purpose flour
1 teaspoon baking soda
1/2 teaspoon baking powder
1/2 teaspoon salt
2 cups sweetened dried cranberries (we both used Craisins)
1 and 1/4 cups old fashioned oats -- for some reason, these were left out in the directions below, so I added them in
2 cups white chocolate chips -- I skipped this this time

Directions:

Preheat oven to 375.
Line baking sheets with parchment paper or Silpat. 

Combine flour, baking soda, baking powder, and salt in a medium bowl and whisk to combine.  
Set aside. 

Beat butter at medium speed with mixer until creamy.  

Add sugars, beating well.
Add egg and vanilla, beating until blended.  
I added the oats here.
Gradually add flour mixture and beat until blended, scraping bowl as needed.  
Stir in cranberries and white chocolate chips.  I did that using a spatula, since the dough was thick and getting stuck in my hand mixer (which I'm using since I haven't been able to get my Kitchen-Aid fixed yet).
 
Drop dough by heaping spoonful onto cookie sheet.  I used my ice cream scoop, and again pressed them down a little into discs.
Bake for 9-11 minutes or until cookies are lightly browned.  
Cool on sheet for about 2 minutes before transferring to cooling rack. 

I ended up getting 16 GIGANTIC cookies!

Saturday, January 18, 2014

Milk chocolate chunk cookies

A friend of mine asked me to make some cookies for a baby shower.  She wanted cookies -- she didn't care what kind of cookies -- her one request was just "cookies."  Luckily for me, she was ok with my suggestion for a variety of large cookies (while I would've loved to make her some baby shower theme shaped cookies with royal icing, it wasn't in the cards given the fact that I got back from vacation on Tuesday, had work the rest of the week, and had to go to Westchester for a doctor's appointment).


She was expecting 25 people and wanted around 30 cookies.  So for once, I decided I wasn't going to make mini cookies.  Large cookies seemed like the best option (that way people wouldn't likely be reaching for seconds).  And why stop at large cookies when I could make MASSIVE cookies?!


Originally I thought I would make some chocolate chunk cookies, which I made over two years ago on the blog.  They're a great cookie and -- although I love dark chocolate as much if not more than the average person -- really are quite awesome when made with milk chocolate chunks.  They're also a pretty big cookie, and I figured I could make them larger to make sure they're about the same size as some other cookies I was making for her (stay tuned for those posts soon!).

Milk Chocolate Chunk Cookies
Originally from Smitten Kitchen

Ingredients:

2 cups all-purpose flour
1/2 teaspoon baking soda
1/2 teaspoon salt
3/4 cup unsalted butter, melted
1 cup packed brown sugar
1/2 cup white sugar
1 tablespoon vanilla extract
1 egg
1 egg yolk
2 cups semisweet chocolate chips -- I used 2 cups of milk chocolate chunks, which I got from cutting a giant milk chocolate bar cut into chunks

Directions:

Preheat the oven to 325°F (165°C).
Grease cookie sheets or line with parchment paper.

Sift together the flour, baking soda and salt; set aside.
In a medium bowl, cream together the melted butter, brown sugar and white sugar until well blended.

Beat in the vanilla, egg, and egg yolk until light and creamy.
Mix in the sifted ingredients until just blended.

Stir in the chocolate chips by hand using a wooden spoon.
Drop cookie dough 1/4 cup (for a ridiculously large cookie, one or two tablespoons for more standard-sized cookies.  I used a regular sized ice cream scoop, just less than completely filled) at a time onto the prepared cookie sheets.
Cookies should be about 3 inches apart.
I pressed the tops of my cookies a little to make them more like discs, since I wanted them bigger and flat.

Bake for 15 to 17 minutes (closer to 12 minutes for non-1/4 cup scoop cookies...Mine took 15 minutes and came out perfectly!) in the preheated oven, or until the edges are lightly toasted.
Cool on baking sheets for a few minutes before transferring to wire racks to cool completely.

I got 15 HUGE cookies!

Sunday, January 5, 2014

Salted bourbon caramels

The other night B and I were cooking and I had said I had OCD.  Not the obsessive handwashing, checking-the-lights-500-times-before-leaving-the-apartment, super-duper-cleanly type of OCD (which there is nothing wrong with, it's just not me....just ask people who have seen the inside of my apartment lately, with it's intensely "organized chaos").  I should've specified better, I have cooking-and-baking OCD.  The I-won't-serve-something-to-others-the-first-time-I-make-them-and-must-make-a-test-batch-first, the I-won't-stop-until-the-recipe-is-just-right, and the you-said-dice-the-onion-and-so-I-will-dice-it-until-they-are-all-uniform-size-and-shape types of ODC.


So now that you know that, it should not come as a surprise that tonight I made my third batch of caramels in 6 days.  That's a batch of caramels every other day, on average!


First were the classic caramels.  They were delicious and a bit chewy, but a bit thinner than I had hoped, due to a smaller batch and a too-big pan.  So they second time, I made espresso caramels, from the same website as the classic caramels, but I'm pretty sure they got slightly overcooked.  They were more of a sucking-candy consistency; crunchy and not all that chewy, but still get-stuck-in-your teeth good like caramels.  So this time I decided to try a different recipe altogether, and made these Salted Bourbon Caramels.  I figured I'd try the recipe as is, even though I'm not a lover of bourbon, because caramels can be oh so temperamental.  Oh, and I still had some leftover bourbon from when I made those Pecan Potato Chip Cupcakes.

Now I have to say, the salted bourbon caramels were gooooood, even though I don't love bourbon.  But, I did think about adjusting them a little; maybe upping the vanilla and removing the bourbon altogether.  The bourbon flavor was kinda mild, so if you're a bourbon lover, I might up the bourbon a little.  See, this is where my cooking-and-baking OCD rears it's ugly head....

Just an FYI, these caramels are soft and chewy, and a little bit sticky, so I highly advise that you coat the knife with some cooking spray before cutting them.  I even wrapped mine in some wax paper so that they held their shape, since they were a bit soft.

Salted Bourbon Caramels

Ingredients:

Nonstick vegetable oil spray
2 cups sugar
1/4 cup water
1/2 cup light corn syrup
1 14 oz. can sweetened condensed milk
1/2 cup unsalted butter, cut into small pieces
2 Tbsp bourbon
1 tsp vanilla extract
1/2 tsp kosher salt
flaky sea salt

Wax paper, to wrap candies
 
Directions:
 
Lightly spray an 8x8 inch pan with vegetable oil (I used by 9x9 inch pan, and sprayed with Pam).
Line with parchment both ways, and spray the parchment.
Set aside.
 
In a large saucepan over medium-high heat, combine the sugar, water, and corn syrup.
Bring to a boil, gently stirring to dissolve the sugar.
 
Once the mixture reaches a boil, let it cook relatively undisturbed (swirl occasionally) until it is a deep amber-brown.
This takes about 10 minutes, give or take a few.
 
Remove from the heat and add the sweetened condensed milk and butter.
It will bubble furiously AND STEAM (oh, did it steam!  I got a mild steam burn from it, so be uber careful), so whisk and be careful!
Whisk until it is completely smooth again, then return to medium-low heat.
 
Cook, whisking continuously, until the candy thermometer registers 240 F.
Remove from heat and whisk in bourbon, vanilla, and ½ tsp salt.
Whisk until smooth, then pour into your prepared pan.
 
Liberally sprinkle sea salt over the top, and let cool before cutting and wrapping in wax paper.
I highly advise coating the knife in cooking spray before cutting them, since they are a bit sticky and soft.

Kahlúa marshmallows...a little bit of a flop

Two days ago we had some snow.  OK, it was more than just some snow.  I think in the end, New York City got over 6 inches.  But what was worse was how cold it was the next day.  It was so cold, in fact, that B and I stayed in that night and cooked a delicious Italian dinner with some red wine.  There was no way we were going to venture out -- the predicted low overnight was 0 degrees -- zero.  degrees!

It's hard to read, but under "Kahlúa Marshmallows" it says "The first time they fell a little flat (pun intended)"

So when I thought about what I might make this weekend, I figured some marshmallows might be a good option....for hot cocoa....because it's cold out there!  And why stop at just marshmallows when I could make flavored marshmallows (the first time I made marshmallows were those toasted coconut marshmallows, which were delicious, but weren't really flavored -- they were vanilla marshmallows dipped in toasted coconut.  The second time I remade that same recipe, skipping the coconut and instead coating them in some corn starch and powdered sugar (which I saw on another recipe)).  Plus, I've been kinda craving making marshmallows again.  It's a win-win situation!

I found a recipe for Kahlúa marshmallows a while ago and had been holding onto it for the right time.  It used flavored Kahlúa, but I figured I'd stick with the original (partly because I like the coffee flavor, and secondly, because I have another recipe I want to use it for).  Plus, alcohol + hot cocoa = extra warmth for the cold weather!  The original recipe called for egg whites, whipped, and then added to the marshmallow mixture.  I have to admit, I was a little weirded out by that.  So I figured that I'd try to substitute the Kahlúa into the original recipe I made and see if that worked.

These marshmallows were kinda a flop.  I'm not completely sure if it's that there was too much Kahlúa in them and, since Kahlúa has some sugar in it, it threw off the balance of ingredients, or if it's because my Kitchenaid made a big clunk, and then the head wasn't at the proper angle on the base, and, well, my kitchenaid seems to be a bit busted right now :-(, or if I should've gone by temperature (like the original Kahlúa marshmallow recipe called for) instead of by timing (like the coconut recipe called for, and I followed).   I debated adding a little vanilla to them, but when I tasted them as they were mixing, I realized they didn't need any vanilla.  They're uber-Kahlúa-y, so I think they'd be best in hot cocoa or even a cup of coffee, but I found them a little strong to be eaten alone.  Again, it could also be because they fell a little flat, and had they been whipped up well, maybe the flavor would've dissipated a little.  I'm already thinking about when I can make them again to test out my theory, but I think I'm going to be on a marshmallow-making hiatus until I figure out how to fix my kitchenaid -- or buy a new one!

So "WHY??" you may ask, am I sharing this story with you when it clearly fell flat (fine, pun intended!).  Well, for two reasons.  First of all, we're all human and we all make mistakes.  Even I have a baking error or two in my past.  Secondly, I'm not sure entirely why the recipe flopped, and I want to investigate that and try to figure out if it was a mechanical error (did I add the sugar recipe too quickly?), a cooking error (did the sugar mixture not get hot enough?), or if it was just a recipe failure.

So once I get my kitchenaid fixed (or, gulp, get a new one), I will be back at it, trying to perfect these Kahlúa marshmallows!

Vanilla marshmallows

I've been on a marshmallow making kick.  I LOVED those toasted coconut marshmallows I made before Christmas, and was dreaming about them.  I wished I had saved some and made s'mores out of them (it was B's brilliant thought -- with our last toasted coconut marshmallow -- to warm them up, and they were delicious), and without any left, I thought about making some more.  Instead, I settled on making some plain (vanilla) marshmallows for s'mores, which is kinda comical because I live in New York City and it's the winter and there's really no reason that I'd actually be eating s'mores.  But I digress.  I just wanted to make marshmallows again.

So I did.


Vanilla Marshmallows
They're from the same recipe as the Toasted Coconut Marshmallows

Ingredients:

For the marshmallows

1 cup water, divided
3 Tbsp. + 1 1/2 tsp. unflavored powdered gelatin (3 envelopes – envelope is 1/4 oz. each, for 3/4 oz. total)
2 cups granulated white sugar
1/2 cup light corn syrup
1/2 tsp. fine salt
2 Tbsp. pure vanilla or vanilla bean paste -- I might cut this down a little bit, maybe 1.5 Tbsp, if eating them plain.

For the coating (I've seen a bunch of homemade marshmallow recipes out there, and they all pretty much use the same coating recipe)

3/4 cup powdered sugar
1/2 cup corn starch

Directions:

Spray a 9x9 or 7x11 inch baking pan and line with parchment paper (Recommendation: cut to fit flat on the bottom, with the edges of the paper over-hanging the sides. The ends are fine just sprayed.)
In a stand mixer fitted with a whisk attachment, pour in 1/2 cup of the water and sprinkle the gelatin over.
Let stand.
In a medium saucepan over high heat, stir together the sugar, corn syrup, salt and the remaining 1/2 cup of water.
Stir until sugar dissolves and mixture begins to boil.
Stop stirring and once mixture comes to a rolling boil, continue boiling for 1 minute.
Remove from the heat. (Recommendation: the original recipe said that they like to carefully pour mixture into a 2-cup glass measuring cup, to make it easier to pour into mixer.  I did this and found it extremely helpful!).
The mixture is very, very, very hot.  Be extremely careful!

Turn the mixer to low and mix the gelatin a bit to loosen.
Very slowly and carefully add the hot sugar mixture by pouring it gently down the side of the bowl.
Continue to mix on low until all the sugar mixture is added.

Turn the mixer to high and whip the mixture for 10 to 12 minutes until the marshmallow batter almost triples in size and becomes very thick.
If you have a smaller mixer bowl, you may need to scrape down the sides of the bowl frequently to avoid the batter overflowing as it grows.
Stop the mixer, add the vanilla, and then whip briefly to combine.  When I added the vanilla, mine thinned out a bit.  Just an FYI.

Transfer the mixture to the prepared baking pan (a silicone bowl scraper works like a charm for this) and use a spatula or bench scraper to spread the marshmallow evenly in the pan, pushing it down into the corners.
Work quickly, as the marshmallow becomes more difficult to manipulate as it begins to set.

Spray a sheet of plastic wrap liberally with cooking spray and lay it across the top of the marshmallow, sprayed side down.
Using you fingers, smooth the plastic wrap on top of the marshmallows a bit to seal it smoothly and tightly against the mixture.

Leave the marshmallow to set at room temperature for at least 3 hours or, even better, overnight.
The marshmallow will be too sticky and soft to cut if you try too soon.

Meanwhile, mix the coating ingredients in a bowl.  I whisked them together with a small whisk.

When marshmallows are ready, grab the edges of the parchment and lift the marshmallows from the pan.
Remove the plastic wrap from the top and fold down the parchment on the sides.
Using a pizza cutter or a large knife, cut the slab into 1x1 inch squares.
Roll each of the freshly cut marshmallow squares in the coating mixture.
Put them on a baking sheet to dry slightly before packaging them up (about 30 – 45 minutes).

Saturday, January 4, 2014

Espresso caramels

So I kinda became obsessed with caramels since I made them last week.  Mine came out pretty awesomely last time given the fact that I didn't have enough corn syrup and had to adjust everything else by decreasing by 20%, which was doable because I'm kinda a math nerd.  But they came out a little thinner than I had hoped, because of the adjustment, and while I knew I should've used a smaller pan, I didn't actually use the smaller pan. 


So I had in my head that I needed to make caramels again with the proper amounts of ingredients.  I debated making the plain, classic ones again because they were so delicious (but do you really want to see me post the same recipe twice, less than a week apart?!).  Then I thought about the sesame ginger ones (yum!) that I had seen on the same website, but I didn't have any candied ginger (and the frigid NYC temperatures and remaining snow on the ground made going outside to buy candied ginger just because seem, well, kinda silly).  I settled on the espresso orange caramels also featured on the same website, but of course I had to adjust them just a little and leave out the candied orange because, well, I think the combination of orange and espresso sounds kinda gross.  And I don't generally like orange flavored things, anyway.


And you know what happened when I went looking for the sugar that I bought at the store the other day in preparation of making some more caramels?  I found the cream that I bought that same day.  Yup, it had been sitting out literally for days.  So then I had to toss that (obviously!), and use the cream I had at home, since I already voiced how silly going out in this weather would be, and had to half the recipe....which, in all honesty, was easier than making 80% of the recipe like I did last time.

Espresso Caramels
Adapted from Ms. Martha Stewart

Ingredients (adjusted due to the amount of usable cream I had here):

Vegetable oil, for baking sheet (or Pam, because I used Pam -- let's face it, it's just easier sometimes)     
1 cup heavy cream
1 cups sugar
3 tablespoons unsalted butter, cut into pieces
1/2 + 1/8 (5/8 total) cups light corn syrup
1/4 teaspoon coarse salt
1/4 teaspoon pure vanilla extract
1/8 cup instant espresso powder
 
Directions:
 
Lightly brush bottom and sides of a 9 x 9 inch rimmed pan with oil.  Or use Pam, like I did.
Line with parchment, leaving a 2-inch overhang on long sides.
Lightly brush parchment with oil.
 
Bring cream, sugar, butter, and corn syrup to a boil in a large saucepan over high heat, stirring until sugar dissolves.
Reduce heat to medium-high.
Cook, stirring occasionally, until caramel reaches 248 degrees on a candy thermometer, about 15 minutes.  You NEED to be VERY quick and take it off at exactly 248 degrees and add the rest of the ingredients.  I took mine off of the heat and moved it and by the time I added the rest of the ingredients, the temp had crept up to 250-251.  When I went to check on the caramels an hour and a half later, they were pretty hard -- I think it's because the caramels were over-heated.
 
Immediately remove caramel from heat, and stir in salt, vanilla, and espresso power.
Pour caramel into/onto lined sheet, and let stand, uncovered, at room temperature at least 8 hours and up to 1 day.
 
Lifting by parchment overhang, transfer caramel to a large cutting board.
Cut into 3/4-by-1 1/4-inch pieces.
Wrap each piece in waxed paper or cellophane.

As I stated above, mine got a little too hot, and when I went to check on them an hour and a half later, the caramels were already really hard.  I went to cut them and they kinda broke as I cut them, so they're oddly misshapen.  BUT...they're super flavorful, and have a little crunch to them (translation: not chewy).  I still advise this recipe but be really quick about removing them off the head and adding the rest of the ingredients.  It helps if the burner behind or next to the pot is open for easy access....I had to move mine to the other side of the kitchen, and that probably allowed the caramels to cook even more than they should've.

I guess you'll have to stay tuned for another caramel recipe in the near future, just working on perfecting my caramel skills ;-)