Facebook 1

Wednesday, February 29, 2012

Oreo rice krispie treats

Today I left class famished.  I ate breakfast and lunch, sat through a few hours of lecture, and then left.  Hungry.  Very hungry.  I wandered into a little deli near school in search of a snack, something to tide me over while I ventured downtown to help a friend.  In my mind I had settled on pretzels, but they were nowhere to be found.  Sure, there were large bags of pretzels and small "single serve" bags of chips, but no small bags of pretzels.  I left, upset, and wandered a little further, eventually ending up at Starbucks (naturally).  A skim latte, I rationalized, would help wake me up and would render me totally functional and helpful by the time I got to my friend's.  But I knew it wouldn't be enough, and I'd need a snack, too.  Now I honestly don't remember if I've spoken about my addiction to Starbucks on this blog before, but there is one thing you need to know about it: I am addicted to Starbucks coffee drinks (and doing school work in Starbucks).  Their regular coffee is definitely not my favorite by far, and their desserts in that fridge never look all that appetizing (the calorie count on the label doesn't help, either).  But there I was, hungry, and - despite my best efforts to get a somewhat healthy snack - staring down the desserts in the Starbucks fridge deciding what to get.  Eventually, I chose the marshmallow dream bar, their version of a rice krispie treat with extra marshmallows in it, and I realized something.  Rice krispie treats are good.  Damn good.

Fairly recently, while searching for recipes, I came across a recipe for cookies and cream rice krispie treats.  I copied it down but can tell you that it was nowhere near the top of my "things I want to bake really soon" list.  That changed, however, when I took a bite of that delicious rice krispie treat and realized that (although I really don't need them), I'd like more rice krispie treats in my life.

Consider that a done deal:


6 cups rice krispies cereal
20 regular Oreos, crushed (I used double stuffed Oreos simply because I had them here for another project)
5 cups marshmallows
3 Tbsp butter

(I halved the recipe and used a smaller dish.  I know I said I'd like more rice krispie treats in my life, but just not that many)

Directions:
1. Spray a 9 x 13" baking tray and a spatula with non-stick spray and set aside
2. Put the rice krispies and crushed Oreos in a bowl, and mix
3. Place the butter and marshmallows in a large microwave safe bowl.  THEY WILL EXPAND A LOT, SO MAKE SURE YOUR BOWL IS BIG ENOUGH.  Microwave them for about 3 minutes, until marshmallows are mostly melted and very puffy.
4. Remove from the oven carefullt and stir to fully combine the butter and marshmallows, making sure that the marshmallows are fully melted.
5. Pout the marshmallow mixture over the cereal/Oreo mixture and mix with the prepared spatula, QUICKLY.
6. Use the spatula to press the mixture into the dish and flatten it as needed.
7. Allow the mixture to cool before cutting into squares.

Enjoy. 

The link above gives you storage directions, although I highly suspect that they'll be gone before you have to worry about storing them...

Sunday, February 26, 2012

Some new ideas on the horizon

I joined pinterest. I had debated joining for a while for several reasons. First, I don't get exactly what pinterest is. I know, I know, it's a virtual pinboard. So...? I post things I like/want, places I've been to/want to visit, things I've baked/want to bake for the whole world to see? Does the world really care that I want to visit Greece, or that I made cute cake pops? But, I digress. Secondly, I didn't need another distraction or procrastination tool. But, after running it by some friends (in a Facebook post, naturally), they recommended I join. For the recipes and baking ideas, they said.  They know me so well.  One friend sent me an email invite...and now I'm on pinterest.

Why do I bring this up? Simply because they were right (and so was I). I admittedly still don't really get pinterest, but I've wasted plenty of time searching for recipes and baking ideas.  I even had some free time on vacation and found a bunch of recipes.  It doesn't help that we consumed a TON of Oreos on vacation, and despite the fact that I don't love Oreos, I still helped eat a few.  Which caused me to find a bunch of Oreo-inspired treats (ranging from homemade Oreos to Oreo icing to things baked with Oreos in them).  I also found a few cute ideas for upcoming parties.  Stay tuned :)

JulieBakes got a makeover!

I have to be honest with you.  I haven't loved the layout of the blog for a long time.  I (secretly) wanted polka dots.  It didn't seem like a huge request.  A polka dotted background.  In pink or black, perhaps dark grey, I wasn't married to any particular color.  But I lack the prowess needed to add a background other than those pre-chosen ones on the blogger site.  That was until a conversation with a friend over vacation, in which he informed me that he could make my polka dotted background (and a banner that I had drawn out for him).  He could make my blog template dreams come true!!  I was glad he was up to the challenge, as the morning after we got back from vacation, there it was...in my inbox in a few installments...my dream banner and background.

So, friends, what do you think of this new polka-dotted blog?  Tell me what you think - I love any and all suggestions.

Sunday, February 19, 2012

Granola bars....two ways

I'm leaving for vacation this weekend.  It is, in my humble opinion, way overdue and well deserved.  I ended the week at work with two very long and hard days.  Seven days in the Carribean seems to be just what the doctor, er nurse practitioner, ordered!

Our flight is at 8:30 a.m. on Sunday.  That's early for a Sunday (at least for me, if i'm not working).  Especially when you take into account the amount of time it takes to get to the airport and the amount of time before your flight that you are required to arrive.  I figured some homemade granola bars for breakfast would be a nice treat for those of us going (all 21 of us!). 

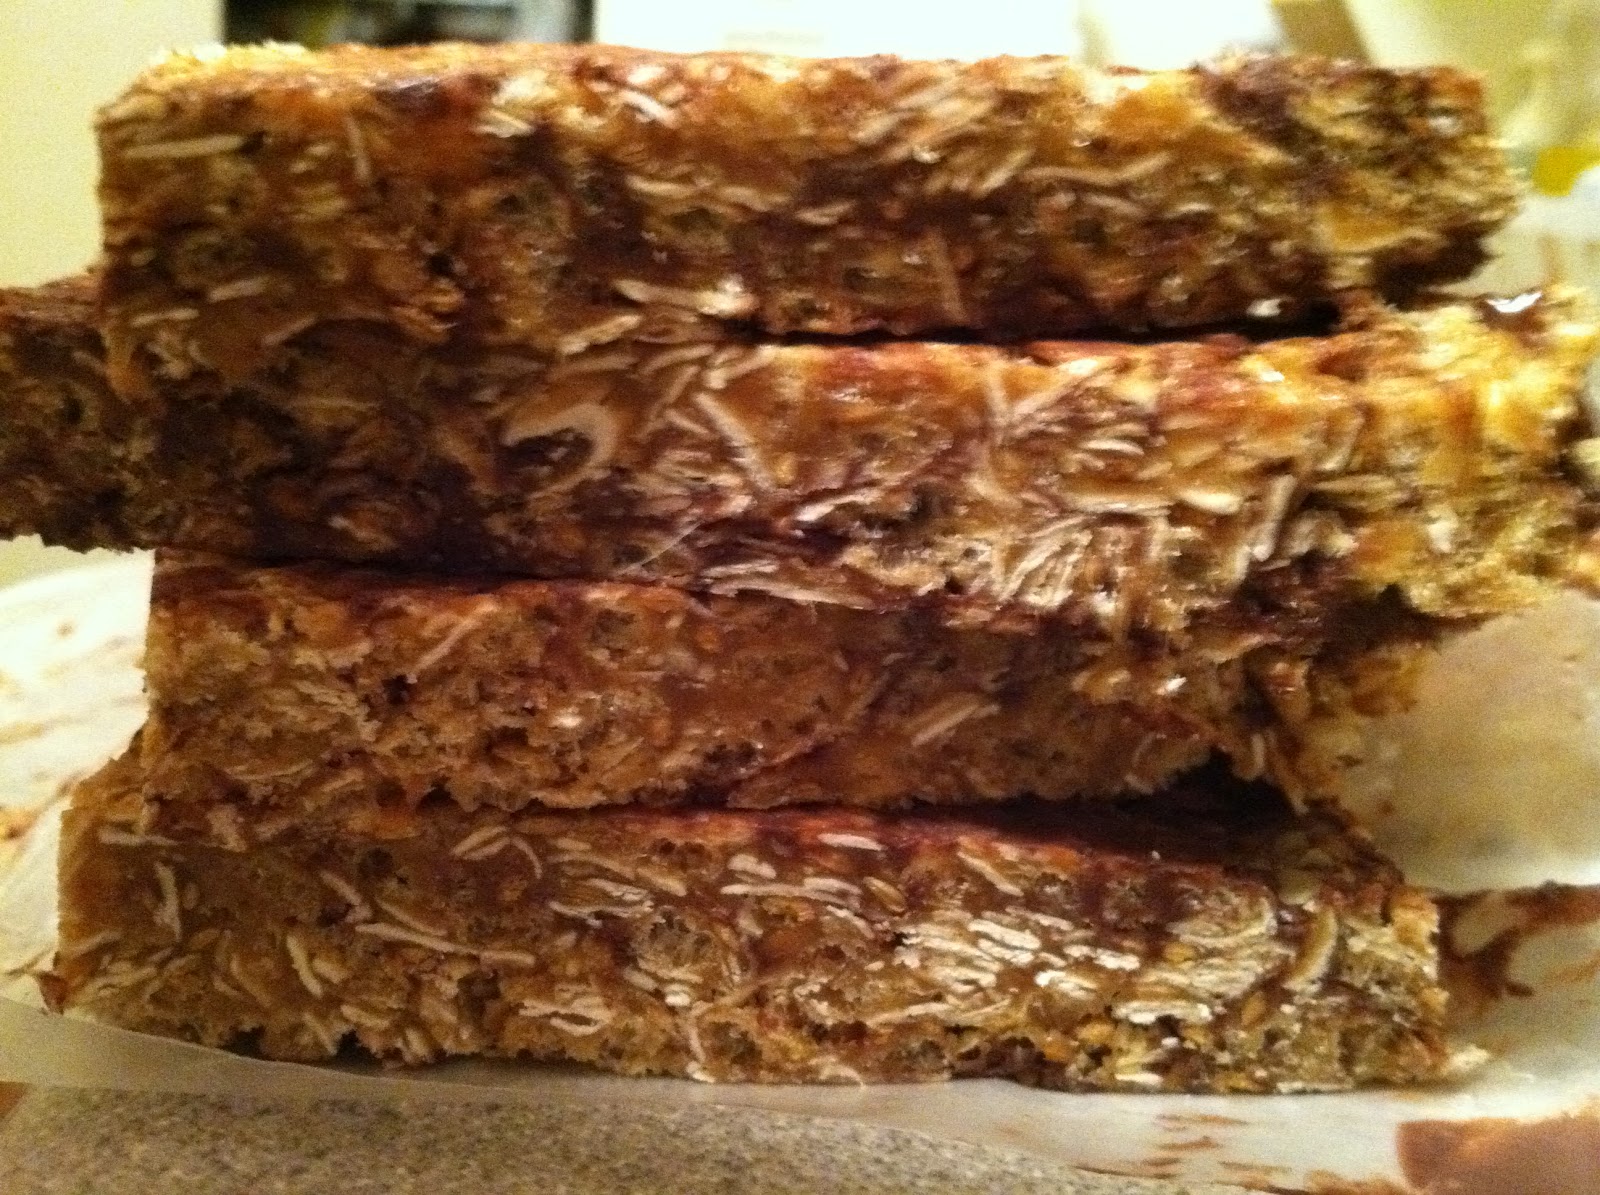
The only issue was what kind of granola bars - fruit-based or chocolate-based.  Eventually, I decided on both of them.  Besides the "add ins" in the granola bars, the recipes did vary.  The majority of the ingredients were the same - oats, honey, brown sugar, wheat germ - and involved mixing the honey and brown sugar over heat and then mixing it with the dry ingredients.  One major difference - the first batch required baking them, whereas the second batch did not (I recommend baking them the full amount of time, as I think I underbaked mine and they were a little crumbly when I was cutting them).  Additionally, the chocolate chip granola bars call for flax and rice krispie cereal.

  
Individually wrapped with wax paper and some twine

  
A mixture of the two types of granola bars all wrapped up :)
Granola Bars with Almonds and Apricots

8 oz (approximately 2 cups) old-fashioned rolled oats
1.5 oz (approximately 1/2 cup) raw sunflower seeds
3 oz (approximately 1 cup) sliced almonds
1.5 oz (approximately 1/2 cup) wheat germ
6 oz (approximately 1/2 cup), honey
1.75 oz (approximately 1/4 cup packed) dark brown sugar
1 oz unsalted butter, plus more to butter the pan
2 tsp vanilla extract
1/2 tsp kosher salt
6.5 oz chopped dried fruit (any combination - Alton Brown recommends apricots, cherries, or blueberries)

(And yes, against my better judgement, I actually WEIGHED the ingredients and didn't measure them out, which would've been SO much easier!)

Directions:
Butter a 9x9" glass baking dish (I used a metal pan, and sprayed it with pam instead of buttering it) and preheat the oven to 350F.
Spread the oats, sunflower seeds, almonds, and wheat germ on a pan.  Toast in the oven for 15 minutes, stirring occasionally.
Combine the honey, brown sugar, butter, vanilla, and salt in a medium saucepan.  Cook until the brown sugar has completely dissolved.
Once the oats are toasted, remove them from the oven.  Decrease the oven temperature to 300F. Immediately add the oat mixture to the liquid mixture, add the dried fruit, and stir to combine.
Pour the mixture into the prepared baking dish and press down, evenly distributing the mixture.
Bake for 25 minutes.
Remove from the oven and allow to cool completely.
Cut into squares (or bars, as I chose to do) and store in an airtight container for up to a week.


1/2 cup of honey or corn syrup (I used honey)
1/2 cup brown sugar
1/2 cup peanut butter
2 cups quick oats
2 cups Rice Krispie cereal (I used Trader Joe's brand) 
1/4 cup ground flax seed (of note, I bought whole flax seeds and had a very hard time grinding them...I advise that you buy the flax seeds ground.  I also assume - though I didn't try (I wish I had) - that using wheat germ in place of the ground flax seeds may work as well)
1 or 2 Tbsp wheat germ
1 c. total of your favorite mix-ins

Directions:
In a small sauce pan, mix honey and/or corn syrup and brown sugar.
Cook over medium-high heat until the sugar is completely dissolved – Stir constantly.
Remove from heat and quickly stir in peanut butter.
Mix the oats, cereal, flax seed, and optional wheat germ in a large bowl.
Pour honey mixture over dry ingredients — mix well.
Stir in chocolate chips or other  "mix-ins" (ie. nuts, dried fruit, or others)
Press mixture into a 9″ x 13″ pan that has been greased or lined with wax paper.
Let cool and harden a little
Cut into bars and store in an air-tight container. 

Friday, February 17, 2012

JulieBakes has a Facebook page

JulieBakes now has a Facebook page!  If you're on Facebook, you should check it out.  Stay tuned for some sneak peaks and upcoming ideas.

Monday, February 13, 2012

Valentine's day cake pops

Valentine's day and chocolate seem to go hand-in-hand, so when deciding what type of Valentine's Day cake pops to make, chocolate seemed like the obvious choice.  So I went with double dark chocolate cake pops dipped in vanilla coating and decorated with Valentine's Day colors and all things heart-shaped.


Happy Valentine's Day!

Check out the cake pops I made last time for the recipe

Saturday, February 11, 2012

Lovin' spoonfuls

Today I came across this cute idea.  It was in a magazine that a patient had left open on the desk in the room when she left.  As I was picking it up to bring it back to the waiting room, I glanced at the opened pages.  There they were, these cute little spoons with chocolate (not to be confused with the chocolate spoons I made before), decorated for Valentine's Day, but I think they could be made for any holiday.  But I'm getting ahead of myself.

I had plenty of Valentine's Day themed decorations at home already, but I bought a few on my way home from work.  Most important of those were conversation hearts.  I loved them when I was a kid.  Back when "fax me" was an up and coming message (ha!  Fax me?  Who OK'd that?).  An added bonus?  I already had red plastic spoons at home, leftover from the Super Bowl, and a few pink ones, too.

These are really easy to make and look great!  Can't wait to try them for other holidays.

Waiting to cool, be put in bags, and tied up.


Lovin' Spoonfuls

Ingredients:

White chocolate
Small Valentine's themed candies
Plastic Spoons
Lollipop bags
Twist ties or ribbon

Directions:

1.  Arrange spoons along the edge of a cookie sheet with a rim, so that the bowls of the spoons are level.
2.  Melt 6 oz of white chocolate for every 8 spoons that you are using.  Melt chocolate in a microwave safe bowl, then transfer to a ziplock bag.
3.  Trim the corner off of the bag and pipe the chocolate into each spoon and gently tap the spoons to level the chocolate.
4.  Sprinkle the candies, sprinkles, and nonpareils. 
5.  Let the chocolate cool completely, then transfer to lollipop bags.  Tie with ribbon or twist ties.

You can include a note stating that the chocolate can be eaten off the spoon or used as a hot cocoa stirrer.