Facebook 1

Showing posts with label Nuts. Show all posts

Thursday, September 25, 2025

Honey Cake

Full disclosure: I don't like honey.  Or honey cake.

But, it's such a traditional Rosh Hashanah dessert.  So this year, after attending a Challah Bake hosted by our local Chabad and featuring Sivan (of Sivan's Kitchen), I did a deep dive into all her recipes.  I already knew I was making her sheetpan cheese burekas for break fast, but then I stumbled on her honey cake recipe.  Since everything Sivan makes looks beyond amazing, I decided to try her recipe.  And I have to amend my previous statement, since I really enjoyed her honey cake.


Not to mention my nearly-99 year old grandfather called my mom after the meal and raved about both cakes I baked (more on the other one later), and asked her to make sure she saved some for him the following day.  Even my boys loved it - especially my pickier one, who had a second serving!

Because this cake is pareve (read: no dairy), it was a dream to whip up, since there was no waiting for butter to come to room temperature (the bottle neck to all my baking).  It's actually so easy to make that I whipped this up after I put my kids to bed.

Traditionally, I've seen honey cakes baked in loaf pans.  I wanted mine to be a bundt cake, so I found some brown and gold paper bundt pans to bake them in.  I divided the recipe in half and baked it in two pans.  They came out perfect!

Of note, I did not drizzle/brush the cake with honey.  I simply forgot, and only realized after I had already served it.

Regardless, this cake is a keeper!

Sivan's Honey Cake
From Sivan's Kitchen

Ingredients:

1 cup brown sugar

3 large eggs, room temp

3/4 cup neutral oil - avocado, grapeseed, or canola (I used vegetable oil, since that's what I had)

1 cup honey

2.5 cups flour

2 tsp cinnamon

3/4 Tbsp baking powder (now that I'm typing this up, I'm fairly certain I used 3/4 TEASPOON...)

1 tsp baking soda

1 cup strong black tea (Early Grey or English Breakfast, regular or decaf)

1/2 cup sliced raw almonds


For the drizzle: honey


Directions:

Make your tea: brew 1 cup of tea using 2 tea bags.  
Let steep until dark in color, then set aside to cool.

Preheat oven to 350F.

Whisk the eggs in a large mixing bowl until frothy. 
Gradually add the sugar, whisking continuously until well combined.

Pro tip: Measure the oil first, then the honey.  This helps the honey slide out easily.

Gradually whisk the oil into the egg mixture.
Then add the honey.

Sift the flour directly into the wet ingredients.
Mix until just combined.
Sift in the baking powder, baking soda, and cinnamon.
Mix thoroughly to ensure everything is well incorporated.
(I was lazy and sifted all the dry ingredients in at once...)

Slowly pour the cooled tea into the batter, mixing gently until the batter is smooth.

Grease your chosen pan with nonstick spray.
Pour the batter into the prepared pans.
Tap the pan on the counter a few times to release any air bubbles.

Evenly sprinkle the sliced almonds on top of the batter.

Bake for 35-40 minutes or until a toothpick inserted in the center of the cake comes out clean.

Let cake cool completely.
Drizzle with honey or brush with melted honey before serving.

Optional: you can add chopped nuts if you'd like.  Fold 1/2 cup chopped nuts into batter before baking.

Thursday, November 24, 2016

Rosemary, pecan, and parmesan cookies

I can see you. Through the computer. With that quizzical look. Rosemary + Parmesan, in a cookie?  She's for sure lost it this time.


But I haven't.  Nor has the creator of this cookie, Dorie Greenspan. (She's kinda like THE cookie goddess, if you don't know who she is.)  Nor has the person who recommended them to me, and told me that despite all the Thanksgiving baking I still had left to do, these cookies definitely needed to be made. 


These cookies are savory -- a savory shortbread, almost closer to a cracker, with a fine crumb (they're so crumbly, but in the best way possible) and just the teensiest hint of sweetness.  So much so that they're called -- get this -- cocktail cookies!  Not in the sense that there's booze in them (how can we make that happen?!), but in the sense that you eat them with booze.  White wine was mentioned somewhere, so was some champagne.  I could definitely get on board with that!

So yeah, these cookies.  It's probably too late for you to make them for this Thanksgiving, but Christmas is right around the corner....so is New Year's...or just any random Friday (or Tuesday) night!

A few thoughts about these cookies:

- They come together super easily!  Like all in the bowl of a food processor. No warming of the butter to room temperature.  Literally a few whirls in the food processor. That's it, people!
- Please, freshly grate your Parmesan. Don't use the stuff from the container from the grocery store.  I just feel like the freshly grated stuff is worlds better when it comes to baking.
- I'm toying with the idea of adding a few grinds of fresh black pepper next time.  I might also up the cheese just a little bit. 
- Lastly, don't be lazy like yours truly. Not wanting to take out your food processor because it's in the back of the cabinet behind a lot of other stuff is a pathetic reason to half the recipe so that you can use your mini-prep (which is way more accessible), yielding half as many delicious cookies, and just necessitating that you make another batch sooner.

Rosemary-Parmesan Shortbread Cookies
These were recommended to me by a friend, who has Dorie's new cookbook.  She even sent me pictures of the recipe from the book, but the flash got in the way, so a not-so-quick, very specific internet search yielded me the recipe linked above.

For a more crumbly texture, Dorie recommends not grating your cheese too fine.

Yields about 60 cookies

Ingredients:

3 Tbsp granualted sugar
2 tbsp fresh rosemary, minced
2 cups all purpose flour
1/2 cup pecans, toasted
1/3 cup Parmesan, grated and lightly packed
1/2 tsp fine sea salt
2 sticks (8 oz) unsalted butter, chilled and cut into small chunks
1 large egg yolk, lightly beaten

Special tools:
1.5" round cookie cutter

Instructions:

Season the sugar:
Working in a small bowl, run the sugar and rosemary together with your fingertips until the sugar turns moist, aromatic, and maybe even tinged green (mine was not green, and my fingers killed from all the mixing, so I left mine aromatic and moist, but still white)

Toast the pecans:
I did mine in a toasted at 400F.  
Watch closely, mine took about 5 minutes.  
Do not let them burn 

Prepare the dough:

Combine the flour, pecans, Parmesan, salt, and rosemary sugar in a food processor.
Pulse to blend.
Add in the pieces of cold butter.
Pulse until the mixture turns crumbly.
Slowly and gradually pulse in the beaten egg yolk.
Then continue to pulse the mixture until it turns to a moist dough that forms clumps and curds.

Roll the dough:

Turn the dough out and divide it in half.
Pat each half into a disk.
Working with one disk at a time, place the dough between two sheets of parchment paper.
Roll the dough out to a 1/4-inch thickness.
Repeat with the other half.
Without removing the parchment paper, slide both disks onto a baking sheet -- you can stack them -- and freeze for at least 1 hour.  (Freeze?  Haha.  My freezer is FULL TO THE MAX.  Literally.  I could not fit a baking sheet into it if I tried.  So I refrigerated mine overnight.)

Position your oven rack to the center of your oven.
Preheat to 350F.
Line a baking sheet with parchment paper or a silicon baking mat.
Have your cookie cutter on hand.

Cut the cookies:
Working with one slab of dough at a time, peel away the top sheet of parchment paper.
Use the cookie cutter to cut out as many circles as you can.
Transfer them to the prepared baking sheet.
Leave about 1 inch between cookies.
Combine the scraps from both portions of dough.
Re-roll the dough.
Freeze and repeat the process with the remaining dough.
Always make sure that you start with a cool baking sheet.

Bake the cookies, for about 15 minutes, or once they turn golden and have set.
Rotate your baking sheet 180 degrees halfway through the baking time.
Once done, let the cookies rest on the baking sheet for 3 minutes and then transfer them to a rack to cool completely.
Bake the remaining cookies.

To store:
If wrapped well, the rolled out dough can be frozen and stored for up to 2 months.
Simply cut out the dough and bake directly from the freezer.
Baked cookies can be kept in a covered container for up to 1 week at room temperature.

Serve with a crisp glass of white wine or champagne.  (or the whole bottle....this is a no judgement zone!)

Sunday, November 20, 2016

Pumpkin spice candied nuts

At my grandfather's 90th birthday (!!) celebration last night, my aunt (who hosts Thanksgiving) asked me if I was baking anything for Thanksgiving.  Of course, the answer was yes!  I asked her what she wants, and I heard the most beautiful words ever: "you have free reign."  As in I can bake whatever I want!  And what's even more, my cousin (whom I love dearly, and we will all miss at Thanksgiving dinner) with the nut allergy won't be there, I can really bake anything!


Like these nuts.

OK, OK, they don't technically fall under "baking," however they do go in the oven, so they are technically baked.

I had been toying with the idea of making some pumpkin spice candied nuts for a while.  But as you probably know, I'm not a huge fan of pumpkin spice.  And when I came home and got ready to bake them, the pumpkin spice mix I thought I had at home was nowhere to be seen.  So with that little snafu (combined with the fact that my Trader Joe's was out of pumpkin spice, too!) as my disdain for pumpkin spice flavors, I made these candied nuts with a combination of spices found in pumpkin spice, but not all of them.  Which is fine for me, since the missing spices are actually the spices I don't like in pumpkin spice flavored foods and drinks.

I chose to package these nuts in a clear cube box (meant for cupcakes).  With a nice bow and cute hanging tag, they'd be a perfect holiday hostess gift...or gift for the pumpkin spice lover in your life!

Pumpkin Spice Candied Nuts
Adapted from these candied cinnamon sugar nuts

Ingredients:

6 cups of nuts (I used mixed nuts.  I wanted to make sure to have some pecans in it, since I think pumpkin pie and pecan pie are synonymous with Thanksgiving.  After devouring half the recipe, B and I decided that the pecans were the best part.  No one would fault you if you went ALL pecans or half pecans and half other nuts.)
2 egg whites
2 Tbsp water
2 cups granulated sugar
2 1/2 teaspoons ground cinnamon
1/2 tsp ground ginger
1/2 tsp ground nutmeg
2 tsp salt

Optional (if you want to really make them "pumpkin spice"-y):

pinch of ground allspice
pinch of ground cloves

Directions:

Preheat the oven to 300F.
Line two large baking sheets with parchment paper or a silicon baking mat.
Spray with non-stick spray (if using parchment paper).
Set aside.

Mix nuts in a large bowl.
Set aside.

Using an electric mixer, beat egg whites and water on medium-high speed until still peaks form, about 4-5 minutes.
Add the sugar, cinnamon, nutmeg, ginger, and salt.
Stir until well combined.

Pour sugar mixture over nuts.
Stir to coat completely.
Spread nuts over the baking sheets.
Bake for 45 minutes, stirring every 15 minutes.

Allow to cool completely.
Enjoy.

Store nuts at room temperature, covered.

Saturday, October 1, 2016

Fresh apple cake with honey glaze

Every Rosh Hashana, I debate for a second or two about making a non-apple dessert.  But, alas, I always end up with an apple centered dessert.  Four years ago I made an apple pizza, something I remember distinctly, since it was right after B and I met. But I digress...


This apple cake appealed to me for two reasons.  First off, it has a honey glaze.  Honey.  The other big sweet food for Rosh Hashana.  Apples and honey are used to symbolize the beginning of a sweet new year (choruses of the kids Rosh Hashana song are ringing in my head now...."dip the apples in the honey...have a happy sweet new year"). Secondly, it's a bundt cake.  Bundt cakes are, in my opinion, way easier to transport than a beautiful layer cake. And considering that my apple cake is going from downtown Manhattan to Brooklyn (via a 2.5 mile walk) and then back up to midtown Manhattan, before a train ride to Westchester, I figured a dessert that was less likely to be demolished en route was a nice option. 

The one change I made to the cake was that I cut the oil down and replaced it with some apple sauce.  Given the fact that we'll be eating a super huge meal (my mom's brisket....OMG I'm drooling just thinking about it!), plus the added apple flavor from the apple sauce, I thought that it would be a nice addition!

Paula Deen's Uncle Bob's Fresh Apple Cake
From Food Newtork

Ingredients:

For the Honey Glaze:

1 cup confectioner's sugar
2 Tbsp honey
2 Tbsp milk

For the Apple Cake:

3 cups diced peeled Granny Smith apples, about 2 apples (I needed 2.5 apples)
1 cup lightly toasted chopped walnuts
2 tsp vanilla extract
2 tsp ground cinnamon
3 cups all purpose flour
1 tsp baking soda
1 tsp salt
2 cups sugar
1 1/4 cups vegetable oil (I used 3/4 cups apple sauce and 1/2 cup canola oil)
3 eggs

Directions:

Make the glaze:

Add all the glaze ingredients to a small bowl and stir until smooth.
Set the bowl aside.

Make the cake:

Preheat the oven to 325F.
Lightly grease a bundt or tube pan.  I debated flouring it afterwards but decided against it since the recipe didn't say.  My cake got stuck when I tried taking it out and actually broke.  So I instantly regretted not flouring the pan.  I recommend you do so.

Toast the walnuts.
Let cool.

In a bowl, mix together the apples, walnuts, vanilla, and cinnamon.
In a separate bowl, sift together the flour, baking soda, and salt.

Using an electric mixer, beat together the sugar, oil, apple sauce, and eggs in a large bowl.
Add in the dry ingredients.
Beat until completely combined.
Fold in the apple mixture.

Scrape the batter into the prepared pan.
Bake for 1 hour and 30 minutes or until a tester inserted into the middle of the cake comes out clean.  Mine was done after about 1 hour and 15 minutes.  I'd say start watching after an hour.

Allow the cake to fully cool in the pan, about 1 hour.
Turn the cake out onto a plate.

Drizzle the cake with some honey glaze before serving.

The cake can be wrapped tightly and stored in the fridge for 3-5 days.

Thursday, July 28, 2016

Tiki party mix

For B's birthday, I decided I'd throw together a little impromptu tiki party on our roof deck.  Although it wasn't really that impromptu -- I had put A LOT of thought into almost every detail.  Pineapples, palm trees, and flamingos adorned most everything, and the color theme was mainly pink, yellow, and green to reflect those things. Matching sprinkles.  Pineapple and shark ceramic glasses (but no actual tiki glasses...go figure!).  Ok, so maybe more casual than impromptu. Poor word choice, Julie!


I let my creative juices flow in terms of decor (floating flamingo drink holders, leis, and mini beach balls) and desserts/baking (pina colada marshmallows, pineapple and palm tree chocolate lollipops), and let my trusty friend Trader Joe do most of the catering (I went with tropical/Polynesian themed foods -- coconut shrimp, scallion pancakes, mini meatballs, chicken lemongrass spring rolls, edamame, shrimp toasts -- but ended up serving only about half of those things). B, my resident bartender extraordinaire, mixed up his signature pineapple and mezcal cocktail, among others!  One more place I let my creativity shine through?  This tropical themed snack mix!

I have to say, sometimes I impress myself!  I went with traditional tropical and Polynesian flavors - coconut, mango, pineapple, macadamia, and banana (I was thinking about adding in some sesame sticks for a salty component, but decided to leave them out). Talk about addictive!  I'm so glad I made a huge batch!!


Tiki Snack Mix
A JulieBakes Original!

Ingredients:

1/2 cup roasted coconut chips
1/2 cup banana chips
1 cup dried baby sweet pineapple (unsweetened), cut into 1/4s (larger rings cut into 1/6s)
1/4 cup lightly sweetened coconut strips, cut into 1/4 inch pieces
1/2 cup dried unsweetened mango, cut into 1/2 inch pieces
1 cup roasted macadamia nuts (I used unsalted, but salted would be good, too.).

Directions:

Cut dried fruit into the sizes mentioned above.
Add them all to a gallon sized zip lock bag.
Shake up until well mixed.

Add to the serving bowl of your choice (I used a plastic coconut drink holder to keep with the theme).
Extra snack mix (if there should even be any), can be stored in the ziplock bag.

Tuesday, April 26, 2016

Flourless blueberry almond muffins (Kosher for Passover)

Passover is here!  While some people I know (whose names will not be mentioned, but they know who they are) lament over the lack of food options during Passover.  Some might even say they *whine* about it.  But I digress.  Bottom line is: food options are limited.  However, one can at least attempt to make lemons out of lemonade, as I have tried.


First off, in a #juliebakesgoessavory endeavor, I made almond crusted chicken fingers for dinner the other night (check it out on my instagram feed).  Then I saw a recipe for Kosher for Passover Almond-Bluberry Muffins, and thought that (a) they sounded delicious, (b) B would love them, and (c) I already had almond meal on hand from the chicken fingers!


I made a few adjustments given what I had at home (Turbinado sugar instead of demerara, sweetened (cinnamon) applesauce instead of unsweetened, and slivered almonds instead of sliced), but they turned out absolutely delicious.  Just a heads up -- I followed the directions and ended up filling the 12 muffin tins and still had enough leftover batter to make 4 more muffins!

And an added bonus?  They're totally gluten-free (or at least can be made that way).  I don't do much gluten-free baking, but between the almond meal and coconut flour I picked up recently, I'm sure I could get int it a little more...

Hope everyone has a wonderful Passover!

Flourless Almond-Blueberry Muffins
(Kosher for Passover, and can be made gluten-free!)
From Epicurious

Ingredients:

2.5 cups almond meal
1 tsp ground cinnamon
5 large eggs, separated
1/3 cup granulated sugar
1 tsp vanilla extract
1/2 cup unsweetened apple sauce
1/2 tsp kosher salt (crushed between your fingers as you add it)
1/2 pint (about 1 1/3 cups)
Sliced almonds (for sprinkling)
Demerara or raw sugar (for sprinkling)

Directions:

Preheat the oven to 350F.
Line a standard 12-cup muffin pan with paper liners (keep a few extra liners around, in case you have extra batter).
Whisk almond meal and cinnamon in a medium bowl.
Set aside.

Using an electric mixer on high speed, beat egg yolks, granulated sugar, and vanilla in a large bowl until pale and doubled in size, about 3 minutes.
Add almond meal mixture and apple sauce.
Stir just to combine.

In another bowl: use an electric mixer on high speed to beat the egg whites and salt (crushing it between your fingers as you add it to the egg whites) until stiff peaks form, about 3 minutes.
Add half of the egg white mixture to the almond meal mixture.
Fold to combine.
Then add remaining egg white mixture.
Fold to combine.
Gently fold in blueberries.

Divide the batter among muffin cups (I filled mine full and then had enough batter to make 4 more muffins).
Top with almonds and demerara sugar.

Bake muffins until tops are golden brown and a tester inserted into the center comes out clean, about 30 minutes (mine took 25 minutes).
Transfer to a wire rack.
Let cool in pan for at least 10 minutes before serving.

*They can be made 3 days ahead.

Monday, October 12, 2015

Salted caramel popcorn

I can't be the only one who has had one of these moments in the kitchen.  You're following a recipe to a T and then all of a sudden you have an 'oh crap' (I usually use a different four-letter word) moment.  Where you fear something has gone terribly wrong (and it usually has)?  Like the burning caramel in the bottom of the pot.  Well in this case, it was what I thought was burnt caramel and actually wasn't (or maybe it was?  As compared to the popcorn in the original post, my caramel is way darker).  But I ended up pouring some of what I thought was burnt caramel out, and my popcorn didn't get totally and completely covered in delicious salted caramel. Which is actually ok.  But I was more impressed with my disaster-averted.


But let me get back to this salted caramel popcorn.  Because first, it's the best combination of salty and sweet.  And secondly, it's really easy (as long as you don't burn the caramel)!


I ended up seeing mimi popcorn kernels on the shelf at the supermarket and I decided that they would probably be the best for caramel popcorn since their surface area to popcorn ratio was high -- meaning more caramel per kernel for a better bite. B thought that I had overthought the popcorn size, but I guess that's the science nerd in me coming out.  Plus, he got a tastier popcorn so I really don't think anyone lost out on this deal!


Salted Caramel Popcorn
From Cookies & Cups

Ingredients:

1/2 cup unpopped popcorn kernels (about 16 cups popped corn)
1 cup salted butter
1 cup light brown sugar
1/3 cup light corn syrup
1.5-2 tsp kosher or sea salt, divided
2 cups of nuts, optional

Directions:

Preheat oven to 300F.

Line a large baking sheet with parchment paper or a silicone mat.
Set aside.

Pop popcorn kernels using air popper into a large bowl (I don't have an air popper, and popping it the old fashioned way in a pan with a little bit of oil worked nicely...just move it to a bowl before proceeding).
If using nuts, add them here.

In a small sauce pan, melt the butter, brown sugar, corn syrup, and 1 tsp of salt together of medium heat.
Bring to a boil.
Boil for 4 minutes without stirring.

Pour caramel mixture over popcorn.
Stir to coat evenly.

Pour popcorn onto lined pan.
Sprinkle remaining salt on top (I skipped this part).
Place pan in the oven.
Bake for 30 minutes, stirring every 10 minutes.

Allow popcorn to cool on a parchment lined counter.

Sunday, March 1, 2015

"Coconut Ranger" cookies

When, while scrolling through my Facebook feed the other day, I came across these cookies.  Immediately, I turned to B and said "these cookies have your name written all over them."  He looked at me quizzically and I explained to him that they had coconut, toffee, and almonds in them, and then he seemed to agree.  I don't remember if he asked me to bake them or if I had already committed myself to baking them, but the next day I left work and went straight to the store to get the ingredients.  It didn't hurt that I was annoyed and I find baking to be therapeutic, so cookie baking that night sounded like a damn good idea!  The only problem I could come up with these cookies was that you have to wait at least 8 hours from when you make the dough till you bake them.  EIGHT HOURS! (Confession: I got 32 cookies worth of dough but only had space for 30 cookies on the tray to put in the fridge, so I baked up the last two after, gulp, not even 8 minutes in the fridge.  And they were goooooood!!)


So when I actually got around to baking these cookies the following day, I baked up a bunch (and then froze the remaining dough for when I wanted a cookie fix and didn't have at least 8 hours to wait for one).  Then, I brought some with me when I met up with friends that night and then also brought some to B.  The response was, across the boards, a resounding "these are awesome!!"

Coconut Ranger Cookies 
Originally from Royal Carribean, recipe found on Chocolate, Chocolate and More

Ingredients:

1/2 cup butter, at room temperature
1 cup Heath Toffee bits (plain toffee, not the ones with the milk chocolate)
1/2 cup sugar
1/2 cup brown sugar
1 tsp vanilla extract
1 egg
1 egg yolk
2 cups all purpose flour
3/4 tsp baking soda
1/2 tsp salt
1/4 cup finely chopped almonds
2 Tbsp Cream of Coconut (Coco Lopez or Goya)
2 1/4 cups sweetened shredded flaked coconut

Directions:

Beat together the butter, toffee bits, and both sugars until light and fluffy.
Add in the egg, egg yolk, and vanilla.
Beat well.

In another bowl, combine the flour, baking soda, and salt.
Gradually add to the butter mixture, until combined.
Add in the chopped almonds, cream of coconut, and shredded coconut.
Mix until fully incorporated.

Line a baking sheet with parchment paper or wax paper.
Use a medium cookie scoop or a spoon, then shape into balls.
Place on the prepared sheet and then flatten to about 1/2 inch thick.
Cover with plastic wrap.
Refrigerate dough overnight, or at least 8 hours.

When ready to bake, preheat oven to 325F.
Place cookies on a baking sheet (I used a parchment lined sheet), 2-3 inches apart.
Cookies will spread.
Bake in oven for 12-14 minutes, just until edges start to turn brown (it's OK if they look a little raw in the center....they actually are supposed to).

Remove from oven and let cookies rest on baking tray for 10 minutes to finish baking.
Remove from baking sheet and place on cooling racks to cool completely.

Monday, February 23, 2015

Browned butter, white chocolate chip, and macadamia nut cookies

I've been a bit hooked on browned butter lately.  It's a bit insane, really, but it's just soooo good and it elevates the taste of so many things, so I've been sticking with using it.  Sue me.  But honestly you won't want to when you try these decadently delicious cookies!


I made these cookies mini because, well, I think mini is adorable -- but also because they're so rich that one or two mini cookies is all you really need.  (But no one would fault you if you grabbed for another few cookies....)


Pardon my odd, sparkly nail polish in the above picture, please.  But look at those cookies.  Mini.  Packed with mini white chocolate chips.  And some raw and toasted macadamia nuts for a depth of flavor....before we even start talking about the butter.  Browned perfectly in the pan and then left to cool.  Adding another layer of slightly nutty, deliciously buttery deliciousness to these cookies.

Browned Butter, White Chocolate Chip, & Macadamia Nut Cookies
Adapted from the Toll House Cookie Recipe

Ingredients:

2 1/4 cups all purpose flour
1 tsp baking soda
1 tsp salt
1 cup (2 sticks) unsalted butter, browned and cooled
3/4 cup granulated sugar
3/4 cup packed light brown sugar
1 tsp vanilla extract
2 large eggs
1 1/2 cups mini white chocolate chips or 2 cups regular-sized white chocolate chips
1 cup chopped macadamia nuts, about 1/2 to 3/4 cups toasted

Directions:

Preheat the oven to 375F.
Line a baking sheet with parchment paper.

Brown the butter in a sautee pan over medium low heat until browned.
Watch carefully so that it does not burn.
Pour into a bowl and allow to cool.
You can put the butter in the fridge to cool, but make sure that it doesn't resolidify.

Measure out the nuts.
Remove about 1/4 - 1/3 of a cup and chop them raw.
Toast the remaining nuts in the oven set at 350F until just light brown and fragrant -- watch them carefully!! as they go from perfect to burnt very quickly.
Allow to cool.
Chop the toasted nuts.
Combine all the nuts in a small bowl.
Set aside.

Combine the flour, baking soda, and salt in a small bowl.
Beat the cooled butter, granulated sugar, brown sugar, and vanilla extract.

Add the eggs, one at a time, beating well after each addition.
Gradually beat in the flour mixture.
Stir in the white chocolate chips and macadamia nuts (both raw and toasted).

Drop by rounded teaspoon onto the prepared sheet.

Bake for 8-10 minutes or until golden brown.
Cool on baking sheets for 2 minutes.
Remove cookies from a wire rack and allow to cool completely (if you can even wait that long!).

Wednesday, February 11, 2015

Browned butter blondies

The other day B and I had a relatively low key day.  We got up and picked up some coffee (and a donut)....walked up a little and then all the way across town to get, yup, another donut.  Walking back across town, we stopped at my most favorite cheese shop in Little Italy and bought provisions for dinner that night, then ended up at Whole Foods to buy the rest of the dinner stuff and some stuff for me to make blondies...because clearly after two donuts (I guess it was technically one each, but still), baking anything is clearly the logical thing to do...

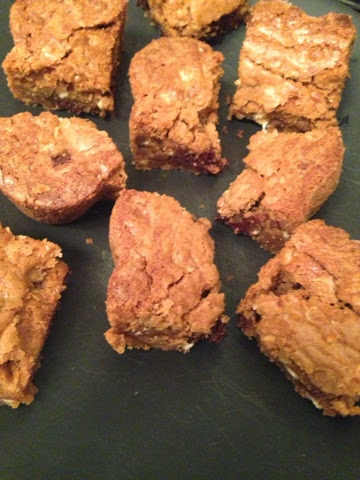
See, I had been copying down A LOT of recipes that I had been coming across lately, and one of them was for blondies.  They were touted as being some of -- if not -- the best out there, so I figured I'd take a stab at them.  Except I don't like nuts in my baked goods, so I left those out.  And ever since I made those browned butter brown sugar cookies, I've been more than a wee bit obsessed with browned butter...and since these blondies called for melted butter anyway, I figured why not brown the butter, too?  Which was, frankly, a delicious idea!


I wanted my blondies a little thicker than the recipe called for, so I made mine in an 9 x 9 inch pan, and then left out some of the batter (to attempt something, which didn't work out exactly as I had hoped).  This yielded a chewy, thick, delicious blondie!  So delicious and rich, in fact, that I had to send the rest of the pan to work with B to get them out of the apartment!


Browned Butter Blondies
Adapted from Cook's Illustrated, Found at Food52.com

Ingredients:

1.5 cups unbleached all purpose flour
1 tsp baking powder
1/2 tsp table salt
12 Tbsp unsalted butter (1 1/2 sticks), melted, browned, and cooled
1.5 cups packed light brown sugar
2 large eggs, lightly beaten
4 tsp (yup, you read that right!) vanilla extract
6-8 oz white chocolate chips (1 cup) or chopped bar, or 3-4 oz each white chocolate chips and semisweet chocolate chips (use smaller amounts if using nuts; if leaving out the nuts, use the higher amounts)

1 cup pecans or walnuts (4 oz), optional

Directions:

If using nuts, put the oven rack in the middle of the oven.
Preheat to 350F,
Spread nuts on a large rimmed baking sheet and bake until deep golden brown, 10-15 minutes.
Transfer to cutting board to cool.
Chop coarsely and set aside.

While the nuts toast, line a 9x13 inch baking pan with foil, leaving enough overhand to help you lift the blondies out of the pan when they're done.
Grease the foil-lined pain with butter or oil.

Whisk flour, baking powder, and salt together in a medium bowl.
Set aside.

Whisk browned butter and brown sugar together in a medium bowl until combined.
Add eggs and vanilla.
Mix well.
Using a rubber spatula, fold in the dry ingredients until just combined -- do not overmix.
Fold in chocolate (and nuts, if using....I did not).
Turn batter into prepared pan, smoothing top with a rubber spatula.

Bake until top is shiny, cracked, and light golden brown, 22-25 minutes.
Do not overbake.
Cool on a wire rack until room temperature.
Remove bars from pan by lifting by foil overhang.
Transfer to cutting board.
Cut into 2 inch squares and serve.

Friday, July 25, 2014

Birthday sticky buns

Last year I made a week of birthday treats leading up to my birthday.  This year?  Well....that's not happening.


Honestly, I'm feeling kinda "blah" about the day.  I can't really put my finger on why.  I did want to bake something for my birthday, but the weekend before I couldn't come up with anything to bake.  So with just 5 days until my birthday, I was not only without a birthday treat, but without an idea of even what to bake!

 (before and after the second 'proofing')

This lead to sleepless nights*, which lead to late-night TV watching, which lead to a fluke encounter...and my birthday treat inspiration!  (* I wasn't sleepless because of the thought of not having something to bake, rather I was just up late one night watching the Cooking Channel, but it sounded so much more dramatic the first way.)  While I was mindlessly watching TV, I heard Bobby Flay talking about the best sticky buns he had ever had.  I was intrigued.  Then they had the baker talking about them. She makes something called a "goo" for her sticky buns. Goo!  How fun!!  The only thing that didn't sell me 100%?  They had pecans.  You know me - not a fan of nuts in my baked goods - but then I saw one. Gorgeously golden, covered in a homemade caramel "goo."  I.  Was.  Sold!  Happy birthday to me!


Oh, and was it ever!! These sticky buns are heavenly.  No doubt partially related to the insane amounts of butter, but also that goo!!    Definitely got me out of my birthday funk long enough to enjoy one (...or two...or three...) of these!!

A thing about this recipe....it calls for enough dough to make double the buns but only one batch of goo.  This leaves you with options, people, plenty of good options.  

1. You can half the dough recipe (clearly the worst of the options...why half it?!).
2. You can make a full dough recipe and then freeze half for up to a week or use it for something else.  Not your best option, but clearly no one would fault you for that.
3. You can double up on the goo recipe, and make a double batch.  Because clearly extra brown sugar, butter, and cream are all good things!
4. You can make a full batch of the dough, make it into a double batch of buns, and then freeze half of them for up to a week!  Then defrost them in the fridge the night before and then bake them up "fresh" the next morning.  This is the only way my loved ones are gonna get freshly baked sticky buns in the morning.  I'm betting I'm not going to hear any complaints! (And in case you haven't already guessed, option 4 was my choice, but option #3 was a close second!)

Flour's Famous Sticky Buns
I heard about 'em on TV, and googled the recipe

Ingredients:

For the goo:

1.5 sticks unsalted butter
1.5 cups firmly packed light brown sugar
1/3 cup honey
1/3 cup cream
1/3 cup water
1/4 tsp kosher salt

For the brioche dough:
(makes a double recipe.  See above)

2.5 cups all purpose flour, plus more if needed
2.25 cups bread flour (I used whole wheat, since that's what the store had....which makes them totally healthy, right?  ;-))
1.5 packages (3 1/4 tsp) active dry yeast
1/3 cup plus 1 Tbsp sugar
1 Tbsp kosher salt
1/2 cup cold water
5 eggs
1 3/8 cups (2 3/4 sticks) unsalted butter, at room temperature, cut into 10-12 pieces

For the filling:

1/4 cup light brown sugar
1/4 cup granulated sugar
1/8 teaspoon ground cinnamon
1 cup pecan halves, toasted and chopped, divided

Directions:

Start by making the brioche dough.

Using a stand mixer fitted with the dough hook, combine the flours, yeast, sugar, salt, water, and eggs.
Beat on low speed for 3-4 minutes or until all ingredients are combined.
Stop the miser as needed to scrape the sides and bottom of the bowl to make sure all the flour is incorporated into the wet ingredients.
Once the dough has come together, beat on low for another 3-4 minutes.
The dough will be very stiff and seem quite dry.

With the mixer on low speech, add the butter one piece at a time, mixing after each addition until it disappears into the dough (each addition took a long time for me).
Continue mixing on low speed for about 10 minutes, stopping the mixer occasionally to scrape the sides and bottom of the bowl.
It is important for all the butter to be thoroughly mixed into the dough.  If necessary, stop the mixer occasionally and break up the dough with your hands to help mix in the butter.

Once the butter is completely incorporated, turn up the speech to medium and beat until the dough becomes sticky, soft, and somewhat shiny, another 15 minutes.
It will take some time to come together -- it will look shaggy and questionable at the start and eventually it will turn smooth and silky.
Turn the speed to medium-high and beat for about 1 minute.  You should hear the dough make a slap-slap-slap sound as it hits the sides of the bowl.
Test the dough by pulling at it: it should stretch a bit and have a little give.  If it seems wet and loose and more like a batter than a dough, add a few Tbsp of flour and mix until it comes together.  If it breaks off into pieces when you pull at it, continue to mix on medium speed for another 2-3 minutes or until it develops more strength and stretches when you grab it.
It is ready when you can gather it all together and pick it up in 1 piece.

Put the dough in a large bowl or plastic container and cover it with plastic wrap, pressing the wrap directly onto the surface of dough.
Let the dough proof in the fridge for at least 6 hours or up to overnight.
**At this point you can freeze the dough in an airtight container for up to 1 week.

Next, make the goo.

In a medium saucepan, melt the butter over medium heat.
Whisk in the brown sugar and cook, stirring, to combine (it may look separated, that's OK).
Remove from the heat and whisk in the honey, cream, water, and salt.
Strain to remove any undissolved lumps of brown sugar.
Let cool for about 30 minutes, or until cooled to room temperature.
You should have about 3 cups (I got just over two cups).
** The goo can be made up to 2 weeks in advance and stored in an airtight container in the fridge.

Toast the pecans.
I did this in a 400 degree oven for about 5 minutes.  
Watch them carefully to make sure they don't burn!
Let cool to room temperature.
Chop the nuts.
Divide into 2 half cups portions.

Using half the dough, roll it out on a floured work surface into a rectangle about 12 x 16 inches and 1/4-inch thick.
It will have the consistency of cold, damp Play-Doh and should be fairly easy to roll.
Position the rectangle so that a short side is facing you.

In a small bowl, stir together the sugars, cinnamon, and a half cup of the toasted pecans.
Sprinkle this mixture evenly on top of the entire surface of the dough.
Starting from the short side farthest from you and working your way down, roll up the rectangle like a jelly roll.
Try to roll tightly so that you have a nice round spiral.
Trim off about 1/4 inch from each end of the roll to make them even.

Use a bench scraper or chef's knife to cut the roll into 8 equal pieces, each above 1.5 inches wide.
** At this point, the unbaked buns can be tightly wrapped in plastic wrap and frozen up to 1 week.  When ready to bake, thaw them -- still in the plastic wrap -- in the fridge overnight or at room temperature for 2-3 hours, then proceed as directed below:

Pour the goo into a 9 x 13 inch baking dish, covering the bottom evenly.
Sprinkle the remaining 1/2 cup of pecans evenly over the surface.
Arrange the buns, evenly spaced, in the baking dish.
Cover with plastic wrap (oops, I forgot to cover mine, but that's totally ok, because they turned out fine!) and put in a warm spot until the dough is puffy, pillowy, and soft and the buns are touching -- almost tripled in size, about 2 hours.

Position a rack in the middle of the oven and preheat to 350F.

Bake until golden brown, about 35-45 minutes.
Let cool in the dish on a wire rack for 20-30 minutes.
One at a time, invert the buns onto a serving platter, and spoon any extra goo and pecans from the bottom of the dish over the top.

The buns are best served warm or within 4 hours of baking.  They can be stored in an airtight container at room temperature for up to 1 day, and then warmed in a 325F oven for 10-12 minutes before serving.

Monday, May 12, 2014

Carrot cake cupakes

For Mother's Day, the response to "Can I bake anything?" was 8 simple words: "Carrot cake mini muffins, chocolate iced banana cake."  Though that's not what I ended up bringing.  I just twisted the requests a little, but am super happy with the finished results.


First up was the variation on the "chocolate iced banana cake."  The version I made was a Banana Bundt Cake with Chocolate Ganache Drizzle.  It was amazing!  You can read all about it here.


Second up was more of a minor tweaking of the request.  See, my aunt asked for Carrot Cake Mini Muffins.  But I originally read that as mini carrot cake cupcakes.  So I set out to bake some of those.  I had to find a new recipe, since as much as I LOVE, LOVE, LOVE my carrot cake recipe, it never seems to bake up well into cupcakes.  It's such a shame since I love the cake so much, but I needed to find a new recipe.  In the past, I had been put off by carrot cake recipes that called for crushed pineapple, but that changed recently when I bought a carrot muffin on my way home to my parents, and it had pineapple in it....and it was delicious!  So I had done a lot of searching for carrot cake cupcakes (thanks, Pinterest!), and had narrowed it down to two recipes.  Ultimately, I ended up choosing this one.  But I digress...


See, she wanted mini cupcakes, er, muffins.  But I halved the recipe, and still had a ton of batter!  Plus, the mix-ins (hand-shredded carrots and the jumbo raisins I had chosen to use) were kinda large and I was afraid you'd get no "cupcake" in mini form.  So, I decided that (despite how much I love all things mini), I needed to go with full-sized cupcakes.  I was supposed to get a dozen from half the recipe.  I got a dozen and STILL had leftover batter, so my aunt got her wish, and I baked up a few (....16!) mini cupcakes for her, too!


I chose to make these nut free for two reasons.  First off, my cousin is deathly allergic to all nuts and also peanuts.  As a rule, I never bake anything with nuts if she will be there.  So no nuts in these cupcakes.  BUT....I also don't usually like nuts in my baked goods (the exceptions are generally carrot cake and zucchini bread....and very infrequently in banana bread), and I wanted these to be on the lighter side, so I subbed in raisins for the nuts.  I think there would be nothing wrong with you at all if you decided to add half nuts and half raisins (as in, I might actually do that the next time I make them).

Carrot Cake Cupcakes
from Deliciously Sprinkled

Ingredients (for 24 full-sized cupcakes):

4 large eggs
3/4 cup canola oil
1/2 cup apple sauce (I used unsweetened)
1 cup golden (light) brown sugar
1 cup granulated sugar
2 cups all-purpose flour
2 tsp baking soda
2 tsp baking powder
1/2 tsp salt
1/4 tsp nutmeg
3 tsp (1 Tbsp) ground cinnamon
3 tsp (1 Tbsp) vanilla extract
3 cups grated carrots (hand grated....trust me.  Freshly hand-grated.  Don't buy the pre-shredded carrots)
1 cup crushed pineapple, drained
1 cup chopped walnuts (like I said above, I subbed in 1 cup of raisins...but no one would fault you (or me, in the future) for using 1/2 cup each of chopped walnuts and raisins)

Directions:

Preheat the oven to 350F.
Line cupcake pan with liners.

Using an electric or stand mixer, mix the eggs, canola oil, applesauce, brown sugar, and sugar until smooth.
In another bowl, whisk together flour, baking soda, baking powder, salt, nutmeg, and cinnamon until combined.
Slowly mix in dry ingredients until no clumps remain.
Stir in vanilla, carrots, pineapple, and chopped walnuts (or raisins, or both).

Pour batter into the pans, about 3/4 the way full (I'd do about 2/3 of the way full...I filled mine 3/4 of the way, and a few of them baked over).
Bake for 20 minutes or until a toothpick inserted in the center comes out clean (mine took 18 minutes).
Allow to cool before frosting.

(The original recipe had a cream cheese icing recipe in it.  However, I love my cream cheese icing, and chose to use it on these cupcakes.  It went perfectly!  See below for my recipe, or use the recipe from the original cupcakes by clicking the link above.)

Cream Cheese Icing
(I got this recipe from Epicurious years ago, and committed it to memory....which is a good thing because the original is nowhere to be found on the website now!)

Ingredients:

3 8-oz packages of cream cheese, at room temperature
1/2 stick butter, at room temperature
3-4 cups of powdered sugar
Vanilla, to taste

Directions:

Blend cream cheese and butter.
Add vanilla to taste.
Add powdered sugar, about 1/2 cup at a time, until desired sweetness and consistency (I usually end up with about 3 cups of powdered sugar).

Assembly

I piped the icing onto the cooled cupcakes, and topped with a royal icing carrot.
If using nuts in the cupcakes, rimming the cupcake with chopped nuts would look nice, too (that's what I do with my full-sized carrot cake).

Friday, March 14, 2014

The Four & Twenty Blackbirds Pie Book

In honor of today being pi day (it's March 14, or 3.14), I figured I'd review my new pie cookbook, because frankly I don't have enough time today to bake a pie!

Honestly, pie isn't my first (or second, or third...) choice when it comes to dessert.  But upon the recommendation of my friend L, I picked up this book because she said the pies were awesome -- but more importantly they had a really great and easy pie crust.  Well, I was sold, considering I have been buying frozen pie crust for all of my pie-baking endeavors that do not require a graham cracker crust!

Enter one of the 3 new cookbooks to my ever-growing collection: The Four & Twenty Blackbirds Pie Book!


Some of the recipes in the book are classic pie recipes, like Derby pie and sour cherry pie.  Some are slightly altered versions of oldies but goodies, with about 5 varieties of pies with apples in them!

Other are newer, fresher, more creative pies, like wild ginger strawberry pie (I can't wait for spring to make this one!!), nectarine blueberry pie, salted caramel apple pie (L made this one for Thanksgiving and I was drooling as she was telling me about it!), and cinnamon apricot pie with vanilla pouring cream, just to name a few.  Mmmmmm!

And get this -- there isn't one pie crust recipe, but 10 crust recipes, including an all butter crust, a chocolate all butter crust, lard & butter crust, and an animal cracker crust!!

And the pictures, oh the pictures!  The pies look heavenly, and there's even a picture of what raw freshly made pie crust is supposed to look like.  Remember that time you made a homemade pie crust and it looked like all the butter wasn't mixed in?  Well, turns out it's supposed to look like that!  According to this book, "the dough should be marbelized with streak of butter."  Who knew!   And as an added bonus, there are illustrations on how to weave a pie crust, too!

Tuesday, December 31, 2013

2013 - The year in review (in baked goods)

2013 was a busy year both for me personally, and for JulieBakes. 

I went to Thailand. 
JulieBakes turned two!! 
I graduated with my doctorate. 
JulieBakes reached 175 fans on Facebook.
This year, JulieBakes had a week of birthday treat posts leading up to my (33rd) birthday.
B and I celebrated a year together. 
JulieBakes had a record 23 posts in December (24 if you include this one!).
Oh, and on December 23rd was JulieBakes' 200th post!


I decided that to cap off this great year, I'd do a "Year in Review" of JulieBakes posts for 2013.  My version of a "Best of" JulieBakes, so to speak.  So I've gathered my favorite shots from the blog from 2013, categorized them my type of treat, and posted them all here for you to see in one place!

Hope you had a great 2013 -- and that you have a sweet and happy 2014! 

Love,
Julie


Cookies


Cakes, Pies, and Breads


Brownies


Cupcakes


Other Treats