Facebook 1

Sunday, March 24, 2013

Samoa cupcakes

The past 9 days have been rough for me.  I fell a little behind on a deadline for school while I was working on other things, and in order to meet the deadline, I spent hours upon hours of writing (two) articles and editing and submitting said articles...and hours upon hours NOT sleeping.  I was beyond stressed, and I love baking when I'm stressed, as it calms me down.  But my lack of time made it hard to bake.

BUT...I promised my friend L a while ago that I'd bake cupcakes for her husband J's 30th birthday this weekend.  AND I submitted my second article today, so I am less stressed and now with some free time.  I'm so glad that the timing worked and I was able to bake for J's birthday!  (For L's 30th birthday this past summer, I made the assortment of mini cupcakes that you can see here.)


L planned a birthday dinner at a BBQ place, so we were trying to figure out BBQ/Southern themed cupcake flavors for J's birthday.  Somehow we ended up with a few "Southern" flavors and a few, well, fun-but-not-very-Southern flavors.


The flavor she was most intrigued by and wanted immediately was this Samoa Cupcake (that I found on Pinterest).  I thought about making them mini, but figured that full sized cupcakes were probably easier to serve.  And boy was that a smart decision -- even though the recipe said that it makes 24 cupcakes, I got 36 full-sized ones!

Red Velvet and Samoa Cupcakes for J's 30th!
[I should also let you in on a little a secret.  I have a box of (unopened) Samoa Girl Scout Cookies in my fridge...and a box of (unopened) Thin Mints, too.  This is when all my friends in New York City start suspiciously calling me to see if I want to hang out...to get a hold of my cookies.  But I digress.]

Samoa Cupcakes
from Spice is Nice

For the cupcakes:

Ingredients:

2 cups sugar
1 3/4 cup flour
3/4 cup Cocoa (Both she and I used Hershey’s special dark)
1 1/2 teaspoons baking powder
1 1/2 teaspoons baking soda
1 teaspoon salt
2 eggs
1 cup milk
1/2 cup vegetable oil
1 teaspoon vanilla
2 teaspoons coconut flavoring
1 cup coconut, packed
1 (scant) cup boiling water (I used 7/8 cup very hot tap water)

Directions:

Preheat oven to 350° and line 24 (like I said earlier, I got 36) muffin tins with cupcake liners.

In a large bowl, combine sugar, flour, cocoa, baking soda, baking powder and salt.

Add in eggs, milk, oil, vanilla, and coconut flavoring. Mix well.

Fold in coconut, then add boiling water. (Batter will be very thin)

Pour batter into muffin tins, filling each cup no more than 3/4 full.
Bake at 350° for 22-25 minutes (Mine took exactly 20 minutes) or until a toothpick inserted in the center comes out clean.
Let cool for several minutes, but then remove cupcakes from tins on cool on a wire rack.

For the Salted Caramel Buttercream:

Ingredients:

2 sticks butter, softened
2 teaspoons vanilla extract
1/2 cup caramel topping, plus more for drizzling (I ended up thinking that it didn't taste "caramel-y" enough, so I used extra caramel, which thinned out the icing a little...so I used the full 4 cups of powdered sugar)
1 pound powdered sugar (about 4 cups)
1 teaspoon salt

Directions:

Cream butter until fluffy.

Add in vanilla extract and caramel topping.
Add powdered sugar and salt and mix until smooth. If icing is still too thin add a bit more powdered sugar (the consistency differs based on the type of caramel topping you use).

Wait until cupcakes are completely cool, and use a pastry bag to ice the cupcakes.

For the Homemade Chocolate Sauce:

Ingredients:

1/4 cup cocoa powder (I used Hershey’s special dark)
1/4 cup granulated sugar
1/4 cup cold water
pinch of salt
1/2 teaspoon vanilla extract

Directions:

Combine all ingredients except vanilla extract in a small saucepan over medium-heat, and whisk until smooth.

Bring sauce to a boil and continue to whisk until sauce becomes thick.
Remove from heat (The original author didn't say when to add the vanilla, so I added it now).
Let cool slightly and drizzle over cupcakes or store in an airtight container in the fridge until needed.

Assembly:

Pipe icing onto cupcakes.

Sprinkle with toasted coconut (I just took some leftover coconut, put it on a foil-lined baking sheet, and toasted it at 350F.  Why 350?  Because thats what the oven was on from baking the cupcakes.  Watch closely -- it can burn in a matter of seconds).

Drizzle with chocolate sauce and remaining caramel sauce.

Sunday, March 3, 2013

Mini Minnie-themed cupcakes

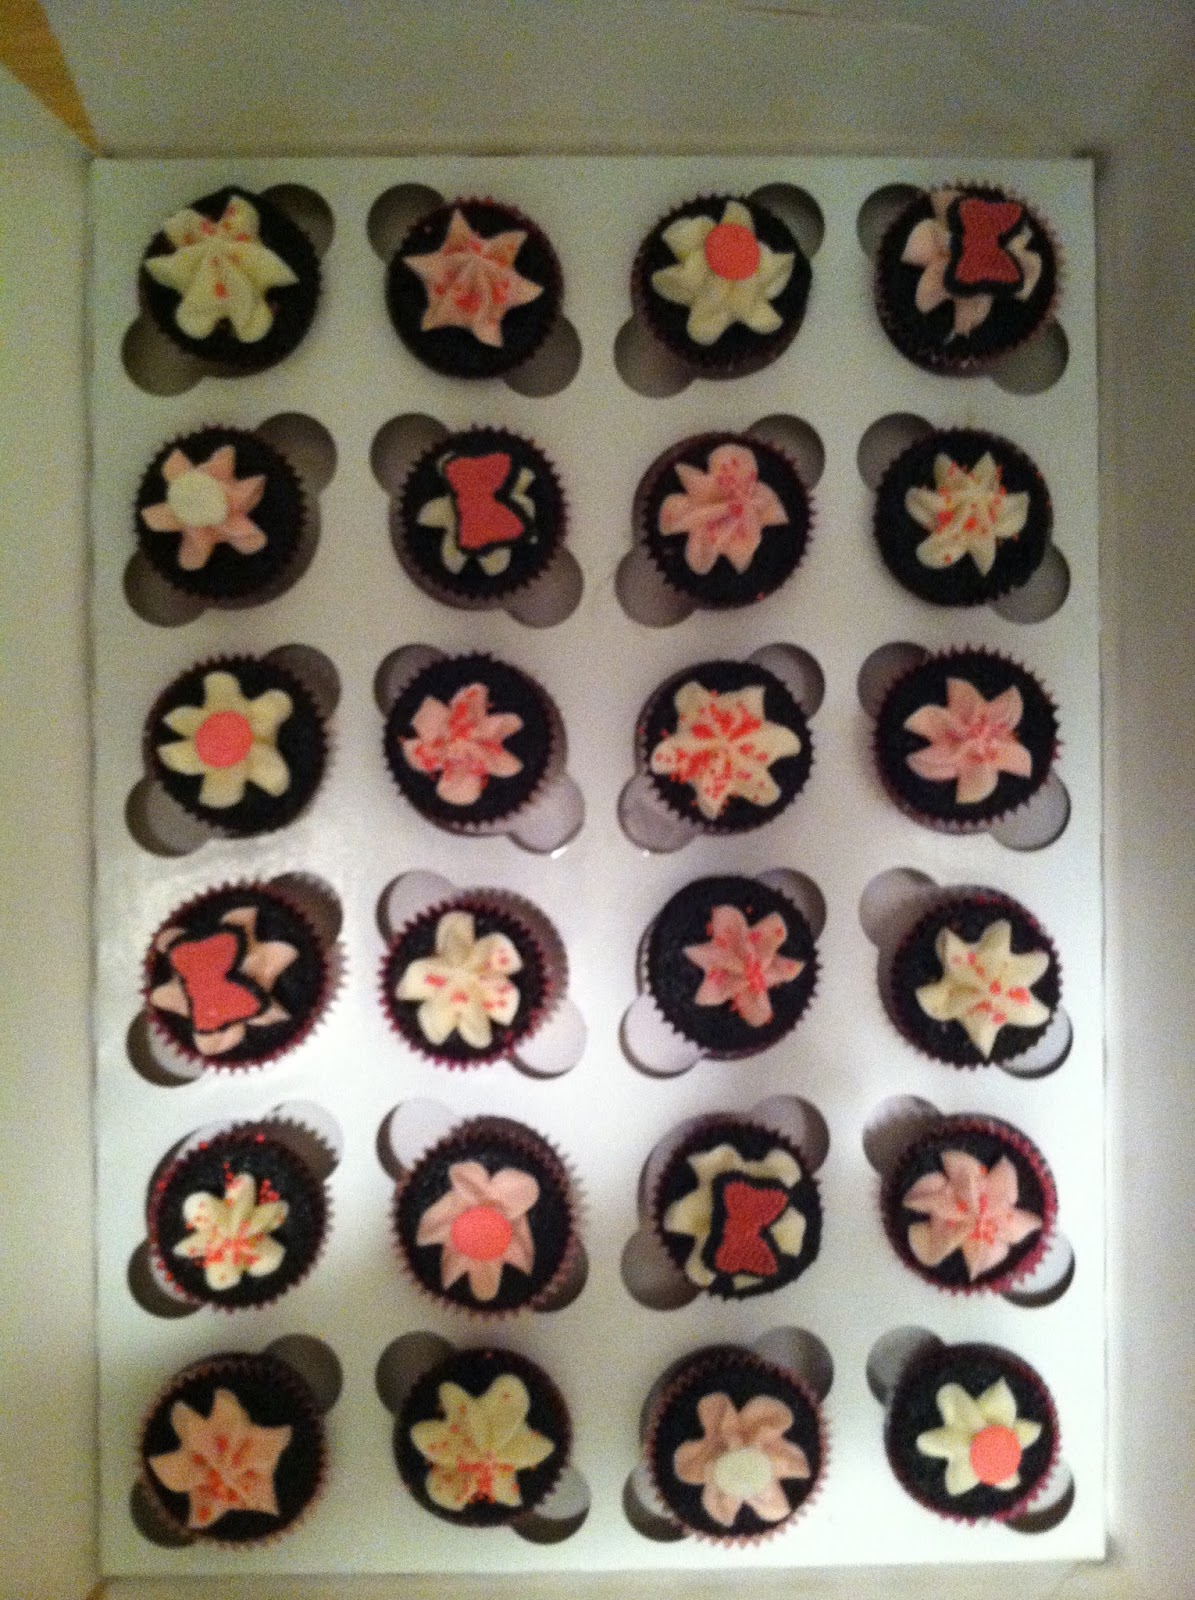
For my friend's daughter's 3rd Birthday, I made some Minnie Mouse Oreo pops, as well as some mini cupcakes.  Staying with the Minnie Mouse theme, I bought some bright pink with white polka dot mini cupcake liners.  The final vote was for chocolate cupcakes with vanilla icing.


In terms of decorations, I wanted to stay with the Minnie Mouse theme.  The pink polka dotted cupcake liners were a start, but I needed some cute decorations.  I had some pink sugar bows (leftover from the Minnie Mouse sugar decorations from the Oreo pops), but there were only 9.  So I bought some big sprinkles in a variety of colors (light blue, dark blue, red, and white), but used the white ones only, and sprayed some of them pink with some leftover edible "spray paint.".  And I had a plethora of bright pink decorations in the apartment - namely nonpareils and sugar crystals.  And while I was already going overboard with the decorations, I figured why not make half of the vanilla icing pink?!


The result is 48 mini cupcakes in a pink-and-white Minnie Mouse theme!  I had enough leftover cake batter to make 3 regular sized cupcakes, one of which I decorated with pink icing and a leftover Minnie Mouse, for the birthday girl.


I used my favorite go-to chocolate cake recipe (the same one I made for my mom's birthday last month) and a new vanilla buttercream recipe (American buttercream, unlike it's French and Swiss counterparts, is way easier to make!).

Rich Chocolate Cake
(a recipe I got from a cooking class I took a long time ago....I may have posted it in the past).

Ingredients:

1 cup sugar
3/4 cup flour
1/2 cup Dutch processed cocoa powder
1 tsp baking soda
1/2 tsp baking powder
1 large egg PLUS 1 large egg yolk
1/2 cup very strong coffee (I used regular strength and they turned out just fine)
1/2 tsp vanilla extract
4 Tbsp (2 ounces) melted unsalted butter, cooled slightly
1/2 cup buttermilk

Directions:

Preheat the oven to 375F.
Line cupcake tray (or mini cupcake tray) with paper liners.

In a large bowl, whisk together the sugar, flour, cocoa powder, baking soda, and baking powder.
Set aside.

In another bowl, whisk together the egg, egg yolk, coffee, vanilla, melted butter, and buttermilk.

Whisk the liquid ingredients into the try. 
Pour into the cupcake tin.
Bake (Mini cupcakes took about 8 minutes, regular sized ones about 16-17).

Let cool.
Ice with your favorite frosting....or check out this delicious and easy vanilla buttercream:


Classic Vanilla Buttercream Frosting
From a new little blog I came across, SavorySweetLife

Ingredients:

1 cup unsalted butter (2 sticks), softened (but not melted!)
3-4 cups confectioners (powdered) sugar, SIFTED (I used 3 cups)
¼ teaspoon table salt
1 tablespoon vanilla extract
4 tablespoons milk or heavy cream (I used heavy cream, since thats what I had....and only ended up using 2 Tbsp)
Food coloring, optional

Directions:

Beat butter for a few minutes with a mixer with the paddle attachment on medium speed.
Add 3 cups of powdered sugar and turn mixer to the lowest speed (so the sugar doesn’t blow everywhere) until the sugar has been incorporated with the butter.
Increase mixer speed to medium and add vanilla extract, salt, and 2 tablespoons of cream and beat for 3 minutes.
If your frosting needs a more stiff consistency, add remaining sugar. If your frosting needs to be thinned out, add remaining milk 1 tablespoons at a time.

I took half the icing out of the mixer and put it into my piping bag fitted with a large tip.  Then, I added pink food coloring to the remaining frosting to make it pink.

Oreo pops, Disney-style

March 5th is my friend's daughter's 3rd birthday.  This year, she (the almost 3-year old, not the mom) chose a Minnie Mouse theme for her party.  Although I'm not going to make it to the actual party this year (it's a Sunday, and it's my Sunday to work), I couldn't not supply some Minnie Mouse-themed treats for the party. 

I discussed with my friend R what I'd make for the party.  We decided on Oreo pops for the kids, and some mini cupcakes (for the adults) to supplement the party-supplied "kids only" cake.  But that post will be up later...

I went to my trusty baking store to buy some Minnie Mouse sugar decorations for the Oreo pops, as well as a few other goodies, and bought out the last 3 packages.

When it came time to make the Oreo pops, I saw some bright pink and white striped paper straws that I had bought for my friend's 30th birthday party, but that were never used.  I cut them in half and used them instead of lollipop sticks for half of the Oreo pops.

Then, I did what I always do with Oreo pops....I wrapped them in clear bags and tied them with (bright pink) curling ribbon, curled the ribbon, and voila! adorable Minnie Mouse-themed Oreo pops!


Now, I've made Oreo pops a bunch of times in the past.  This post seems to be the best at how I did it, along with other sites that have directions.  It also happens to be that that post will take you to what I made for this same little girl for her 2nd birthday!

Wednesday, February 27, 2013

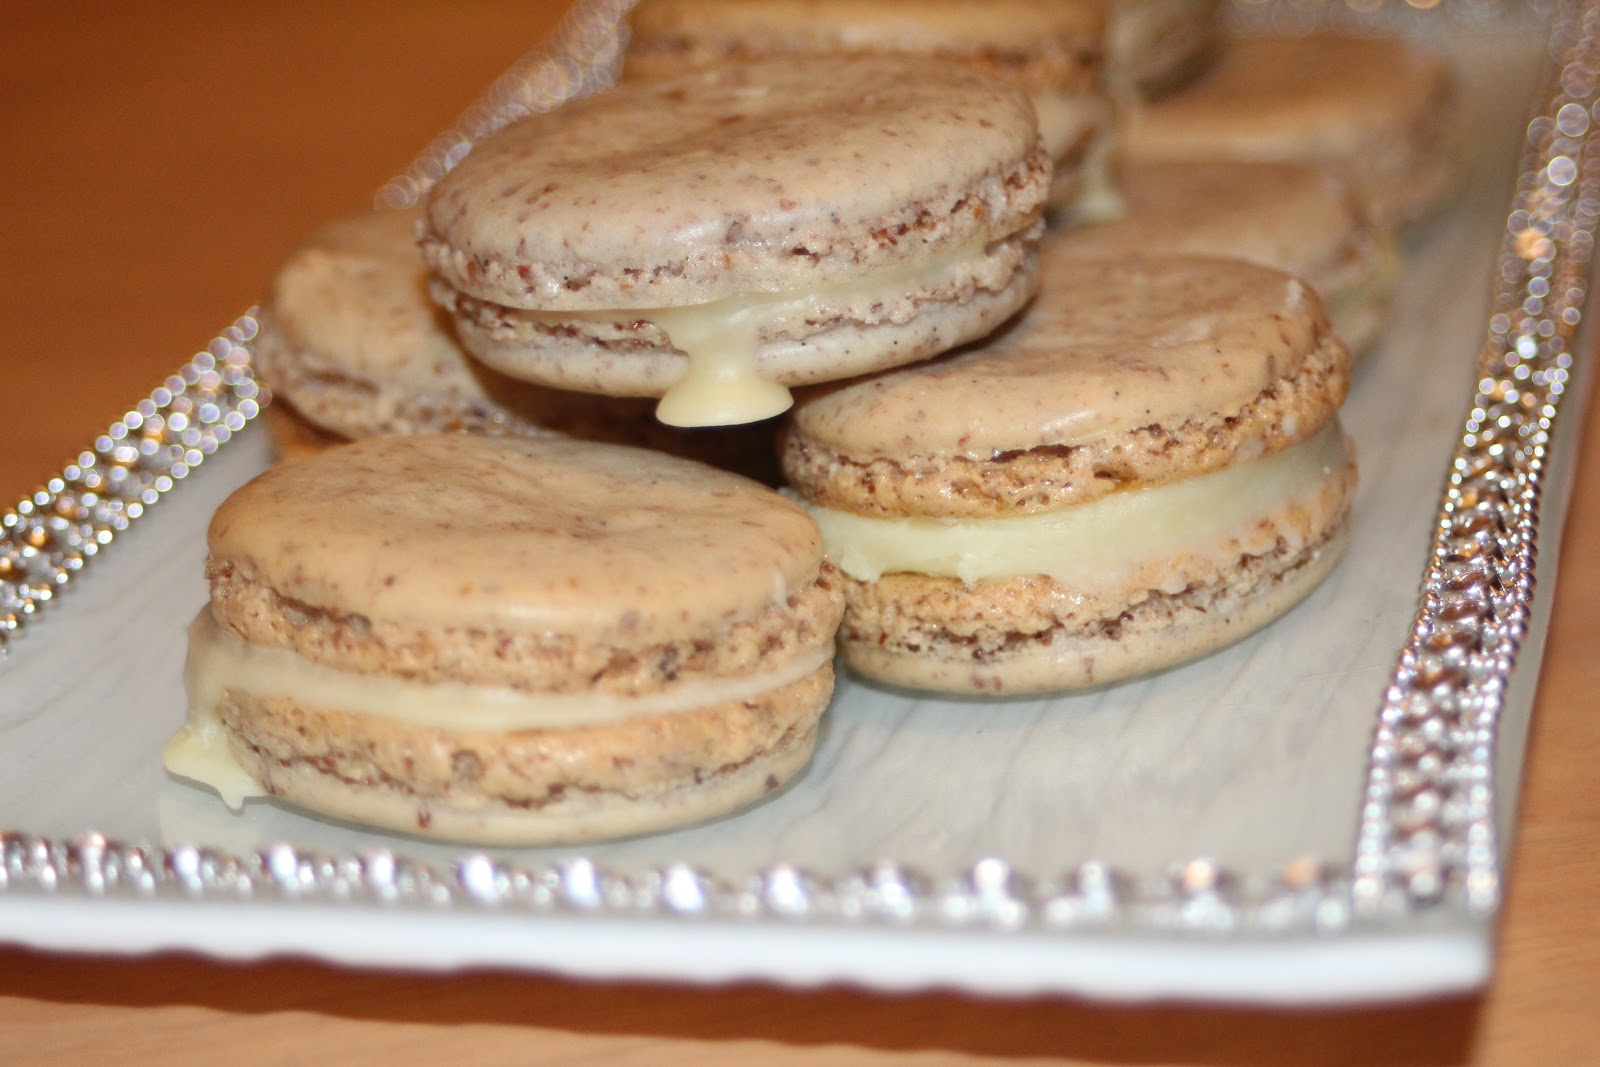
Vanilla macarons

When I baked my mom's birthday cake last week, the recipe called for an egg and an egg yolk (I doubled the recipe, so 2 yolks).  That left me with 2 egg whites.  Great for a breakfast omelette - which, I admit, was the first thought that popped into my mind - or macarons (they call for 3 egg whites, usually).  Of course I tossed the egg whites this morning (I had added a third one to the mug), and then looked at the recipe and found out that it actually calls for 3-5 day old egg whites (mine were 7 days, so in retrospect, tossing them this morning was a good idea).  I had read once, years ago, that room temperature egg whites were best, so I left them sitting out on the counter during the day while I did other things (school work, cleaned, ran errands).


I surprisingly had all the ingredients in the apartment.  That's because there are 5 ingredients in this recipe.  And  because I had leftover almond meal from the last time I made macarons.  You can use blanched almonds -- or you can buy almond meal (mine is from Trader Joe's).  The difference is mostly in appearance -- mine are "flecked" with pieces of almond skin.  If I were making them for an event or if I were to color them (with powdered food coloring only), I'd probably go through the task of grinding my own blanched almonds.  But since I was making macarons just for the sake of making macarons, I went with what I had (and the easy option).


I've made macarons before.  Three times to be exact.  The first time I made Snickers macarons (making delicate French cookies into an American candy bar is kinda sacreligious), then I made pink lemonade macarons (which used pink lemonade mix....sacreligious again, I know), and then chocolate macarons for Passover (less sacreligious).  This time I opted to go with good old fashioned plain macarons.  Although the recipe I used called for the seeds of half a vanilla bean, which I hadn't seen in other recipes.  By the way, these would be great for Passover (which is next month!).


French Macarons
From Tartelette

Ingredients:

100 grams egg whites
25 grams granulated sugar
200 grams confectioners sugar
110 grams ground almonds (or whole almonds)
seeds of half a vanilla bean

Directions:

In a stand mixer fitted with the whisk attachment, whip the egg whites to a foam, gradually add the sugar until you obtain a glossy meringue.
Combine the almonds and powdered sugar in a food processor (I used a whisk) and give them a quick pulse if you use already ground almonds.  If using whole almonds, pulse thoroughly for a minute or so.
Add them to the meringue, along with seeds from the vanilla bean, and start to give quick strokes at first to break up the mass, and then slow down.  Should be no more than 50 strokes.
Mixture is ready when tops of drops flatten out on their own.  If theres still a small beak, fold a few more times.

Fill a pastry bag fitted with a plain tip with the batter and pipe small rounds (1.5 inches in diameter) onto parchement paper lined sheets.
Preheat the even to 280-300F.
Let the macarons sit out for an hour to allow their shells to harden a bit (this is what gives them the little "foot" at the bottom when they bake).
Bake for 15-18 minutes, depending on their size.
Let them cool completely before filling. 

Pipe or spoon some of the filling on one shell and sandwich with another.

White Chocolate Ganache
(Stolen from one of my all time favorite brownie recipes, and quite possibly my mom's favorite brownie ever)

Ingredients:

6 ounces high-quality white chocolate, chopped
5 tablespoons heavy whipping cream
1/4 teaspoon ground cinnamon  (optional - I opted for it on some of them)
 
Directions:
 
Place white chocolate in medium microwave-safe bowl.
Bring cream to simmer in small saucepan.
Pour cream over chocolate in bowl.
Let stand 30 seconds, then stir until chocolate is melted and smooth.
If necessary, microwave on low power in 10-second intervals until white chocolate is melted completely.
Chill until ganache is thick but not hard.
 
Fill the macarons.  Let them sit a little while so the ganache is not too soft or runny.  Serve.


Sunday, February 10, 2013

Food finds of Thailand

If you view my JulieBakes Facebook page, I've apologized profusely for having been MIA and not posting any recipes recently.  But when I got back from Thailand today, and signed in to write this post, I saw that my last post was December 31st!  I'm appalled!  But don't worry, that will change very soon.

I just got back from almost two weeks in Thailand.  I took a few notes of new food finds and I wanted to share them with you:

1.  Fruit smoothies.  I have a general rule: I don't drink my calories unless they are in the form of coffee (often) or alcohol (less so).  However in northern Thailand, fruit smoothies were EVERYWHERE.  Sometimes they had milk added, sometimes yogurt (a la an Indian lassi), and sometimes just blended juice and (filtered) ice.  The latter being my favorite.  I got watermelon ones, passion fruit, and pineapple-mango-coconut...however, when I got to the Islands, they were harder to find.  But that didn't stop me...I kept searching.  My favorite was the watermelon one.  I can't wait to make them.  Now all I need is a blender...

2.  Watermelon juice.  During my 9.5 hour layover in the Hong Kong airport, I found a Starbucks (!!), and they had Starbucks-brand bottled juices including orange, grapefruit, guava, and watermelon.  Unsure of which to get - guava or watermelon - I chose watermelon and was unsure if it would be good.  It was delicious!  I wonder if I could recreate it with a juicer at home.  Now I just need a juicer, too.


3.  Thai iced coffee.  My sister introduced me to this delicacy.  As above, I usually don't drink my calories unless they are in the form of coffee or alcohol, but my "usual" coffee calories in the US are skim milk and a Splenda added to espresso.  Thai iced coffee is the antithesis of what I drink in the US.  It's a rich coffee (probably better than US coffee, although I've seen it made with instant coffee, too) mixed with condensed milk.  It's rich and sweet and tastes like the best coffee ice cream...melted.  After my first one, I wanted at least one a day, but held back...

4. Mango sticky rice.  We took a cooking class just outside of Chiang Mai and for dessert I made sticky rice with mango.  I usually don't eat dessert in Thai restaurants, or restaurants in general, but for some reason I never order dessert in Thai restaurants.  But seeing as a dessert course was part of the cooking class, I went with it.  Sugar and coconut milk, mixed with rice, topped with fresh mango and a little more coconut milk, and sprinkled with dried mung beans for crunch.  Delish!

5.  Green papaya salad.  This is not technically a food find of Thailand, since I've been eating it for years, but it's so good that its worth mentioning here.  There are apparently a few kind of green papaya salad, the biggest difference I've been able to find is the inclusion or exclusion of dried baby shrimp.  I'm used to the Thai-American green papaya salad, which is the one sans dried shrimp, and after having been served both in Thailand, I can say hands down that I prefer it without the dried shrimp.  However, in a pinch, it's easy to pick them out.

Monday, December 31, 2012

Personal cheesecakes

I was talking to a friend recently, and he mentioned that cheesecake used to be his favorite dessert.  While I know he has a sweet tooth, and loves a pastry in the morning, I've never known him to order dessert, so I filed away this little tidbit of information.  And now I can put it to good use. 


This New Year's Eve my friend and I planned a low key evening in, cooking dinner and watching the ball drop.  The perfect opportunity to bring some cheesecakes!  The only issue was that I didn't remember if he mentioned that he liked a regular graham cracker crust or a chocolate crust.  Not a problem, I mused, I'd just make personal cheesecakes and I'd make a few with each type of crust.  Added benefit?  I didn't have to go buy a new springform pan, since I own a 9" and the recipe called for a 7".  I didn't even know 7" was a standard springform size.  But I digress.


Just over a year ago I went to a "New York" themed party and needed a New York-y dessert.  The hostess wanted me to make black and white cookies, but I hadn't made them before and was hesitant to make them for a party (it was before I made them for a black-and-white themed New Year's Eve Party last year).  Rifling through my mind for other New York inspired desserts, I settled on mini cheesecakes (baked in a mini muffin tin) with their own little crusts.


Since I was making personal (aka baked in a regular cupcake tin) cheesecakes, I figured I could experiment with flavors.  Maybe add some mini chocolate chips to some, some heath bar to another, and I even stuck a mini rolo into the centers of a few...so I divided the extra cheesecake filling and added a few different mix-ins.  Just for fun.  Truth be told, they weren't as pretty as the plain cheesecakes.  And maybe I didn't add enough of the mix-ins, but I didn't think they tasted much different either.  But it didn't really matter...I packed away a few of the plain ones for New Year's Eve, and the rest for my doormen.  The not-to-pretty ones were tasted and then tossed.  I didn't need to be picking at cheesecakes....too many calories for something I don't even love that much.

Heath Bar Cheesecakes
Now, there is actually an interesting story behind this cheesecake recipe.  A while ago my parents, aunt, and sister went out for dim dum (Chinese passed dumpings and small plates) in Westchester, and were talking to another lady in line.  Somehow their conversation lead them to - of all things - cheesecake.  She and my mother exchanged email addresses, and she forwarded my mom this recipe shortly after they met.  When I was looking for a cheesecake recipe, my mom forwarded it on to me.

Shari's Cheesecake (Shari is the lady from the dim sum line)
This made just over 30 full sized cupacake cheesecakes.  I had leftover crust mixture, but I did make a full batch of each crust recipe, and that may have been too much.  My baking time was about 25-28 minutes.  As you can tell, mine didn't get golden brown, but they were cooked through (bonus points if you can find the toothpick holes in one of the cheesecakes from testing it's doneness.).

Ingredients:

For the crust
(if you're making "mini" or "personal" cheesecakes, you will need extra crust mixture....I doubled it last time....or you can make a mixture of graham crusts and chocolate crusts, and follow the link/recipe beneath for the chocolate crust)

1 cup graham cracker crumbs
1/4 cup melted butter (I used unsalted, as I always do with baking)
1/6 cup sugar

For the filling

1 lb 14 oz cream cheese (3 and 3/4 8 oz packages of cream cheese)
7/8 cup sugar
2 Tbsp corn starch
2 eggs
1/2 cup heavy cream
3/4 tsp vanilla

Mix-ins: With the leftover cheesecake filling, I decided to experiment with some mix-ins.  I used some mini chocolate chips, and some leftover health bar pieces from those chocolate covered pretzels.

Directions:

Grease a 7" springform pan (or in my case, line a regular sized (or mini) muffin tin with paper or foil liners).

Make the crust

Mix the crust ingredients together.
Press the crust into the springform pan.
Bake a 400 degrees until brown, being careful not to burn it.

Make the filling

Mix the sugar and cornstarch together.
Add the cream cheese and blend well.
Add the eggs and blend well.
Add the cream, a little at a time, and blend.
Add vanilla and blend.

* Pour the cream cheese mixture into the well greased springform plan on top of the crust.
Cover the pan with foil.
Place the pan in a water bath -- Fill a lined baking sheet with water, and place the filled springform pan on the tray.
Bake at 450 for 40-45 minutes until golden brown.

Shari's directions:  When done, open the oven about 3-4 inches so the oven cools, leaving the cake there for about 20 minutes.  It is supposed to stop the top from cracking.  (I skipped this step, and they turned out OK)

No-Bake Chocolate Crust (from Martha Stewart)

Ingredients:

7 ounces chocolate wafer cookies
3 Tbsp sugar
6 to 8 Tbsp unsalted butter

Directions:

Place cookies in a food processor and process until finely ground.
Combine cookie crumbs and sugar in a bowl.
Add 6 tablespoons butter, and mix well until crumb mixture holds together. (If needed, add remaining 2 tablespoons butter.)
Transfer cookie mixture to bottoms of lined cupcake tins, and pat out evenly to make the crust.
Place in freezer while proceeding.

Go back to the previous recipe and follow from the *

Tuesday, December 25, 2012

Chubby Hubby truffles

Chocolate + pretzels + peanut butter = delish.  I thought that that went without saying.  Case in point:


See, a few days ago I went grocery shopping for the ingredients for these.  I bought a bunch of other things, but among the goodies I bought were pretzels to make these truffles.  Of course I used those pretzels to make the 4 flavors of chocolate covered pretzels and the chocolate pretzel treats before I even sat down to make these.  Luckily I had enough pretzels leftover from those two treats in order to make these truffles!

 
Chubby Hubby Truffles

Ingredients:

1 1/2 cups pretzel pieces
1/2 cup creamy peanut butter
1 tablespoon unsalted butter, at room temperature
2 tablespoons light brown sugar
Pinch of salt
3 tablespoons powdered sugar
1 cup milk or semisweet chocolate chips
1 tablespoon vegetable shortening
(I chose to use CandiQuik chocolate coating instead of the chocolate chips and shortening)

Extra peanut butter and crushed pretzels for decoration

Directions:

Put the pretzels into a resealable plastic bag and crush into very small bits (a rolling pin works great for this) - I found this part confusing.  I wasn't sure if it was 1.5 cups of pretzel pieces, or 1.5 cups of crushed pretzels....my filling mixture was a bit dry and I wonder if it's because I used the 1.5 cups of crushed pretzels

In a small bowl, combine the peanut butter, butter, brown sugar and salt.
Stir until all of the ingredients are completely blended and smooth.
Add the pretzel bits to the peanut butter mixture and mix thoroughly.
Add the powdered sugar and mix until completely combined.
Line a small baking sheet with wax paper.
Using a small cookie scoop, or about 2 teaspoons worth of peanut butter mixture, gently shape into a ball with your fingertips.
Place the ball on the wax paper-lined cookie sheet and repeat with the remaining peanut butter mixture.
Place the baking sheet into the refrigerator and chill for at least 30 minutes.

When ready to dip the truffles, microwave the chocolate chips and vegetable shortening together in a small bowl in 30-second increments, stirring after each, until completely melted and smooth.

Working one at a time, dip one peanut butter-pretzel ball into the melted chocolate and use a fork to roll it around, making sure that it is completely coated with chocolate.
Let any extra chocolate drip off and place back on the wax paper-lined sheet.
Repeat with all of the peanut butter-pretzel balls.

Return the baking sheet to the refrigerator and again chill for at least 30 minutes.
Garnish with a drizzle of melted peanut butter and crushed pretzels, if desired (I desired.)
Store in an airtight container in the refrigerator.