For my friend's fundraiser, I planned to bake cookies and brownies. The brownies were black-and-white brownies, which I've made several times before and they always get rave reviews. But something happened during the brownie baking process. Brace yourselves people, but.....even "professional" (or wanna-be professional) bakers have a mishap or two in their careers. This was one of those nights. The evidence is clear:
The only things missing from the picture are the first-degree burns that my thigh (through my jeans!) and foot sustained when the hot brownies fell on me.
But I still needed brownies. Without enough semisweet chocolate chips to repeat the recipe, I had to turn to another brownie recipe. Luckily for me, I have a brownie cookbook. A quick glance through it, and I stopped at triple chocolate brownies. I guess that multi-chocolate is my theme for the fundraiser - triple chocolate cookies, dark chocolate cookies with white chocolate chips, and these triple chocolate brownies.
Triple Chocolate Brownies
From the Fat Witch Brownies Cookbook (Makes 12-18 brownies, I got more than than since I cut them smaller)
Ingredients:
8 Tbsp (1 stick) unsalted butter
1/3 cup bittersweet chocolate chips
1/2 cup milk chocolate chips
3 large eggs
1 cup granulated sugar
1/2 teaspoon pure vanilla extract
3/4 cup unbleached flour (I used regular all-purpose flour)
1/4 teaspoon salt
1/3 white chocolate chips
Directions:
Grease a 9x9" baking pain with butter (I used cooking spray).
Dust with flour and tap out the extra flour.
Preheat the oven to 350F.
Combine butter, bitttersweet chocolate chips, and 1/4 cup of milk chocolate chips in a small saucepan.
Melt together over low heat, stirring constantly.
Set aside and let cool to room temperature.
In a bowl, beat together the eggs, sugar, and vanilla until smooth.
Add the cooled chocolate mixture.
Continue beating until well blended.
Measure the flour and salt and then sift together (I skipped the sifting part) directly into the chocolate batter.
Mix until well combined and no trace of the dry ingredients remains.
Gently stir in the white chocolate chips and the remaining 1/4 cup of milk chocolate chips.
Spread the batter evenly in the prepared baking pan.
Bake for 30 minutes or until a toothpick inserted into the center comes out clean or with only crumbs - no batter - on it.
Remove from the oven and let cool on a rack for at least 1 hour.
Cut just before serving.
Facebook 1
Wednesday, September 5, 2012
Tuesday, September 4, 2012
Chocolate chip cookies
We probably all grew up on chocolate chip cookies. And there's a pretty good chance that if you did grow up eating homemade chocolate chip cookies, that they were of the Tollhouse variety. I'll be honest with you, it's still my go-to chocolate chip cookie recipe. Great warm out of the oven. Or even unbaked....raw cookie dough is pretty awesome, if you ask me.
And as good as these cookies are on their own, stay tuned in the near future for a little riff on the "plain old" chocolate chip cookie...
Chocolate Chip Cookies
(Straight from the Toll House Semi-Sweet Morsels Bag)
Ingredients:
2 1/4 cups of flour (all-purpose)
1 tsp baking soda
1 tsp salt
1 cup (2 sticks) butter, softened
3/4 cup sugar (granulated sugar)
3/4 cup packed brown sugar
1 tsp vanilla extract
2 large eggs
2 cups (12 oz package) Toll House semi-sweet chocolate morsels
Directions:
Preheat oven to 350F.
Combine flour, baking soda, and salt in a bowl. Set aside.
Beat butter, both sugars, and vanilla extract in large mixer bowl until creamy.
Add eggs, one at a time, beating well after each addition.
Gradually beat in flour mixture.
Stir in morsels.
Drop by tablespoonfuls onto ungreased baking sheets (I used parchment paper-lined baking sheets)
Bake for 9-11 minutes or until golden brown
Let cool on baking sheets.
And as good as these cookies are on their own, stay tuned in the near future for a little riff on the "plain old" chocolate chip cookie...
Chocolate Chip Cookies
(Straight from the Toll House Semi-Sweet Morsels Bag)
Ingredients:
2 1/4 cups of flour (all-purpose)
1 tsp baking soda
1 tsp salt
1 cup (2 sticks) butter, softened
3/4 cup sugar (granulated sugar)
3/4 cup packed brown sugar
1 tsp vanilla extract
2 large eggs
2 cups (12 oz package) Toll House semi-sweet chocolate morsels
Directions:
Preheat oven to 350F.
Combine flour, baking soda, and salt in a bowl. Set aside.
Beat butter, both sugars, and vanilla extract in large mixer bowl until creamy.
Add eggs, one at a time, beating well after each addition.
Gradually beat in flour mixture.
Stir in morsels.
Drop by tablespoonfuls onto ungreased baking sheets (I used parchment paper-lined baking sheets)
Bake for 9-11 minutes or until golden brown
Let cool on baking sheets.
Triple chocolate cookies
Wow, it's been a while since I've posted....I apologize for the lag, but I will more than make up for it soon.
My friend started a non-profit animal rescue and about two weeks ago was one of their fundraisers. They had a bake sale at the event, and I was honored when he asked me to bake some treats for the event. I was trying to decide what to bake for the event - it needed to be something hand-held and portable, so that people could walk around during the event eating said treats, but also portable in the sense that I had to get it to the event and that involved a big detour all the way uptown before going downtown to bring the treats. I thought about mini cupcakes, but lets face it, I've made a ton of those lately. It was down to cookies and brownies. Unable to decide, I chose both. And why stop at one kind of cookie? So I opted for a few.
When I made those (totally awesome) chewy chocolate cookies with white chocolate chips last month, my friend saw them and asked "Wow - those look fantastic - Can ya make them on the 23rd?" So that was the first type of cookie that I made.
Then I decided to make "giant double chocolate cookies" except I made smaller triple chocolate cookies. Because if double chocolate is good, triple chocolate is better. No, I'm not making that up. I'm sure someone has proven it in the past.
Giant Double Triple Chocolate Cookies
Modified from the recipe for Giant Double Chocolate Cookies, which is based on the amazing cookies from Levain Bakery in New York City
The recipe states that it makes 12 very large cookies. I got a ton of small-medium sized ones.
Ingredients:
1 cup (2 sticks) cold, unsalted butter, cubed
1 1/4 cup sugar
2 large eggs
1/2 cup dark cocoa powder
2 1/4 cups all-purpose flour
1/4 tsp coarse salt
1 tsp baking powder
2 1/2 cups semi-sweet chocolate chips (I used 1 1/2 cups semisweet chocolate chips and 1 cup of milk chocolate chips. I actually had dark chocolate chips, too, but decided that the world might not yet be ready for quadruple chocolate cookies....)
Directions:
Preheat the oven to 350˚ F. Line baking sheets with parchment paper or silicone baking mats.
In the bowl of an electric mixer, combine the butter and sugar. Beat together on medium-high speed until light and fluffy, 2-3 minutes. Blend in the eggs one at a time, scraping down the bowl as needed.
Mix in the cocoa powder until well blended.
Add the flour, salt and baking powder to the bowl and mix on low speed just until incorporated.
Fold in the chocolate chips with a spatula.
Transfer the dough to a work surface and knead briefly by hand to be sure the ingredients are well combined.
Divide the dough into 4 ounce portions (or divide into 12 equal pieces - I made them much smaller). Roll each portion of dough into a ball and flatten just slightly into a disc.
Place on the prepared baking sheets, a few inches apart. Bake 16-20 minutes (less for smaller cookies).
Let cool on the baking sheets 5-10 minutes, then transfer to a wire rack to cool completely.
My friend started a non-profit animal rescue and about two weeks ago was one of their fundraisers. They had a bake sale at the event, and I was honored when he asked me to bake some treats for the event. I was trying to decide what to bake for the event - it needed to be something hand-held and portable, so that people could walk around during the event eating said treats, but also portable in the sense that I had to get it to the event and that involved a big detour all the way uptown before going downtown to bring the treats. I thought about mini cupcakes, but lets face it, I've made a ton of those lately. It was down to cookies and brownies. Unable to decide, I chose both. And why stop at one kind of cookie? So I opted for a few.
When I made those (totally awesome) chewy chocolate cookies with white chocolate chips last month, my friend saw them and asked "Wow - those look fantastic - Can ya make them on the 23rd?" So that was the first type of cookie that I made.
Then I decided to make "giant double chocolate cookies" except I made smaller triple chocolate cookies. Because if double chocolate is good, triple chocolate is better. No, I'm not making that up. I'm sure someone has proven it in the past.
| All three cookies that I made packaged as a gift |
Modified from the recipe for Giant Double Chocolate Cookies, which is based on the amazing cookies from Levain Bakery in New York City
The recipe states that it makes 12 very large cookies. I got a ton of small-medium sized ones.
Ingredients:
1 cup (2 sticks) cold, unsalted butter, cubed
1 1/4 cup sugar
2 large eggs
1/2 cup dark cocoa powder
2 1/4 cups all-purpose flour
1/4 tsp coarse salt
1 tsp baking powder
2 1/2 cups semi-sweet chocolate chips (I used 1 1/2 cups semisweet chocolate chips and 1 cup of milk chocolate chips. I actually had dark chocolate chips, too, but decided that the world might not yet be ready for quadruple chocolate cookies....)
Directions:
Preheat the oven to 350˚ F. Line baking sheets with parchment paper or silicone baking mats.
In the bowl of an electric mixer, combine the butter and sugar. Beat together on medium-high speed until light and fluffy, 2-3 minutes. Blend in the eggs one at a time, scraping down the bowl as needed.
Mix in the cocoa powder until well blended.
Add the flour, salt and baking powder to the bowl and mix on low speed just until incorporated.
Fold in the chocolate chips with a spatula.
Transfer the dough to a work surface and knead briefly by hand to be sure the ingredients are well combined.
Divide the dough into 4 ounce portions (or divide into 12 equal pieces - I made them much smaller). Roll each portion of dough into a ball and flatten just slightly into a disc.
Place on the prepared baking sheets, a few inches apart. Bake 16-20 minutes (less for smaller cookies).
Let cool on the baking sheets 5-10 minutes, then transfer to a wire rack to cool completely.
Thursday, August 16, 2012
Bundt cake cookbook
One lazy day this past weekend, I stumbled into Williams Sonoma (and by lazy, I mean hectic errand-running weekend that brought me within a few feet of Williams Sonoma). I checked out the baking tins and trays, and then meandered over to the cookbook section. Two caught my eye. One was a bundt cake cookbook and the other was a cookbook from a local bakery. I wanted them both but didn't have my Williams Sonoma gift card on me, but I couldn't completely delay gratification nor did I have enough time to go back later that same day to buy them, so I bought one.
I love that this book has a variety of different kinds of bundt cakes - mainstream, fancy....and even minis! I think I am most excited to try the Lemon Basil one. Partly because I'm intrigued, and partly because I think my sister will like it, and she isn't big into sweets.
Check out the book:
And I was sure to put my gift card in my wallet as soon as I got home so that next time I pass a Williams Sonoma on one of those "lazy" days, I can pick up the other one.
I love that this book has a variety of different kinds of bundt cakes - mainstream, fancy....and even minis! I think I am most excited to try the Lemon Basil one. Partly because I'm intrigued, and partly because I think my sister will like it, and she isn't big into sweets.
Check out the book:
And I was sure to put my gift card in my wallet as soon as I got home so that next time I pass a Williams Sonoma on one of those "lazy" days, I can pick up the other one.
Wednesday, August 15, 2012
Vanilla (yellow) cupcakes
Vanilla is.....boring. I'm sorry if you're a huge vanilla fan, and I really don't have all that much against it, it's just that I think chocolate is so much richer tasting. more flavorful. better.
But after the "complex" cupcakes I made last week, a friend requested a vanilla cupcake. Plain vanilla. I don't get it, but being a people pleaser, I decided I'd make those vanilla cupcakes. I've made the recipe before in mini cupcakes and a cake, and since they were so good those times (even to me, the vanilla non-lover), I stuck with that recipe again.
And then I did something so uncharacteristic of me....I made (gulp!) regular-sized cupcakes. And then I decided to quarter the recipe, since I was making cupcakes for two people and didn't want tons of cupcakes (I still got 9!). But, in true fashion, I made a chocolate icing. Originally, my goal had been a vanilla cupcake with vanilla icing as I knew my friend is a huge vanilla fan, but my vanilla buttercream recipe is time-intensive and I simply didn't have the time today. Years ago I had made a really good easy chocolate icing, so I googled that, but couldn't find it. So I googled "easy chocolate buttercream" and found the icing I ended up using. It is SO good! And, I actually made it with a whisk -- I didn't even need to use a hand mixer or my kitchenaid!
For the yellow cake cupcakes, click here. Again, I divided the recipe by 4 and ended up with 9 full-sized cupcakes. That would be 36 cupcakes for a full recipe, but the original says 22-24. Someone's math is wrong, and I don't think it's mine.
Chocolate Buttercream Frosting
But after the "complex" cupcakes I made last week, a friend requested a vanilla cupcake. Plain vanilla. I don't get it, but being a people pleaser, I decided I'd make those vanilla cupcakes. I've made the recipe before in mini cupcakes and a cake, and since they were so good those times (even to me, the vanilla non-lover), I stuck with that recipe again.
And then I did something so uncharacteristic of me....I made (gulp!) regular-sized cupcakes. And then I decided to quarter the recipe, since I was making cupcakes for two people and didn't want tons of cupcakes (I still got 9!). But, in true fashion, I made a chocolate icing. Originally, my goal had been a vanilla cupcake with vanilla icing as I knew my friend is a huge vanilla fan, but my vanilla buttercream recipe is time-intensive and I simply didn't have the time today. Years ago I had made a really good easy chocolate icing, so I googled that, but couldn't find it. So I googled "easy chocolate buttercream" and found the icing I ended up using. It is SO good! And, I actually made it with a whisk -- I didn't even need to use a hand mixer or my kitchenaid!
For the yellow cake cupcakes, click here. Again, I divided the recipe by 4 and ended up with 9 full-sized cupcakes. That would be 36 cupcakes for a full recipe, but the original says 22-24. Someone's math is wrong, and I don't think it's mine.
Chocolate Buttercream Frosting
Ingredients
1 cup unsalted butter (2 sticks or 1/2 pound), softened
3 1/2 cups confectioners (powdered) sugar
1/2 cup cocoa powder
1/2 teaspoon table salt
2 teaspoons vanilla extract or 1 teaspoon almond extract
4 tablespoons milk or heavy cream (I used skim milk, since it was all I had as I had used all the cream in my apartment to make homemade vodka sauce today)
Directions:
Cream butter for a few minutes in a mixer with the paddle attachment on medium speed (I used a whisk and did it by hand). Turn off the mixer.
Sift 3 cups powdered sugar and cocoa into the mixing bowl.
Turn mixer onto the lowest speed until the sugar and cocoa are absorbed by the butter.
Increase mixer speed to medium and add vanilla extract, salt, and milk/cream and beat for 3 minutes.
If frosting needs a more stiff consistency, add a little more sugar/If your frosting needs to be thinned out, add additional milk 1 tablespoon at a time.
Friday, August 10, 2012
30th birthday Oreo pops
Besides 3 varieties of mini cupcakes, I also made chocolate covered Oreo pops for my friend L's 30th birthday party. As I may have mentioned before, her favorite color is pink, so when it came to making the Oreo pops, I debated making milk chocolate-covered Oreos with pink 30s versus pink-dyed white chocolate with 30s on them. The answer was easy - both!
The 30s are made of rolled fondant. I let it harden a little bit and then sprayed it with pink edible food spray. Then, I let them dry again. I affixed them to the Oreo pops when the chocolate/CandiQuik was still wet. I also used pink nonpareils and coarse pink sugar to decorate the pops.
Just two notes - (1) I didn't use white chocolate, I used vanilla flavored CandiQuik. (2) When coloring white chocolate or vanilla CandiQuik, make sure you use powdered food coloring.
The 30s are made of rolled fondant. I let it harden a little bit and then sprayed it with pink edible food spray. Then, I let them dry again. I affixed them to the Oreo pops when the chocolate/CandiQuik was still wet. I also used pink nonpareils and coarse pink sugar to decorate the pops.
Just two notes - (1) I didn't use white chocolate, I used vanilla flavored CandiQuik. (2) When coloring white chocolate or vanilla CandiQuik, make sure you use powdered food coloring.
| All the yummy desserts set up! |
Sunday, August 5, 2012
Red velvet cupcakes
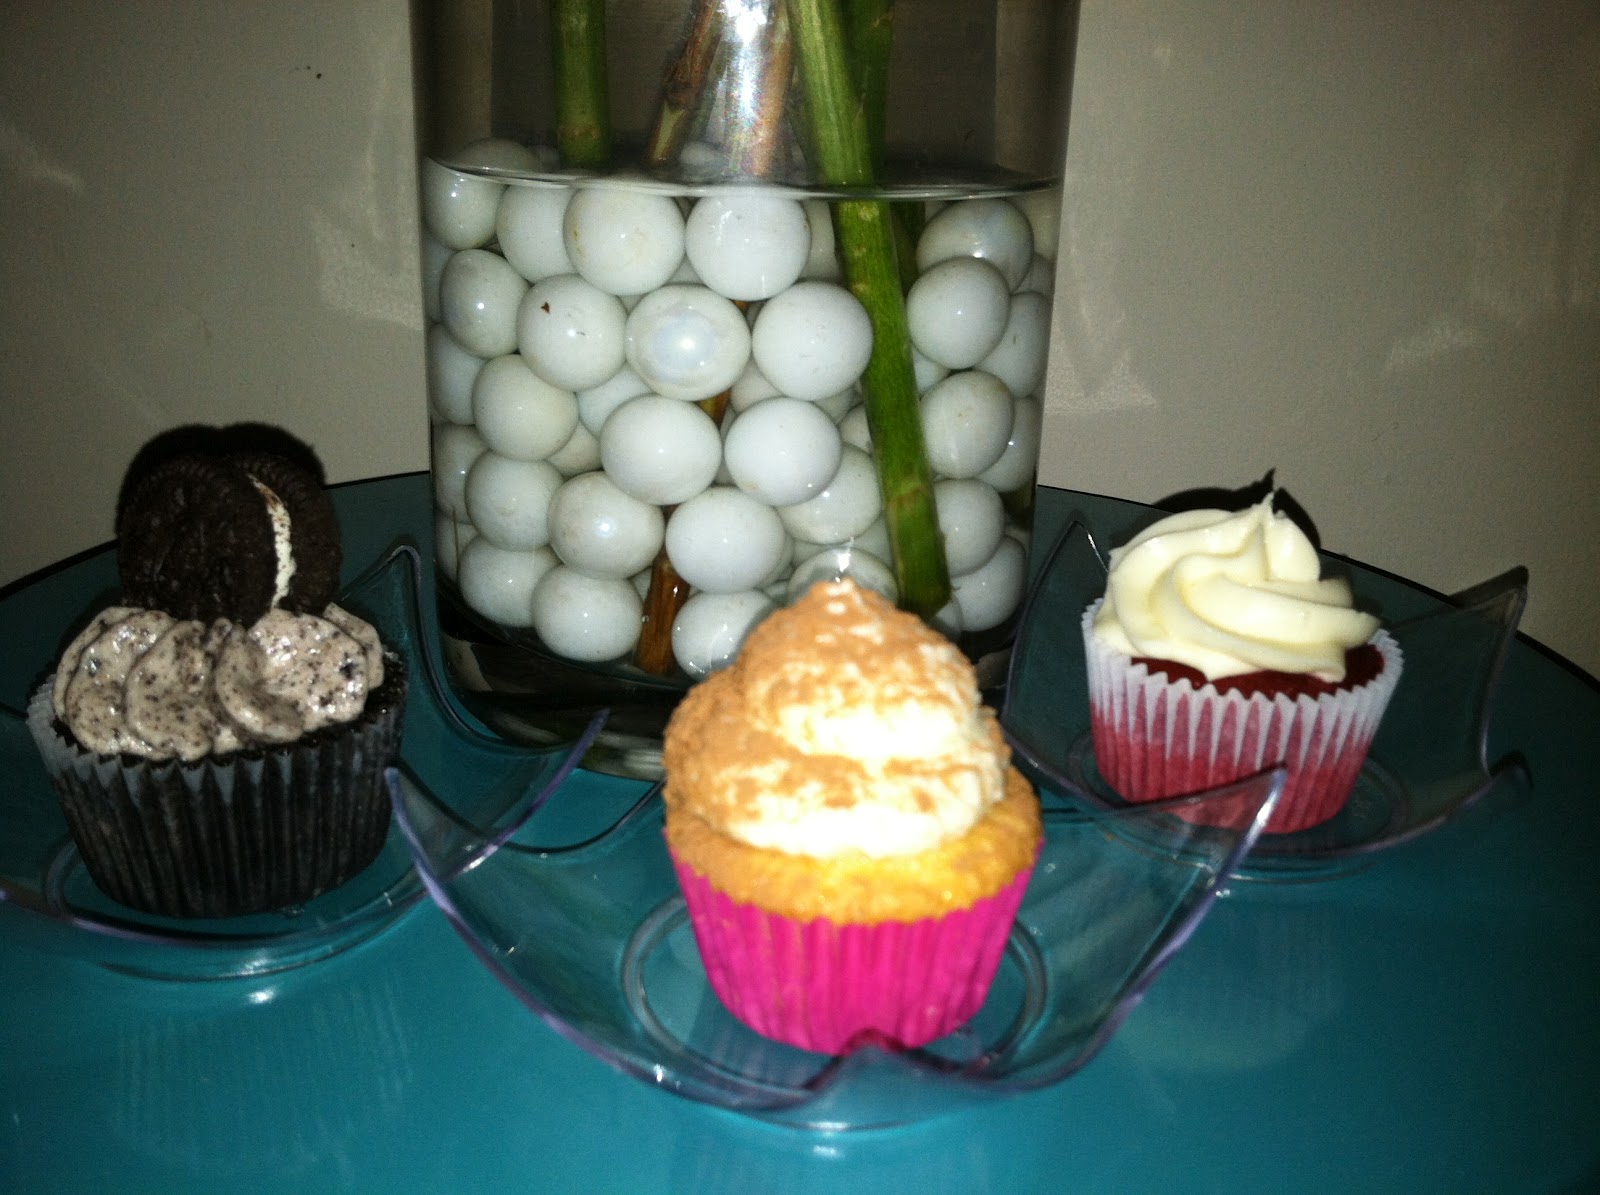
The 30th birthday bash for my friend L was last night. We went to a great dinner, and then to a fantastic bar for drinks afterwards. I brought the treats to the bar....mini cupcakes and chocolate covered Oreo pops (that post will be up in the next few days).
L's two favorite desserts are tiramisu and red velvet cake, so those cupcakes were givens for the party. I also made some "Death by Oreo" cupcakes; as I stated last night "no self-respecting woman would show up with cupcakes and not bring chocolate ones."
So I set out to make the cupcakes the night before and that day. Three types of mini cupcakes, three different icings. Three different piping tips. Several washings of the kitchenaid bowl and attachments. Two loads of dishes run. But it was worth it - in taste, in presentation, in everything!
I made the tiramisu mini cupcakes and "Death by Oreo" cupcakes before. I thought I had made red velvet cupcakes on here before, too, but a quick search through older posts proved me wrong. Check the above links for the other two cupcakes, and below for the red velvet ones. FYI, I halved the red velvet recipe and got 48 minis and 4 full-sized cupcakes.
I'm also posting a picture of all the cupcakes together:
Red Velvet (mini) Cupcakes
Ingredients (for the full batch):
(their recipe uses a vanilla icing, but - in case you didn't know - red velvet (at least in my opinion, but I'm not the only one) should have cream cheese icing, so look below for that recipe)
Directions:
Cream Cheese Icing
(this is originally from Epicurious but I can't find the original recipe anymore. Since I make it all the time, I've somewhat memorized it....see below)
Ingredients:
3 8-oz packages of cream cheese, room temperature
1/2 stick of butter, room temperature
3-4 cups of powdered sugar (I think the original recipe called for 4 cups, but I usually go by taste, because I don't like it too sweet)
Vanilla to taste (I used 1 tsp)
Directions:
Blend together cream cheese and butter
Add vanilla and incorporate
Add powdered sugar, half to 1 cup at a time, to taste.
L's two favorite desserts are tiramisu and red velvet cake, so those cupcakes were givens for the party. I also made some "Death by Oreo" cupcakes; as I stated last night "no self-respecting woman would show up with cupcakes and not bring chocolate ones."
So I set out to make the cupcakes the night before and that day. Three types of mini cupcakes, three different icings. Three different piping tips. Several washings of the kitchenaid bowl and attachments. Two loads of dishes run. But it was worth it - in taste, in presentation, in everything!
I made the tiramisu mini cupcakes and "Death by Oreo" cupcakes before. I thought I had made red velvet cupcakes on here before, too, but a quick search through older posts proved me wrong. Check the above links for the other two cupcakes, and below for the red velvet ones. FYI, I halved the red velvet recipe and got 48 minis and 4 full-sized cupcakes.
I'm also posting a picture of all the cupcakes together:
Red Velvet (mini) Cupcakes
Ingredients (for the full batch):
3 1/2 cups cake flour (not self-rising)
3/4 cup (1 1/2 sticks) unsalted butter, softened
2 cups sugar
3 large eggs, at room temperature
6 tablespoons red food coloring (I use gel coloring, and use less than the recipe calls for as it is very strong food coloring)
3 tablespoons unsweetened cocoa
1 1/2 teaspoons vanilla extract
1 1/2 teaspoons salt
1 1/2 cups buttermilk
1 1/2 teaspoons cider vinegar
1 1/2 teaspoons baking soda
Directions:
Preheat oven to 350°F.
Grease and lightly flour three 9- by
2-inch round cake pans, then line the bottoms with waxed paper.
Or use cupcake papers if making cupcakes or mini cupcakes.
In a small bowl, sift the cake flour and
set aside.
In a large bowl, on the medium speed of an electric mixer, cream the
butter and sugar until very light and fluffy, about 5 minutes.
Add the eggs, one
at a time, beating well after each addition. In a small bowl, whisk together the
red food coloring, cocoa, and vanilla.
Add to the batter and beat well.
In a measuring cup, stir the salt into the buttermilk.
Add
to the batter in three parts alternating with the flour.
With each addition,
beat until the ingredients are incorporated, but do not overbeat.
In a small
bowl, stir together the cider vinegar and baking soda.
Add to the batter and mix
well.
Using a rubber spatula, scrape down the batter in the bowl, making sure
the ingredients are well blended and the batter is smooth.
Divide the batter among the prepared pans. Bake for 30-40
minutes (my mini cupcakes took about 8 minutes), or until a cake tester inserted in the center of the cake comes out
clean.
Let the cupcakes cool.
Ice the cupcakes with:Cream Cheese Icing
(this is originally from Epicurious but I can't find the original recipe anymore. Since I make it all the time, I've somewhat memorized it....see below)
Ingredients:
3 8-oz packages of cream cheese, room temperature
1/2 stick of butter, room temperature
3-4 cups of powdered sugar (I think the original recipe called for 4 cups, but I usually go by taste, because I don't like it too sweet)
Vanilla to taste (I used 1 tsp)
Directions:
Blend together cream cheese and butter
Add vanilla and incorporate
Add powdered sugar, half to 1 cup at a time, to taste.
Subscribe to:
Posts (Atom)