Facebook 1

Wednesday, August 15, 2012

Vanilla (yellow) cupcakes

Vanilla is.....boring.  I'm sorry if you're a huge vanilla fan, and I really don't have all that much against it, it's just that I think chocolate is so much richer tasting.  more flavorful.  better.


But after the "complex" cupcakes I made last week, a friend requested a vanilla cupcake.  Plain vanilla.  I don't get it, but being a people pleaser, I decided I'd make those vanilla cupcakes.  I've made the recipe before in mini cupcakes and a cake, and since they were so good those times (even to me, the vanilla non-lover), I stuck with that recipe again.

And then I did something so uncharacteristic of me....I made (gulp!) regular-sized cupcakes.  And then I decided to quarter the recipe, since I was making cupcakes for two people and didn't want tons of cupcakes (I still got 9!).  But, in true fashion, I made a chocolate icing.  Originally, my goal had been a vanilla cupcake with vanilla icing as I knew my friend is a huge vanilla fan, but my vanilla buttercream recipe is time-intensive and I simply didn't have the time today.  Years ago I had made a really good easy chocolate icing, so I googled that, but couldn't find it.  So I googled "easy chocolate buttercream" and found the icing I ended up using.  It is SO good!  And, I actually made it with a whisk -- I didn't even need to use a hand mixer or my kitchenaid!


For the yellow cake cupcakes, click here.  Again, I divided the recipe by 4 and ended up with 9 full-sized cupcakes.  That would be 36 cupcakes for a full recipe, but the original says 22-24.  Someone's math is wrong, and I don't think it's mine.

Chocolate Buttercream Frosting

Ingredients

1 cup unsalted butter (2 sticks or 1/2 pound), softened
3 1/2 cups confectioners (powdered) sugar
1/2 cup cocoa powder
1/2 teaspoon table salt
2 teaspoons vanilla extract or 1 teaspoon almond extract
4 tablespoons milk or heavy cream (I used skim milk, since it was all I had as I had used all the cream in my apartment to make homemade vodka sauce today)

Directions:

Cream butter for a few minutes in a mixer with the paddle attachment on medium speed (I used a whisk and did it by hand). Turn off the mixer.
Sift 3 cups powdered sugar and cocoa into the mixing bowl.
Turn mixer onto the lowest speed until the sugar and cocoa are absorbed by the butter.
Increase mixer speed to medium and add vanilla extract, salt, and milk/cream and beat for 3 minutes.
If frosting needs a more stiff consistency, add a little more sugar/If your frosting needs to be thinned out, add additional milk 1 tablespoon at a time.

Friday, August 10, 2012

30th birthday Oreo pops

Besides 3 varieties of mini cupcakes, I also made chocolate covered Oreo pops for my friend L's 30th birthday party.  As I may have mentioned before, her favorite color is pink, so when it came to making the Oreo pops, I debated making milk chocolate-covered Oreos with pink 30s versus pink-dyed white chocolate with 30s on them.  The answer was easy - both!

The 30s are made of rolled fondant.  I let it harden a little bit and then sprayed it with pink edible food spray.  Then, I let them dry again.  I affixed them to the Oreo pops when the chocolate/CandiQuik was still wet.  I also used pink nonpareils and coarse pink sugar to decorate the pops.

Just two notes - (1) I didn't use white chocolate, I used vanilla flavored CandiQuik.  (2) When coloring white chocolate or vanilla CandiQuik, make sure you use powdered food coloring.


All the yummy desserts set up!

Sunday, August 5, 2012

Red velvet cupcakes

The 30th birthday bash for my friend L was last night.  We went to a great dinner, and then to a fantastic bar for drinks afterwards.  I brought the treats to the bar....mini cupcakes and chocolate covered Oreo pops (that post will be up in the next few days).


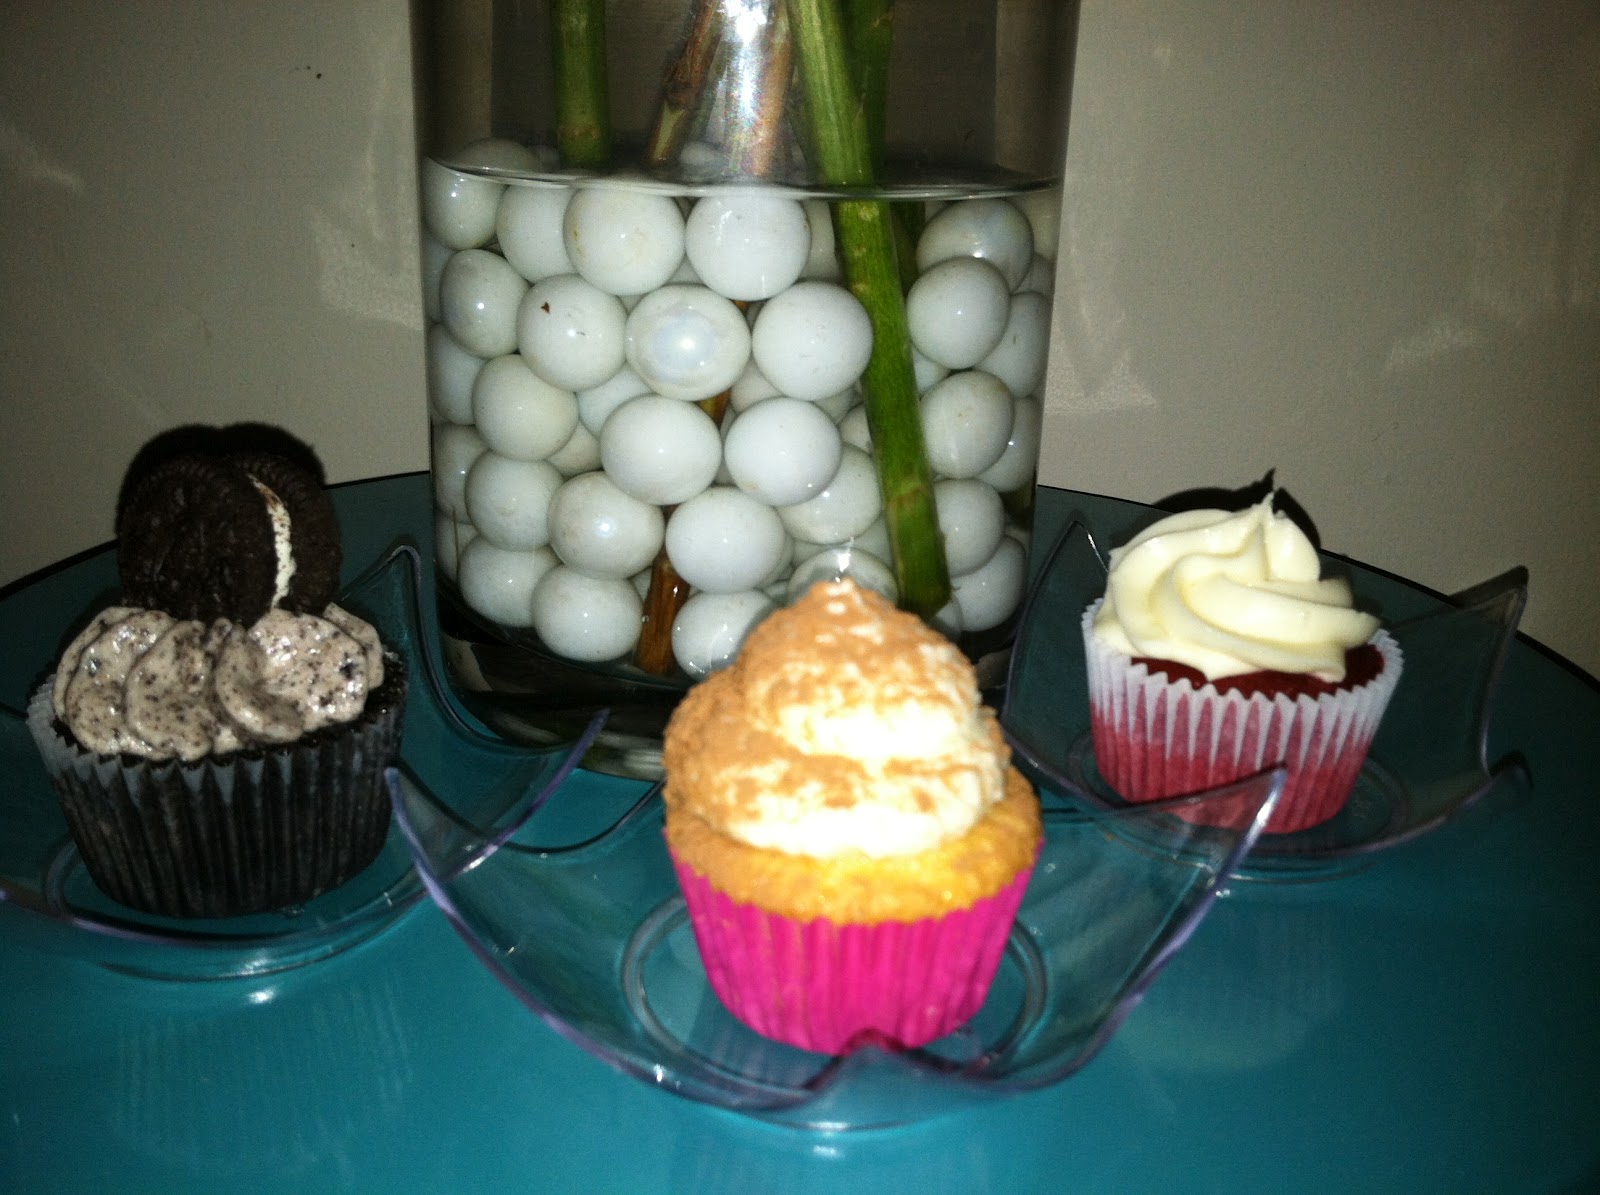
L's two favorite desserts are tiramisu and red velvet cake, so those cupcakes were givens for the party.  I also made some "Death by Oreo" cupcakes; as I stated last night "no self-respecting woman would show up with cupcakes and not bring chocolate ones." 


So I set out to make the cupcakes the night before and that day.  Three types of mini cupcakes, three different icings.  Three different piping tips.  Several washings of the kitchenaid bowl and attachments.  Two loads of dishes run.  But it was worth it - in taste, in presentation, in everything!


I made the tiramisu mini cupcakes and "Death by Oreo" cupcakes before.  I thought I had made red velvet cupcakes on here before, too, but a quick search through older posts proved me wrong.  Check the above links for the other two cupcakes, and below for the red velvet ones.  FYI, I halved the red velvet recipe and got 48 minis and 4 full-sized cupcakes.

I'm also posting a picture of all the cupcakes together:


Red Velvet (mini) Cupcakes

Ingredients (for the full batch):

3 1/2 cups cake flour (not self-rising)
3/4 cup (1 1/2 sticks) unsalted butter, softened
2 cups sugar
3 large eggs, at room temperature
6 tablespoons red food coloring (I use gel coloring, and use less than the recipe calls for as it is very strong food coloring)
3 tablespoons unsweetened cocoa
1 1/2 teaspoons vanilla extract
1 1/2 teaspoons salt
1 1/2 cups buttermilk
1 1/2 teaspoons cider vinegar
1 1/2 teaspoons baking soda

(their recipe uses a vanilla icing, but - in case you didn't know - red velvet (at least in my opinion, but I'm not the only one) should have cream cheese icing, so look below for that recipe)

Directions:

Preheat oven to 350°F.
Grease and lightly flour three 9- by 2-inch round cake pans, then line the bottoms with waxed paper.
Or use cupcake papers if making cupcakes or mini cupcakes.

In a small bowl, sift the cake flour and set aside.
In a large bowl, on the medium speed of an electric mixer, cream the butter and sugar until very light and fluffy, about 5 minutes.
Add the eggs, one at a time, beating well after each addition. In a small bowl, whisk together the red food coloring, cocoa, and vanilla.
Add to the batter and beat well.

In a measuring cup, stir the salt into the buttermilk.
Add to the batter in three parts alternating with the flour.
With each addition, beat until the ingredients are incorporated, but do not overbeat.
In a small bowl, stir together the cider vinegar and baking soda.
Add to the batter and mix well.
Using a rubber spatula, scrape down the batter in the bowl, making sure the ingredients are well blended and the batter is smooth.

Divide the batter among the prepared pans. Bake for 30-40 minutes (my mini cupcakes took about 8 minutes), or until a cake tester inserted in the center of the cake comes out clean.
Let the cupcakes cool.
Ice the cupcakes with:

Cream Cheese Icing
(this is originally from Epicurious but I can't find the original recipe anymore.  Since I make it all the time, I've somewhat memorized it....see below)

Ingredients:

3 8-oz packages of cream cheese, room temperature
1/2 stick of butter, room temperature
3-4 cups of powdered sugar (I think the original recipe called for 4 cups, but I usually go by taste, because I don't like it too sweet)
Vanilla to taste (I used 1 tsp)

Directions:

Blend together cream cheese and butter
Add vanilla and incorporate
Add powdered sugar, half to 1 cup at a time, to taste.

Sunday, July 29, 2012

Chewy chocolate cookies with white chocolate chips

My friend L's 30th birthday is tomorrow!  We've planned a big 30th birthday bash for her this coming weekend, but tomorrow she's planning to get a few of us together to watch a movie in Bryant Park (weather dependent, of course, considering the 10-day forecast in New York City is showing 10 days of rain).  I was going to bring cupcakes, but decided against it for a few reasons....first of all, tomorrow is my first day back at work after vacation, and the idea of schlepping 12 or 24 full sized cupcakes to Brooklyn to work and then back into Manhattan with me seemed daunting.  Plus, I just made two different varieties of mini cupcakes for my birthday party last night.  And that 30th birthday bash that I mentioned?  Yeah, I'm baking for that, too (keep your eyes peeled over the next week and a half for all those posts).


So cookies seemed like a good idea.  Tasty, portable, and no garbage related to them (like cupcake wrappers), which seemed nice for the park.  I had two options of types of cookies that I was going to make.  These chewy chocolate cookies with white chocolate chips and a double chocolate variety.  Originally I was going to make them both, but decided that they were kinda redundant....chocolate cookies with chocolate chips, just different kinds of chips.  I chose the white chocolate chip onces since they (a) used dark chocolate cocoa powder (well the both did, but I love dark chocolate), and (b) I liked the contrast of the white chocolate chips in the super rich dark chocolate cookie.


I decided to make cookies on the smaller size.  I made 48.  There's now about enough cookie dough to make AT LEAST another 48 in my freezer.  Great for a rainy day (or a surprise event).

Chewy Chocolate Cookies with White Chocolate Chips

Ingredients:

1 3/4 cups flour
1 1/4 cups cocoa powder (I used Hershey’s Dark Chocolate Cocoa Powder)
1 cup white sugar
3/4 cup brown sugar
2 tsp baking soda
1 cup butter, room temperature
2 eggs
1 tsp. vanilla
1/4 tsp salt
2 cups white chocolate chips

Directions:

Preheat oven to 350 degrees and grease cookie sheet (or line with parchment paper).

In a large bowl, cream together the butter, brown sugar and white sugar until light and fluffy.
Add eggs one at a time, beating well with each addiction.
Add the salt and vanilla.

In another bowl, combine the flour, cocoa and baking soda.
Gradually add to the creamed mixture (I just dumped it all in....oops!)
Fold in chocolate chips.
Drop by rounded spoonfuls onto the prepared cookie sheet.  I used my mini scooper to make smaller cookies - they came out about the size of an Entemann's cookie - remember those?  Such fond memories....but I digress - but a bit thicker.

Bake for 8 to 10 minutes until fluffy but still soft.  My smaller cookies baked for about 6 minutes.
Allow cookies to cool on baking sheet for 5 minutes before removing to a wire rack to cool completely.

Kit Kat cupcakes

This is the second installment of my birthday cupcakes.  First ones were the S'mores ones I posted before these.

This post is about candy cupcakes.  I wanted to make a candy-themed cupcake for my birthday but wasn't really sure what kind of candy I should choose.  I had been at Target recently and debated whether or not to buy a bag of mini tri-colored (white, milk, and dark chocolate) Kit Kats....and although I didn't buy them, I guess it stuck with me since I ultimately made Kit Kat cupcakes.


I found a recipe for Kit Kat cupcakes the old-fashioned way - through a google search and not from Pinterest!  I made a few modifications.  For instance, the blog complained that the wafers in the cupcakes popped up.  So instead of placing the wafer on top of the cupcake batter, I placed it in the cupcake tin first and then put the batter on top.  I also used chocolate filled wafers.  And my frosting, a whipped milk chocolate ganache like the recipe called for, but I had to doctor the proportions so that the consistency was right (and I don't really know the proportions).  And I, of course, topped them with a piece of a Kit Kat!


Again, I halved this recipe.  I still got 48 mini cupcakes from that.


Kit Kat Cupcakes
(Cupcake ingredients are listed for the full recipe)

Ingredients:

Bite sized wafer cookies (48 for a half batch of batter)

1/2 cup water
1/2 cup cocoa
1/4 cup canola oil (I used vegetable oil, since thats what I had)
1/2 cup butter to a boil
1 cup whole wheat pastry flour (I replaced that with all purpose flour)
1 1/2 cups all purpose flour (So I used 2.5 cups of all purpose and NO whole wheat flour)
1 teaspoonful baking soda
1 teaspoonful salt
2 eggs
2 cups sugar
1/2 cup buttermilk
1 teaspoonful vanilla

Milk Chocolate
Heavy whipping cream
(in 3:1 ratio chocolate to cream)

Kit Kat bars, optional

Directions:

Preheat oven to 350 (there was actually no cooking temperature for the recipe, so I used 350 as that is what most recipes use)

Bring water, cocoa, oil, and butter to a boil, then let it cool. 
Sifted together flour, baking soda, and salt.
In another bowl, mix together eggs, sugar, vanilla, and buttermilk.
Add the dry ingredients to that bowl.
Then add in the cocoa mixture.
Stir until blended.

Place one small wafer in the bottom of each cupcake liner.
Place 1 tablespoon of batter on top of each wafer and make sure that it completely covers and surrounds the wafer.
Bake for about 10 minutes until cupcakes are cooked through.

Make the icing: Boil cream.  Pour on top of chopped milk chocolate.  Mix until all chocolate is melted.  Let cool.  Whip until holds peaks.  Pipe onto cupcakes.  Top with a piece of Kit Kat.

Saturday, July 28, 2012

S'mores cupcakes

My birthday was a few days ago.  I had the week off from work and I had a low-key day.  One thing I didn't have?  A cupcake or a slice of cake!  That was despite the fact that a good portion of the birthday wishes I got on Facebook said things like: "I know you're always baking up a storm, but I hope someone else baked you a cake for your birthday, too;" "I hope that someone is baking you something special today;" and "I hope someone makes you a nice cake." 

But, alas, I was the one who did the baking (just not on my actual birthday).  This weekend I'm getting together with friends for drinks, and decided to bring some cupcakes.  The only problem was that I didn't know what type of cupcakes to make.  I wanted something that I hadn't yet featured on the blog and something that would hopefully stand up to the heat (as, weather depending, we'll be outside).  At least one recipe had to be nut and peanut free, as my cousin is allergic to both, and she'll be there.
First up were S'mores cupcakes.  I changed the original recipe a little - instead of coating the graham cupcake with a semisweet chocolate ganache glaze, I filled it with a milk chocolate ganache.  S'mores are, at least in my recollection, made with Hershey's milk chocolate, so I couldn't rationalize using semisweet chocolate over milk chocolate (but shhhh!, I didn't use Hershey's).  Oh, and after much debate, I made them mini.  For once, it wasn't an automatic reaction to make minis....but ultimately minis won out for one reason only...some of my favorite cupcake liners are mini, and I wanted to use those!  I'll have to make some full-sized cupcakes soon with some of my other favorite cupcake liners :)


 Just so that you know, I halved the recipe.  The HALVED recipe made 47 mini cupcakes.  It probably would've made a few more, except I overfilled the cups a little in the first batch that I made, and a bunch of them rose a lot and overflowed.  I used a scooper made for mini muffin tins and it was too much.  The second and third batches that I made I used a heaping tablespoon of batter and they just rose to a few millimeters below the top of the cupcake liner.  That was fine for me, since I planned to inject some milk chocolate ganache into the center of the cupcakes, and I knew that that would make them rise a little.
It's kind of hard to see on the picture on the right, but the ganache filling is peeking out

I ended up using a different icing for one reason - my thermometer doesn't reach the necessary temperature AND I couldn't find my thermometer.

***I found graham flour at Whole Foods.  It's also available online from places like King Arthur Flour (I just placed an order from them for another cupcake-related product for an idea I have) and Bob's Red Mill (the brand they had at Whole Foods).***

Graham Cupcakes
(These amounts are for the FULL recipe)
Ingredients:
1 1/2 cups all-purpose flour
1 1/3 cups graham flour
2 teaspoons baking powder
1 1/2teaspoons salt
1 1/2 teaspoons ground cinnamon
10 ounces unsalted butter, room temperature
2 cups light brown sugar
1/4 cup honey
6 eggs
2 teaspoons vanilla extract

Directions:

Preheat oven to 350 degrees F.
Line muffin tins with paper liners.
Whisk together both flours, baking powder, salt and cinnamon.
With an electric mixer on medium-high speed, cream the butter, brown sugar, and honey until pale and fluffy.
Reduce speed to medium.
Beat in the eggs and vanilla, scraping down the sides of the bowl as needed.
Add the flour mixture and mix until just combined.
Place the batter in the lined cups.  Use 1 Tbsp for mini cupcakes
Bake until golden brown and a toothpick inserted in the centers comes out with only a few moist crumbs attached, about 10-12 minutes for minis.
Transfer tins to wire racks to cool 10 minutes; turn out cupcakes onto racks and let cool completely. Cupcakes can be stored up to 1 day at room temperature, or frozen up to 1 month.
Milk Chocolate Ganache Filling

Ingredients:

6 oz milk chocolate, chopped
2 oz cream

Directions:

Boil cream
Pour over chocolate
Mix until all chocolate is melted (I used a whisk)
Let cool slightly

Place into a pastry bag fitted with a thin small tip.
"Inject" a small amount of ganache into center of each cupcake.

Cloud Frosting (otherwise known as Martha Stewart's Seven Minute Frosting) - It's said to be a cross between whipped cream and marshmallow
Slightly modified by moi

Ingredients:

2 1/2 cups sugar
6 egg whites, room temperature (oops, didn't read that part until later)
1/2 cup water (I used less since I wasn't using cream of tartar)
1/2 tsp cream of tartar (I left this out)
1 Tbsp vanilla

Directions:

Combine sugar, egg whites, water, and cream of tartar in bowl of an electric mixer and mix until foamy.  As I stated above, I didn't use the cream of tartar and decreased the water (I ended up using just under a quarter of a cup).
Set pan over a pot of slightly simmering water (makeshift double boiler) and whisk until sugar is dissolved and mixture is warm to the touch.
Transfer the bowl to the stand mixer and whisk on high until stiff peaks can be formed, about 12-16 minutes (mine took less, maybe because of the changes I made?)
Add vanilla and beat until incorporated (I must confess, I added the vanilla when I switched it to the stand mixer)

Pipe frosting onto cupcakes.

I topped them with a small sliver of milk chocolate.

Sunday, July 22, 2012

Peach vanilla bean bundt cake

Tonight I got together with my camp friends.  I've know these girls since the beginning of the summer of 1993.  That's 19 years!  Every once in a while we try to get us all together.  Recently I saw my friend J after she completed the NYC Triathlon (!!) and celebrated her early birthday, and I saw my friend E and her fiancee for drinks in the city a few weeks ago.  Before that, L opened an adorable kid's clothing store, Picnic, and L & E and I went to the opening.  (As an aside, if you're in the Brooklyn Heights area and looking for kids clothing, check out Picnic).  But tonight was the first time in a long time that all 5 of us were together.


Originally I thought that I'd make cupcakes.  I was going to do one for L, the expectanct mom, with a onesie on it.  One for the other L, whose daughter just turned one, I was going to have a big fondant "1" on it.  For E, a bridal themed one, since she's getting married at the end of September.  And then 3 birthday-themed ones - one for J whose birthday was a week and a half ago, one for L (the expectant mom), whose birthday is the 26th...and then one for me, since my birthday is this week.  And although cupcakes would transport easily, thanks to my handy cupcake packaging that I bought (check out the minis here....I also have full-sized ones), I was afraid the heat would melt the icing on my trek from Manhattan to New Jersey....on public transportation!  I had a bunch of other summer-themed ideas for the rest of the cupcakes, but it didn't matter.  I needed something summery and tasty but that wouldn't melt on my journey.


Enter the bundt cake.  A summery flavored bundt cake that had one of my favorite things in it....peaches!  So I did something so very un-Julie, and made it today for the first time....to bring to them tonight.  I snuck a taste of the bottom (shhh!  Don't tell the ladies!) and it was really good...I'm thinking of renaming it the "Peaches and Cream" bundt cake, since it tastes like peaches and cream....and thats before I put on the peach soaking syrup!


Peach Vanilla Bean Bundt Cake with Peach Soaking Syrup
(or Peaches and Cream Bundt Cake)

Ingredients

3 cups all-purpose flour
1/2 teaspoon baking powder
1/2 teaspoon baking soda
1/2 teaspoon salt
1 cup (2 sticks) unsalted butter, softened
1 3/4 cups granulated sugar
4 large eggs, room temperature
1 vanilla bean, split, seeds (save the pod for something else)
1 cup sour cream
1 1/2  cups diced fresh peaches (peeled)

For the syrup:
1/3 cup fresh peach puree, strained (I strained mine after I made the syrup....oops.  But it worked)
2/3 cup granulated sugar
1 tablespoon orange juice

Directions:

Place rack in center of oven and preheat oven to 350.
Grease and lightly flour inside of 10 inch bundt pan (In the notes it said to make sure you grease and flour well, so I used baking Pam and then ALSO floured the pan.  It worked....it literally slipped out as I was inverting it.  But thankfully it didn't fall and stayed perfectly intact....minus a little inch by half inch section that fell off).

Whisk together flour, baking powder, baking soda, and salt in a large bowl. Set aside.

Using either a stand mixer (paddle attachment) or a hand mixer, beat the butter at medium speed until creamy, about 2 minutes.
Gradually add sugar and beat at medium-high speed until the mixture is light in texture and color, about 3 minutes.
Beat in eggs one at a time, beating for 30 to 40 seconds after each addition.
Scrape down sides of bowl as necessary.
Beat in vanilla bean (the scraped seeds).
At low speed, add flour mixture in three additions, alternating with sour cream.

Scoop half of batter into pan and spread with spatula. Sprinkle with peaches. Scoop remaining half of batter on top of peaches. Smooth with spatula.  In reading the notes at the bottom, I read that you can fold the peaches into the batter instead of layering them.  I thought this might be safer considering the voyage the cake has to take today.

Bake cake for 50 to 60 minutes, or until a tooth pick inserted in the center comes out clean. Cool the cake in the pan on a cooling rack for 10 minutes, then invert it onto another rack. Place the cake, on the rack, over a baking sheet.

While cake is baking, make syrup. Combine peach puree, sugar, and orange juice in a small non reactive saucepan and cook over medium heat, stirring until the sugar dissolves, 3 to 4 minutes.
Remove pan from heat.
Using a pastry brush, dab syrup generously all over surface of the warm cake, allowing it to soak into the cake before reapplying.
Let the cake cool completely.