Facebook 1

Saturday, July 21, 2012

Big apple cookies

My friends B & E are leaving New York at the end of the month - they're moving back home to Kentucky.  Before they leave, they've arranged a picnic in Central Park as a send-off.  Of course I replied that I'd there and that I'm be willing to bring some food.  I was informed that B would be making a BBQ brisket and was asked to bring some sides.  I made some Mexican slaw (no mayo.....because mayo is ewwww (in my opinion), but also because mayo left out in the heat and sun is double ewwww).  But I also wanted to bring a treat.  This is, afterall, the JulieBakes blog and not a JulieCooks blog (although I wouldn't put it past myself to create that in the near future).


I tried coming up with some cute New York-themed desserts.  I already made those black and white cookies for the black-and-white-themed New Year's Eve party that I attended earlier in the year, and while I'm not against repeating a recipe in the less-than-one-year-life of this here blog, I'm not a super huge fan of black and white cookies.  Mini cheesecakes sounded like a cute idea, but it's July.  In New York.  And it's HOT!  I ended up sticking with my original idea..."Big Apple" sugar cookies!  They're tasty, easy to transport, and such a cute idea (if I do say so myself).


A few years ago I went on a cookie cutter buying spree.  I bought cookie cutters for events that I had planned (baby shower, bachelorette party); ones that I thought were versatile and "every day," like flowers and candy shapes; holiday-themed ones (Channukkah, Christmas); and ones that I simply thought were cute (fruit shapes, champagne glass).  One of those fruit shaped ones was an apple.  In my case a "Big Apple." 


I made the cookie dough a few days ahead and then baked them a few days before the BBQ.  I needed to leave enough time to make the cookies, decorate them with royal icing, and then let them dry before I packaged them up.  Then I made cute labels to put in the bagged cookies for B & E (The picture is kinda hard to read.  They say "We're going to miss you in the BIG APPLE" and they're red, but look pink in the photo.


Sugar Cookies (from Martha Stewart's Cookies, and available here)
(In full disclosure, the cookies you see above are actually butter cookies from my friend's grandmother's family recipe.  I used that version because they can be made further ahead than these sugar cookies and I had time constraints.  I have not yet gotten permission to disclose her family recipe, but this is my cut out sugar cookie recipe of choice.)

Ingredients:

4 cups sifted all-purpose flour
1 teaspoon baking powder
1/2 teaspoon salt
1 cup (2 sticks) unsalted butter, room temperature
2 cups granulated sugar
2 large eggs
2 tablespoons pure vanilla extract (the web version says freshly squeezed lemon juice instead of vanilla)
Directions:

Sift flour, salt, and baking powder into a bowl.

Put butter and sugar in the bowl of an electric mixer fitted with the paddle attachment. Mix on medium speed until pale and fluffy.
Mix in eggs and vanilla.
Reduce speed to low. Gradually mix in flour mixture.
Divide dough in half; flatten each half into a disk. Wrap each in plastic. Refrigerate until firm, at least 1 hour or overnight.

Preheat oven to 325 degrees with racks in upper and lower thirds. Let one disk of dough stand at room temperature just until soft enough to roll, about 10 minutes.
Roll out dough between two pieces of plastic wrap (I use wax paper or in a pinch parchment paper...I also recommend flouring the paper.  The original Martha Stewart Cookies cookbook says to roll in out on a lightly floured work surface, but I always roll cookies between layers of wax/parchment) to 1/4-inch thick. Remove top layer of plastic wrap.
Cut out cookies with a cookie cutter. Transfer cut out cookies onto a parchment paper-lined baking sheet. dough on plastic wrap to a baking sheet. Transfer baking sheet to freezer, and freeze dough until very firm, about 15 minutes.
Roll out scraps, and repeat.
Repeat with remaining disk of dough.

Bake, switching positions of sheets and rotating halfway through, until edges turn golden, 15 to 18 minutes.
Let cool on sheets on wire racks.

Royal Icing (from Cookie Craft)
There are different recipes for the piping and flooding versions of the icing.  I'll be honest - in order to keep the colors the same, I made the piping incing, take what I need and pipe it onto the cookies while keeping the mixer going.  Then, when I have finished piping, I add the additional water to that version of the icing to make the flood version.

Piping Royal Icing. 
This recipe can be halved....see below
(I use meringue powder because I think it's safe and it's what I have....it can be made with powdered egg whites or liquid pasteurized egg whites, but the proportions are different, so don't replace those for the meringue powder in the same amounts)

Ingredients:

4 cups (1 lb) confectioners' sugar
3 Tbsp meringue powder (FYI, if halving, use 4 tsp meringue powder)
6 Tbsp warm water (plus an additional 6 Tbsp for flooding consistency)

Directions:

Combine all ingredients in the bowl of an electric mixer
Beat on high for 5 minutes (10 minutes if using a hand mixer).  If your mixer has a paddle attachment, use that (I used the whisk attachment and it works JUST fine).
When you reach the desired consistency, immediately cover the mixture or store it in airtight containers (As I did with the green and brown while I was using the red).

Add food coloring as desired.

Add icing into a bag fitted with a coupler and piping tip. 
Pipe away!

With the mixer going, slowly add the additional 6 Tbsp of warm water, 1 Tbsp at a time until you have the desired consistency.  You may not need all the water as you've already removed some of the icing for piping.....now you have flooding royal icing.

Let piping frosting dry and harden, then flood the area with the flooding royal icing.  I use a toothpick to spread that icing all the way to the piped edges.

Monday, July 16, 2012

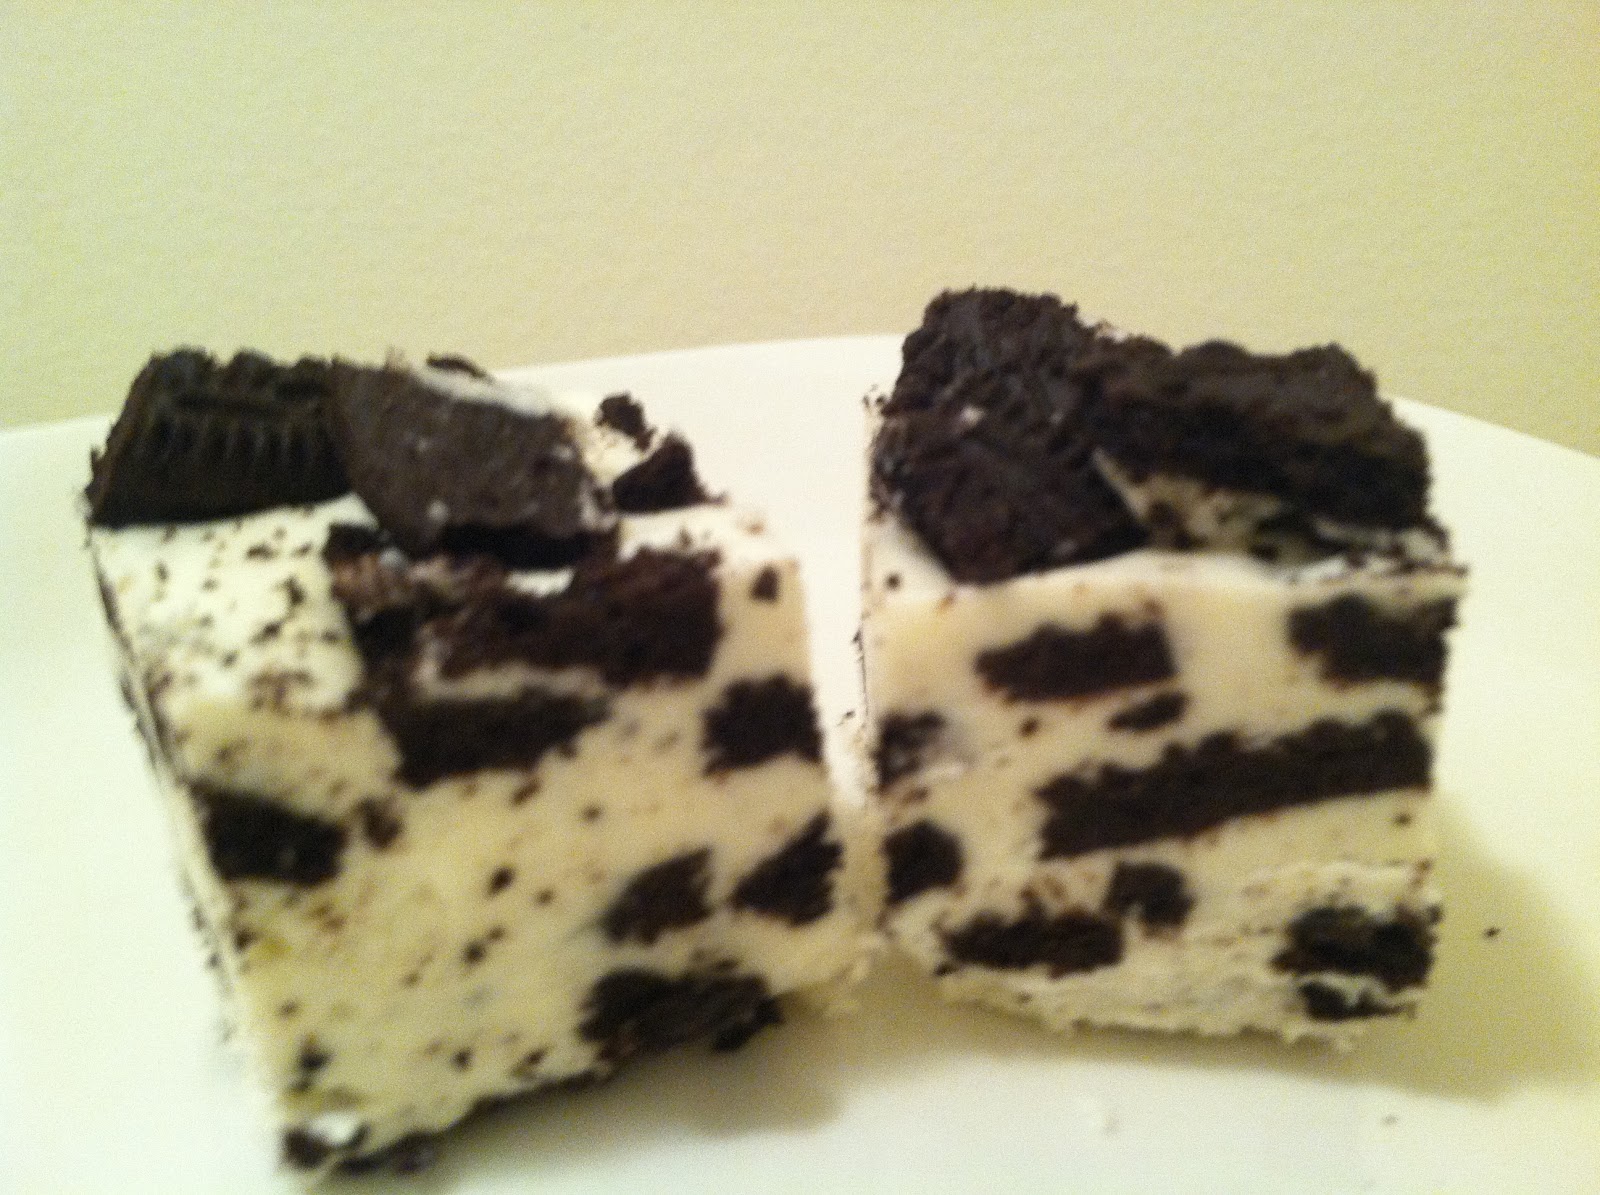
White chocolate cookies n' cream fudge

First off, I'm not sure why the original recipe called it "white chocolate cookies n' cream fudge" and not "white chocolate Oreo fudge."  Because frankly, whenever I think of cookies n' cream, I think of Oreos.  But I digress.


I saw this recipe a while ago.  I wanted to make it, but had no occasion for which to make it, so I put it aside for later on.  But that event never came, and the recipe was still calling to me.  So about a week and a half ago I went to the grocey store and picked up the ingredients for a few things that I wanted to make.  This fudge was one of them.  The ingredients lasted more than a week in my kitchen, and last night after I got home from work and celebrating a friend's birthday, I finally made it. 


I often think white chocolate is very sweet, and with the added sugar and Oreos, I expected that this would be one sweet fudge!  Surprisingly, it wasn't too sweet.  However, I do recommend cutting it into small pieces.  And sharing it.  With a ton of people.  I actually think it would make a cute gift, maybe with a carton of milk?  I'm wondering if this recipe is adaptable, and perhaps next time I'd make it with a semisweet or dark chocolate, or add in other fillings....

White Chocolate Oreo Fudge
(I've renamed it.....it's my blog afterall and I can do what I want!)

Ingredients:

1 cup sugar
3/4 cup butter
1 (5 oz) can evaporated milk

2 x 12 oz bags of white chocolate morsels
1 7oz jar of marshmallow cream (I found a 7.5oz jar and eyeballed the 7oz from it)
3 cups coarsely chopped Oreos (about 25), divided (I used 2/3 a package of regular - not double-stuffed - Oreos)
Pinch of salt

Directions:

Line a greased (oops, missed that part, but I don't understand why greasing the pan under the foil would make a difference...and it didn't) 9x9 inch pan with tin foil (leave some overhanging)

Combine the sugar, butter, and evaportaed mik in a medium saucepan.
Cook over medium-high heat stirring constantly, until it comes to a boil.  Cook 3 more minutes, stirring constantly.
Remove from the heat, add: white chocolate morsels, marshmallow cream, 2 cups of Oreos, and salt.
Stir until morsels melt.
Poir fudge into prepared pan.
Sprinkle remaining crushed cookies over the fudge, and gently press cookies into fudge.
Cover and let chill until firm, about 1-2 hours.

Lift the block of fudge from the pan (using the overhang....convenient, right?)
Remove foil and cut fudge into squares

Sunday, July 8, 2012

Chocolate cups

Almost everyone loves a Reese's Peanut Butter Cup.  Except maybe my peanut-allergic cousin.  But I digress.  Anyway, Reese's....loved by almost everyone.  And for good reason.  Peanut butter and chocolate are an age old - and delicious - combination.  But, while I enjoy the occasional Reese's Peanut Butter Cup (I much prefer the pieces to the cups), I always wonder about alternative fillings.  Enter Pinterest.  I found recipes for chocolate Nutella cups and chocolate chip cookie dough peanut butter cups.  But that wasn't enough for me. 


Then I remembered the Speculoos Cookie Butter that I had picked up at Trader Joe's a while back.  And the marshmallow fluff that I had picked up for another (yet to be made) recipe.  And I always seem to have some Nutella here.  And thus, some flavor combinations were born...

I made four different flavors of chocolate cups: Speculoos cookie butter, marshmallow fluff, Nutella, and Speculoos cookie butter with fluff.  I decided I'd save the chocolate chip cookie dough peanut butter cups for another occasion.


I'm going to include a recipe for these, but frankly, they don't really need a recipe.  You just need to know one thing....these are good.  Very good!


Chocolate _____ Cups -- you fill in the blank!
Based on this recipe for chocolate Nutella cups

Ingredients:

Chocolate chips (the Nutella recipe says 8 oz) in any flavor - I used semisweet because, well simply, thats what I had in the kitchen.
1/2 cup of the filling of your choice (Nutella, peanut butter, almond butter, fluff, Speculoos cookie butter....the list could go on and on)
Mini cupcake liners -- although I used candy cups (a bit smaller)

Directions:

Melt chocolate chips in the microwave at 30 second intervals, mixing in between.

Take a small spoon and scoop some melted chocolate into the bottom of each cupcake line so that it completely lines the bottom (you want it thick enough to hold in the filling but not too thick so that you don't have room for filling the cups).
Take the back of the spoon and dip into chocolate and line the inner sides of the cupcake liners with chocolate as well (I used a lollipop stick). Repeat with all cupcake liners.
Once the inside of the cupcake liners has been completely coated with chocolate, put in the refrigerator to harden, for about 20 minutes.

Remove liners from fridge after the chocolate has hardened. Take spoonful of the filling and place into each chocolate cup.
Take a spoonful of the remaining melted chocolate and pour on top of the filling until you can no longer see the filling.
Attempt to smooth top with back of spoon.
Repeat with remaining cups. Place cups in fridge for another 20 minutes until chocolate is hardened.

Saturday, July 7, 2012

Zebra cakes

Sometimes I'm foolish.  Hard to believe, right?  Me, the professional + doctoral student + type A personality, foolish?  Yes, sometimes I am.


See, it started out a few days ago when I was unsure of what I'd bake this weekend.  See, I don't have anything to bake for.  No birthday parties, baby showers, pot-lucks....well, you get the picture.  Without an event to bake for, I turned to my JulieBakes Facebook page and asked my "fans" what they thought I should bake.  A few reponded (note: you can still vote....like JulieBakes on facebook and answer the question - it's on the top left), so I'm giving it some more time. But I wanted to make something today (those fruit snacks I made last night were tasty - and addictive - but didn't quench my desire to make something in the kitchen). 

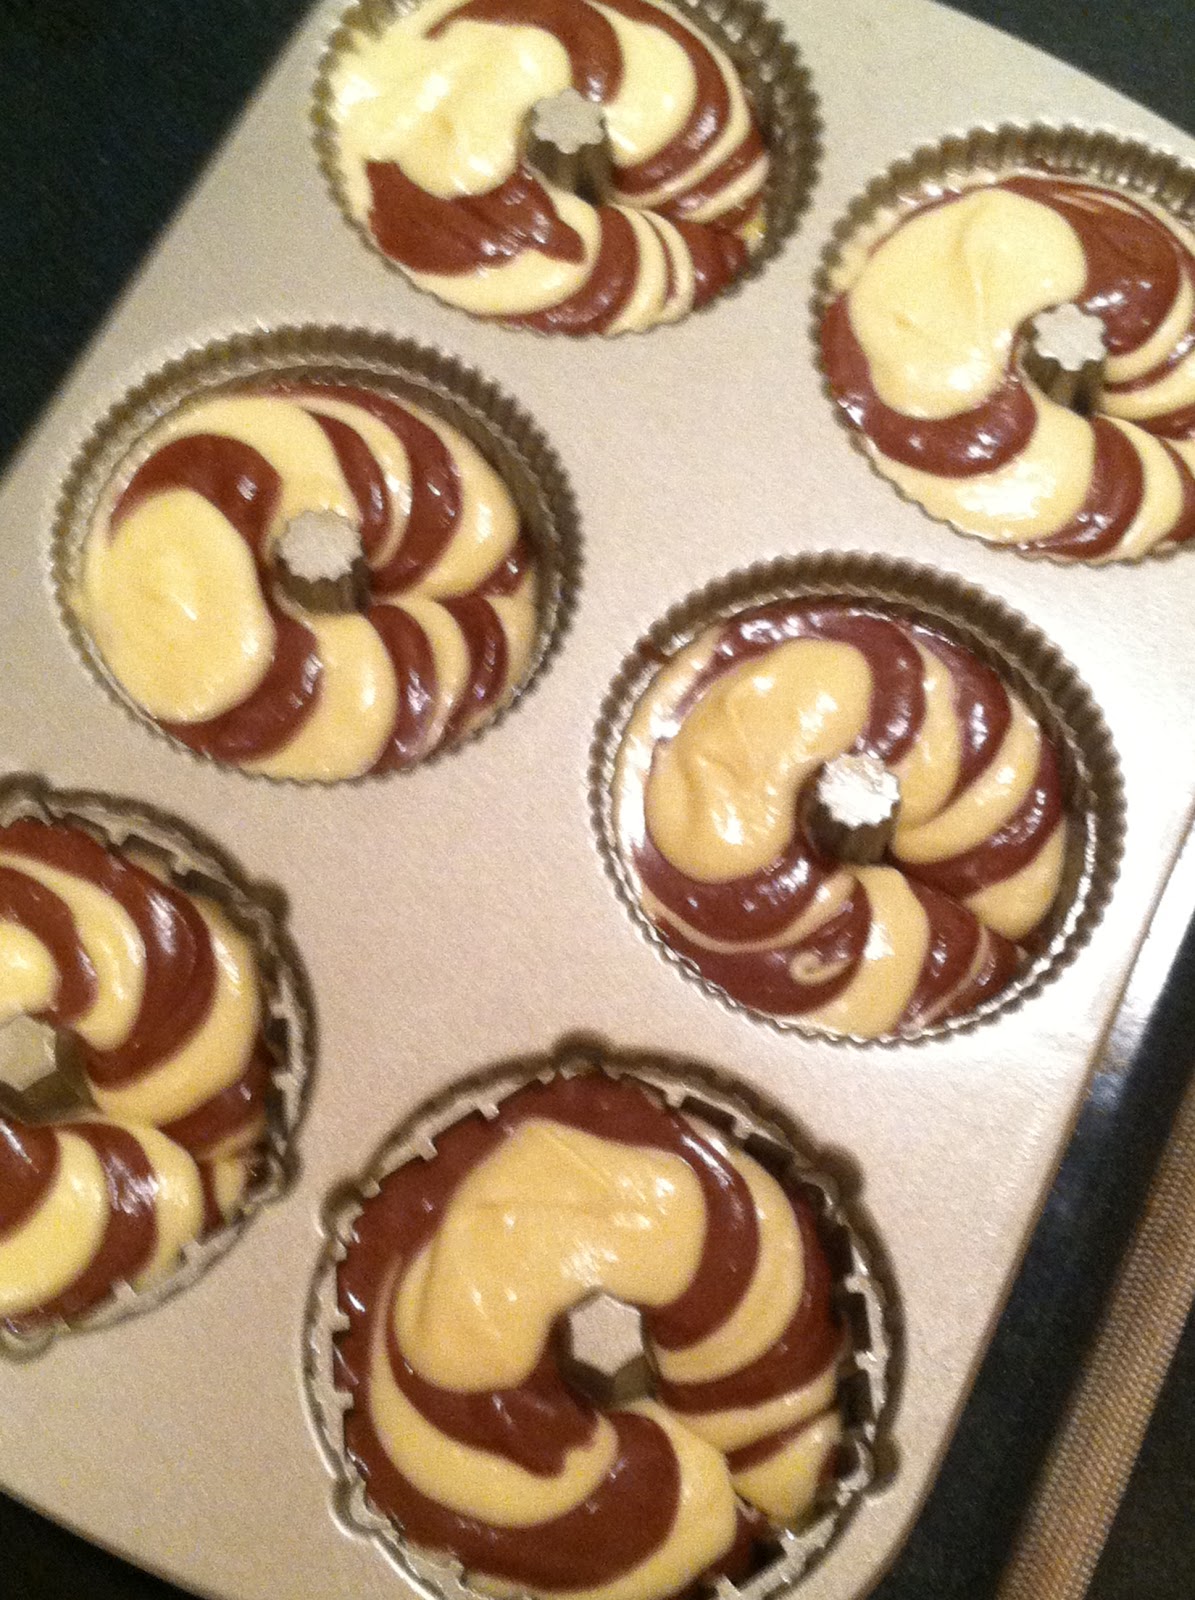
So today I decided to make something else.  Was it one of the things I had suggested on my Facebook poll?  Nope.  Was it something no-bake, considering today's high was 97 degrees in New York City?  No, that would've been smart.  It was a Zebra Bundt Cake that I had been eyeing for, well, forever.  But did I stop at that?  You guessed it...but nope.  I made Mini Zebra Bundt Cakes.  And when I had leftover batter, I made a Zebra Cake, too.

So there I was, standing in my hot scorching  (97 degrees out + no AC in the kitchen + oven preheating to 350F) kitchen, layering not one, but six mini bundt cakes, and wondering what exactly I was thinking when I set out to start this project.


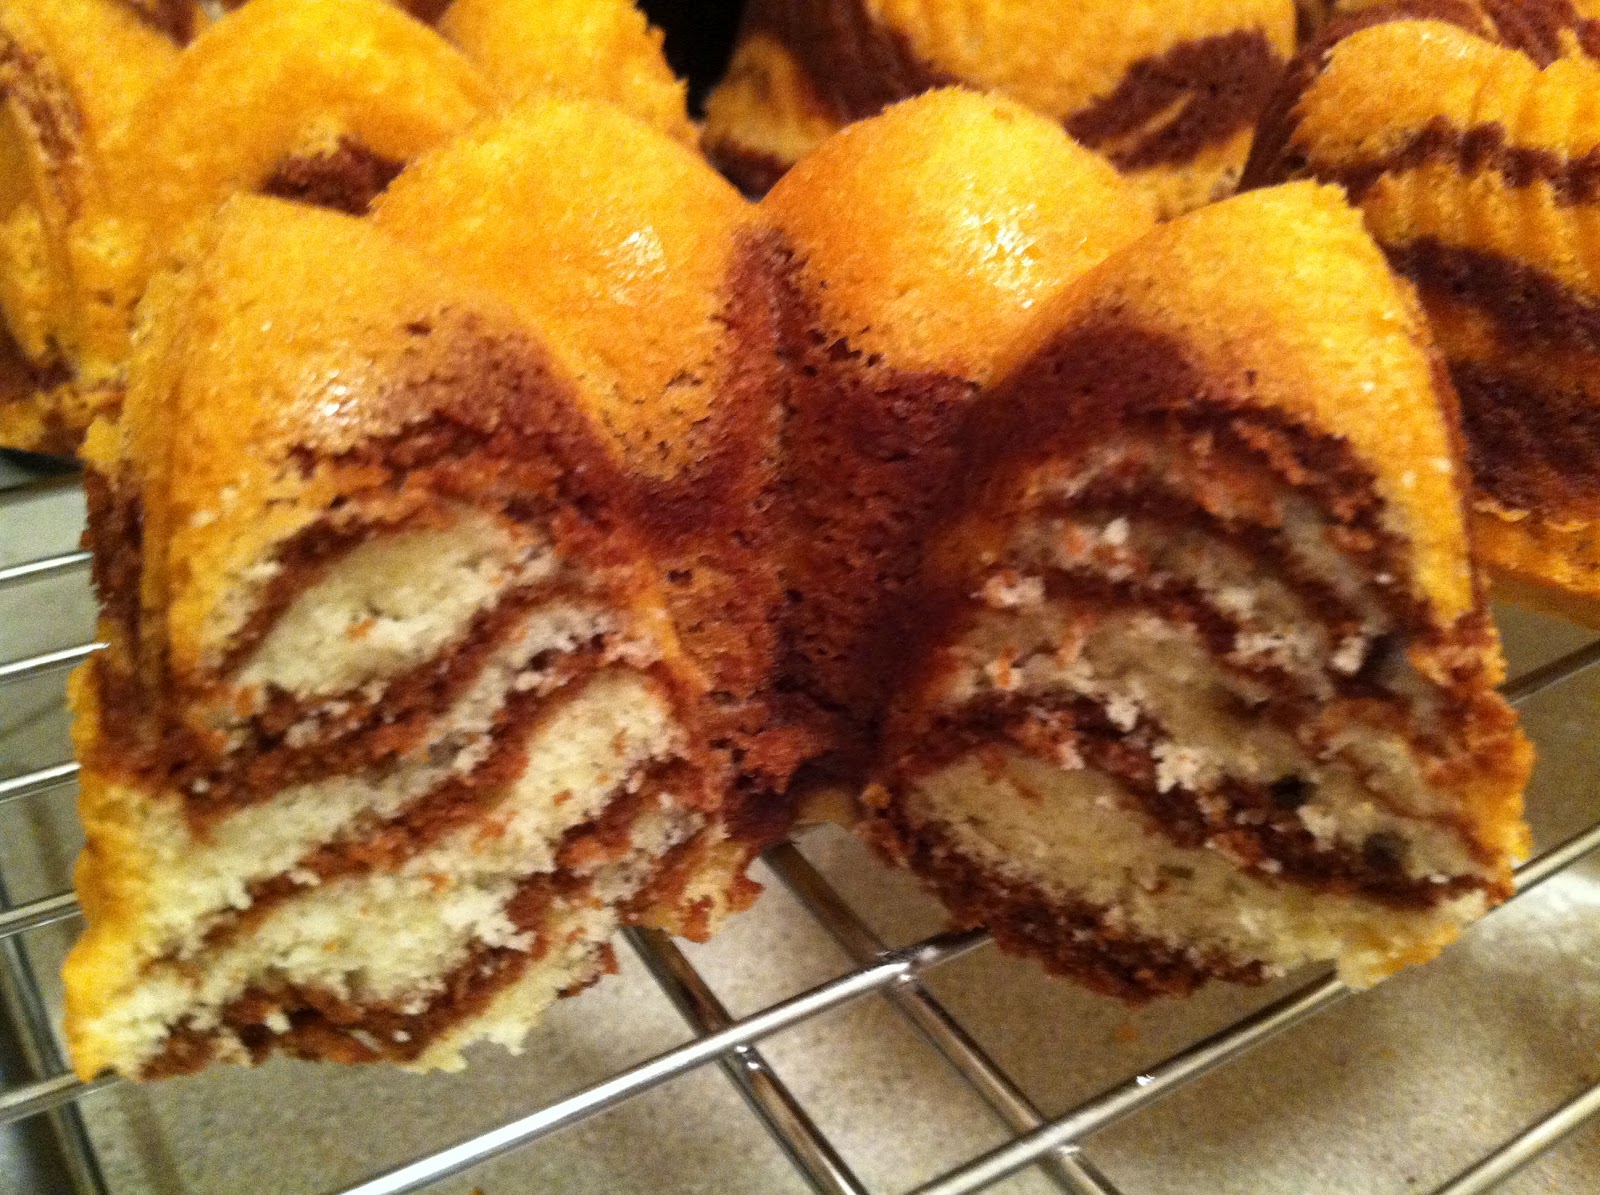
But, despite my foolishness (and yes, it was foolish), the cakes came out adorable, and tasty, too!
Left: top view of zebra Cake; Right: inside of zebra cake
Below: slice of zebra cake atop the cake


How cool would it be to ice this cake, then slice into it, and have the surprise zebra pattern inside?!

Mini Zebra Bundt Cakes (and a Zebra cake, too)
(from Zebra Bundt Cakes - and follow this link for how to layer the cakes to make the zebra appearance - note the original has a beautiful powdered sugar sprinkling topped with a lovely chocolate gaze, but I didn't have the time or patience to make it given the temperature in the kitchen, although the next time I make this cake - and I will - I will definitely make the glaze and decorate the cake with the powdered sugar and glaze)

Ingredients:

Cake

3 cups cake flour
2 teaspoons baking powder
1/2 teaspoon salt
2 1/2 cups granulated sugar, divided
1/2 cup natural (not Dutch-processed) cocoa powder
6 tablespoons water
1 1/2 cups unsalted butter, melted and cooled
1 1/2 teaspoons vanilla extract
5 large eggs
1/2 cup whole milk (I used skim since that's what I had)

Glaze (I didn't use it but it looks good!)

6 ounces bittersweet chocolate
2/3 cup heavy cream

Directions:

Make the Cake:

Preheat overn to 350F

Sift flour baking powder and salt into a bowl; set aside.

In a separate medium size bowl add in ½ cup of sugar, the cocoa powder, and water then whisk until mixture is smooth; set aside.

Place melted butter and sugar in a stand mixer bowl fitted with a paddle attachment. Beat on medium high until mixture is blended, about 1 minute.
Add in vanilla and beat until combined.
Add eggs one at time, mixing well after each addition.
Once all eggs are added, beat mixture until it becomes light and fluffy.

Turn mixer speed down to low and add the flour mixture in three additions, alternating with the milk in two additions and mixing just until blended.

Add 2 cups of the batter to the cocoa mixture and stir until blended.

Using an ice cream scoop, pour two scoops of vanilla mixture into pan (since I made mini cakes, I used smaller amounts at a time). Now alternate and pour one scoop of chocolate mixture on top of vanilla mixture. Continue to alternate between vanilla and chocolate layers until bundt pan is filled.

Bake zebra bundt cake for 50-60 minutes at 350F or until a cake tester inserted into the center comes out clean (my mini bundt cakes took about 25-30 minutes.  The mini cake took literally forever, and I ended up pulling it out with the top center still wet but the rest of the cake almost burnt). Cool cake in the pan on a wire rack for 15 minutes. Invert the cake onto the rack and cool completely.

To Make Glaze:

Place chocolate and cream in a pan over low heat and stir until chocolate is melted. Set aside to cool for 10 minutes before using.

Assemble: Pour the glaze on top and let glaze set, about 30 minutes. Slice and serve.

Homemade fruit snacks

When I was a kid, there were two fruity snacks that used to fight for space in my lunch bag.  Actually, I would've gladly taken them both to school for dessert, but my mother probably wouldn't have allowed that...so the battle ensued.  It was the fruit roll-up versus the now-extinct fun fruits.  Do you remember those?  They were these half jelly bean shaped fruit chews that came in a foil-lined pouch.  Not sure why either of them was allowed to be part of my childhood school lunches, but we loved them!


While I was searching Pinterest the other day - have you used Pinterest yet?  It's my newest form of procrastination/recipe searching - I came across a recipe for homemade fruit snacks.  They sounded fun and cute, so I put them onto my "Things I Want To Bake" board (even though they don't involve baking....I know, I need another board for non-baked treats) and thought to myself that eventually I'd get to making them, once I got a mold for them.

Well today was an exciting day for me.  And by exciting, I'm being totally sarcastic...I worked, ran errands, got a snack, came home, cleaned, did school work, had dinner, and ran more errands.  I ended up at Bed, Bath, & Beyond and was roaming the aisles picking up tons of random useless things that I didn't need (two samplers of new Keurig coffee flavors, pouring spoons for cupcakes, bathroom cleaner...ok, so I needed the bathroom cleaner), and came across little ice cube trays for "cubettes" and had an epiphany -- "these will be perfect for those fruit snacks!"  On my way home I bought a box of jello to make them.  The store was closing in 4 minutes and I grabbed a box....of new Mango Jello.


The "cubette" tray makes 90 mini ice cubes.  I got 62 mini fruit snacks from this recipe - not including some partially filled cavities of the tray.  When I made these again, I'd definitel double or triple the recipe in order to get enough fruit snacks.  Although they are easy enough to just make another batch, although cleaning the pot is the hardest part of the whole process.  That and removing the fruit snacks from the tray.  A toothpick seemed to aid in the process.

The amazing thing about these fruit snacks is that they're actually good!  I can't wait to try them in different flavors.  And the size of the fruit snacks that this tray makes is perfect for, well, snacking!


Homemade Jello Fruit Snacks

Ingredients:

1 3 oz box Jello, any flavor
2 x 0.25 oz boxes unflavored gelatin
1/3 cup water

Directions:

Sprinkle the gelatins over the water in a small saucepan.
Heat over medium heat and stir until gelatin is completely dissolved.
Pour into molds and allow to set at least 20 minutes.

Voila!  Homemade fruit snacks!

Wednesday, July 4, 2012

Cheesecake truffles

Turtle flavored desserts have been all the rage lately.  I, however, don't love pecans.  Or nuts in my desserts, in general.  So I took a recipe that I found for turtle cheesecake balls, altered it a little, and renamed them cheesecake truffles.  Because truffles just sound tastier.  And fancier.  This is another great no-bake summer treat, however I don't know that it's good to serve in the summer.....unless there is some air conditioning on!  I think they'd just melt into a blob.  And blobs don't sound all that tasty.  Or fancy.


The original recipe called for coating the cream cheese-graham cracker mixture in chocolate, sprinkling with chopped pecans, and drizzling them with caramel sauce.  But as I mentioned earlier, I don't like pecans.  And the caramel sauce just sounded messy.  So I made half of the recipe with the cream cheese and graham crackers, and then added a tablespoon of caramel sauce to the mixture.  Way less messy!

I froze them overnight without the chocolate coating, but then got worried that the chocolate would crack if I dipped them straight from the freezer, so I let them "warm up" in the fridge for a little while before dipping them.


Plain on the left, caramel on the right                                                        

Now, being that I'm not a huge cheesecake fan, these truffles are great because they have a bite-sized cheesecake punch with a chocolatey coating.  Not that huge slice-of-cheesecake heaviness, just a little taste.  And the fact that the cream cheese is mixed with the graham cracker crumbs also cuts the heaviness a little more.

Cheesecake Truffles
(adapted from these Turtle Cheesecake Balls)

Ingredients:
 
8oz cream cheese
1/2 - 1 cup graham cracker crumbs (I ended up using 1/2 cup plus about 2 Tbsp)
8 oz bittersweet chocolate cut into 1/2-inch pieces (I used chocolate chips)
1 tbsp vegetable oil
 
Optional:
 
1/4 cup caramel sauce (or melted caramel squares) - I added 1 Tbsp caramel sauce to half of the cream cheese and graham cracker crumb mixture instead of drizzling them
3 tbsp chopped pecans, finely chopped (I left this out completely)
Instructions:

Combine the cream cheese with 1/2 cup graham cracker crumbs. Taste and add more graham cracker crumbs as desired.  (Keep in mind that the chocolate and caramel add plenty of sweetness, so you want the cream cheese mixture to still have some tang.)
Use a melon baller to scoop up 1 1/4" sized balls to a wax-paper lined baking sheet (I used my mini scooper, so mine were smaller than 1 1/4 inches).  You should have about 15 balls (but I got a lot more).

Freeze for 10-15 minutes.

While the cheesecake balls are being chilled, melt the chocolate in a double boiler with the vegetable oil, stirring until smooth.

Using 1 or 2 forks, dip each cheesecake ball into the melted chocolate. Let the excess chocolate drip away between the tines. Place the chocolate covered balls back on the wax paper on the baking sheet. Repeat for all cheesecake balls.

Refrigerate at least 1 hour before serving. Best if served within 24 hours.

If using the pecans and caramel drizzle, Top each truffle with pecans. Drizzle caramel over each truffle before refrigerating.

No bake Oreo bars

It's hot in New York City.  I had a bunch of things I wanted to make, but these no-bake Oreo bars were the first thing I ticked off my agenda.  Partly because the words no and bake are in the title, but also because they require three ingredients.  Yes, three.  ingredients.


I do have to apologize, though - this is my second Oreo-related post in a row.  Crazy, no?  And - are you sitting down? - there will be another one soon.  But I digress.  Think of these bars as the Oreo equivalent of rice krispie treats.  They almost don't even need a "recipe" - but I've included it below.


No Bake Oreo Bars
Ingredients:

1 16 oz package of Oreos (mine says 15.5 oz - I guess they rounded up)
5 cups of large marshmallows
4 Tbsp butter (I used unsalted)

Directions:
Butter an 8x8 inch pan (I used a smaller pan, since I have an 9x9 but not an 8x8 and I didn't want them to come out too thin...oh, and I used Pam).
Line with parchment paper and let the edges hang over (I used wax paper). 
Butter the lined pan (I used Pam again).
Grind the Oreos in a food processor.
Put the butter and marshmallows in a large microwave safe bowl and microwave until puffed, about 1.5-2 minutes (mine took 2 1/2 minutes). 
Stir in the ground Oreos until combined (I recommend spraying your spatula with Pam before doing so).
Transfer to the prepared pain
Using a piece of wax paper (Spray it with Pam before doing so - otherwise it'll all get stuck onthe wax paper....trust me, I learned the hard way!), press the mixture evenly in the pan.
Let sit for at least 10 minutes.
Cut into bars and serve. Oh, and they're super rich.  The ones I cut above are about 1" x 1".  Mine are a bit thicker than yours will be if you use the recommended 8x8" pan.